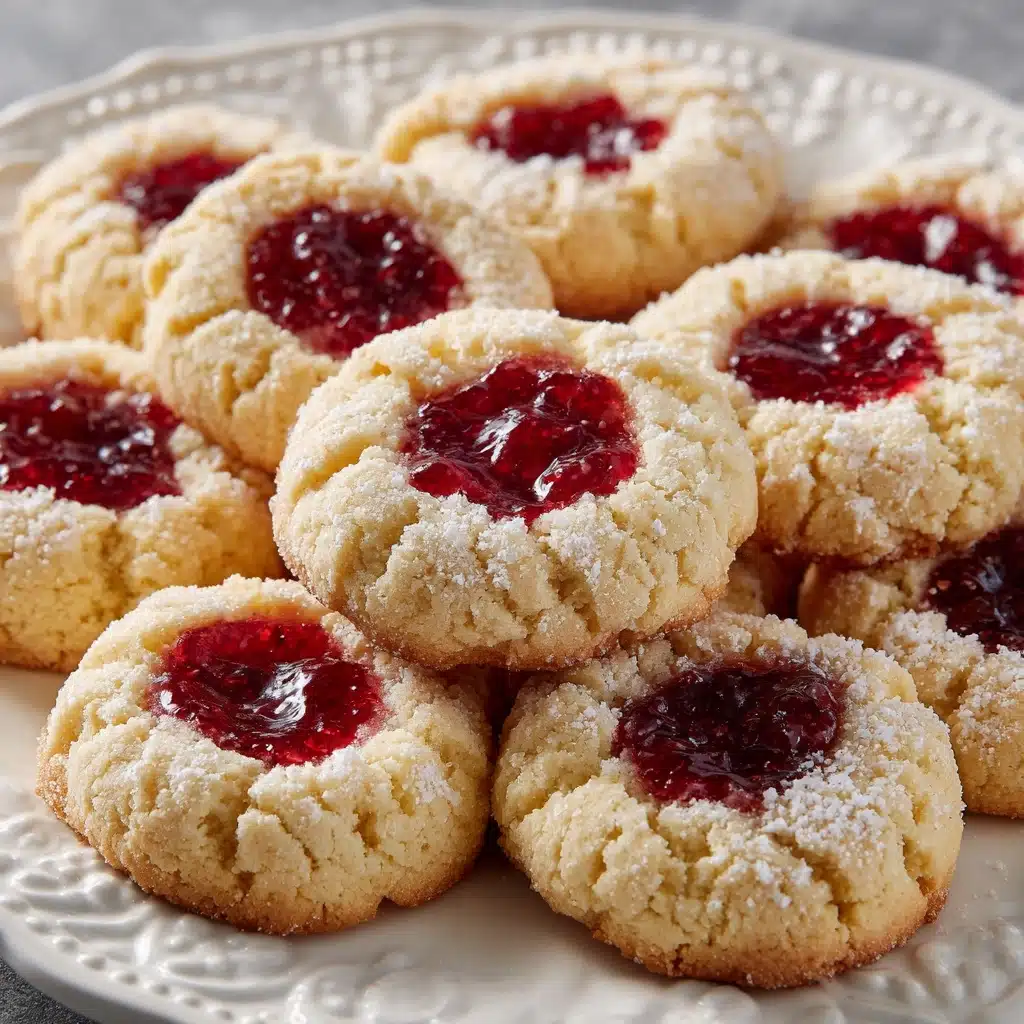
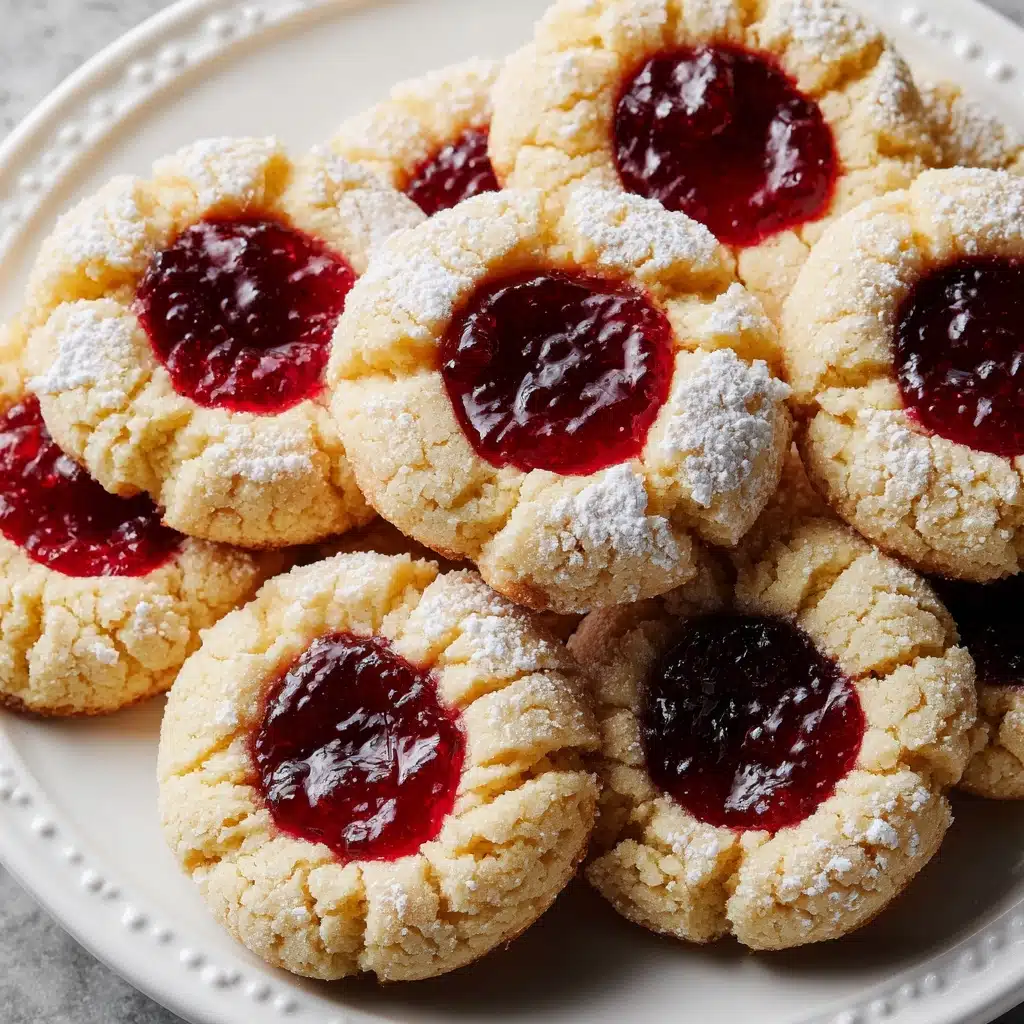
Thumbprint Cookies Recipe
There’s something magical about Thumbprint Cookies: a buttery vanilla cookie nestled around a jewel-bright pocket of your favorite jam, finished with a delicate dusting of powdered sugar. These little treats are as much a feast for the eyes as they are for the taste buds, and they capture the joy of homemade baking in every bite. Whether you’re planning a holiday cookie platter, need a sweet gift from your kitchen, or just crave an afternoon pick-me-up, Thumbprint Cookies are a classic for a reason—and once you’ve tasted one warm from the oven, they’ll be a staple in your home too.
Ingredients You’ll Need
Each ingredient in this recipe plays a starring role—no fillers here! From the creamy butter that gives a tender crumb to the vibrant jam that creates color and zing, every item on this list brings something important to the table. The beauty is that you probably have most, if not all, of these simple essentials in your pantry right now.
- Unsalted butter (1 cup, softened): The butter creates the cookies’ melt-in-your-mouth richness—don’t skimp on quality if you can help it!
- Granulated sugar (2/3 cup): Adds the perfect amount of sweetness and helps the cookies form delicate crisp edges.
- Vanilla extract (1/2 teaspoon): Brings warmth and rounds out the cookie flavor with its cozy aroma.
- All-purpose flour (2 cups): The foundation that gives structure and that signature “shortbread” bite.
- Salt (1/4 teaspoon): Just a pinch brings out all the buttery and sweet notes beautifully.
- Fruit preserves or jam (1/2 cup, raspberry, strawberry, or apricot): The colorful heart of each cookie—choose your favorite, but make sure it’s nice and thick for best results.
- Powdered sugar (optional, for dusting): For a snowy finish that looks as pretty as it tastes.
How to Make Thumbprint Cookies
Step 1: Prep Your Baking Sheet
Preheat your oven to 350°F and line a baking sheet with parchment paper. This not only ensures easy cleanup, but it also helps your Thumbprint Cookies bake evenly, sliding right off when they’re done.
Step 2: Cream Butter and Sugar
In a large mixing bowl, combine the softened butter and granulated sugar. Using an electric mixer (or a sturdy wooden spoon and a little elbow grease), beat them until the mixture is light, fluffy, and pale—about 2 to 3 minutes. Taking the time to cream them really well leads to cookies with that perfect soft texture.
Step 3: Add Vanilla
Mix in the vanilla extract, blending until just combined. This little splash adds a comforting aroma that’ll have everyone wondering when cookies are coming out of the oven!
Step 4: Add Flour and Salt
Gradually add the all-purpose flour and salt to the bowl, mixing on low until a soft, slightly crumbly dough forms. The dough should be smooth but not sticky—if it feels too dry, knead gently with your hands for a few seconds.
Step 5: Form Dough Balls
Scoop and roll pieces of dough into 1-inch balls. Place them on your prepared baking sheet, spacing each about 2 inches apart. This gives the Thumbprint Cookies room to spread ever so slightly while baking.
Step 6: Make the Thumbprints
Now for the fun part! Use your thumb (or the back of a small spoon) to gently press a well into the center of each dough ball. Be careful not to press all the way down—the goal is a tidy little nest for your jam.
Step 7: Fill with Jam
Spoon about 1/2 teaspoon of thick fruit preserves or jam into each well, being careful not to overflow. This is where you can get creative—mix and match flavors or stick to a forgiving favorite.
Step 8: Bake to Perfection
Slide your tray into the oven and bake for 12 to 15 minutes, or until the edges of the cookies are just turning golden. Don’t overbake—these are meant to be tender! Let them rest on the baking sheet for 5 minutes, then transfer to a wire rack to cool.
Step 9: Dust and Serve
Once your Thumbprint Cookies are completely cool, dust them with powdered sugar if desired. Invite everyone into the kitchen—their irresistible aroma has probably already done most of the work!
How to Serve Thumbprint Cookies
Garnishes
Feel free to dust your cookies with powdered sugar just before serving for a snowy, festive touch. If you want to go the extra mile, a tiny sprinkle of finely chopped pistachios or a sliver of candied orange peel on top of the jam can add a pop of color and even more flavor.
Side Dishes
Although Thumbprint Cookies can absolutely stand alone, they pair beautifully with a hot cup of tea, a mug of steaming coffee, or even a cold glass of milk. They’re also charming additions to a dessert board with fresh fruits, chocolate squares, and other bite-sized treats.
Creative Ways to Present
Try arranging your Thumbprint Cookies on a tiered dessert stand for a stunning afternoon tea display. For holiday gifting, stack them in cellophane bags tied with ribbon, or arrange in a pretty tin with parchment paper between the layers. If you want to be extra playful, choose a rainbow of different jams and set them out on a tray for a little “cookie tasting flight” at your next gathering!
Make Ahead and Storage
Storing Leftovers
Keep any leftover Thumbprint Cookies in an airtight container at room temperature. They’ll stay fresh for about 4 to 5 days—if they last that long! Layering with parchment paper helps prevent sticking and keeps them looking perfect.
Freezing
These cookies freeze beautifully: just arrange cooled cookies in a single layer on a baking sheet, freeze until firm, then transfer to an airtight container with parchment paper between the layers. They’ll keep well in the freezer for up to 1 month and are perfect for making ahead for holidays or special occasions.
Reheating
If you’d like to refresh your cookies after storage or freezing, let them thaw at room temperature, then pop them into a 300°F oven for 2 to 3 minutes. This brings back their tender crumb and perkiness, making them taste almost like they were just baked.
FAQs
Can I use salted butter instead of unsalted?
Yes, you can use salted butter in a pinch, just reduce the added salt in the recipe to a pinch or omit it altogether. The cookies will still be delicious—just slightly saltier.
Why did my Thumbprint Cookies spread too much?
If your cookies spread out more than you’d like, it’s probably because the butter was too soft or the jam was too runny. Try chilling the prepared dough balls for 10–15 minutes before baking, and always use a firm jam or fruit preserve.
Can I make them gluten-free?
Absolutely! Substitute the all-purpose flour with your favorite gluten-free blend, ideally one formulated for baking. Keep an eye on the texture of the dough and add more flour if needed.
Which jam flavors work best?
Raspberry, strawberry, and apricot are traditional choices and work beautifully because they’re flavorful and hold their shape. You can also get adventurous with fig, cherry, or even lemon curd—just make sure whatever you pick is thick and not too runny.
My cookies are a bit dry—how can I fix this?
Thumbprint Cookies should be tender, not crumbly. If yours are dry, you may have added too much flour or baked them a bit too long. Make sure to measure flour by spooning it into your cup (not packing it down) and check your cookies right at the 12-minute mark.
Final Thoughts
If you’re searching for a cookie that’s as fun to make as it is to eat, give these Thumbprint Cookies a try. Their buttery vanilla base, gleaming jam centers, and crowd-pleasing presentation will win hearts at any table. So gather your favorite jams and get baking—sweet moments await!
Print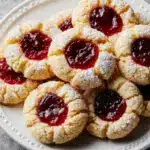
Thumbprint Cookies Recipe
- Total Time: 30 minutes
- Yield: 24 cookies 1x
- Diet: Vegetarian
Description
These Thumbprint Cookies are a classic holiday treat that are as beautiful as they are delicious. Buttery, tender cookies filled with sweet jam, they are perfect for gifting or enjoying with a cup of tea.
Ingredients
Cookies:
- 1 cup unsalted butter, softened
- 2/3 cup granulated sugar
- 1/2 teaspoon vanilla extract
- 2 cups all-purpose flour
- 1/4 teaspoon salt
Fillings:
- 1/2 cup fruit preserves or jam (raspberry, strawberry, apricot)
- Optional: powdered sugar for dusting
Instructions
- Preheat oven and prepare baking sheet: Preheat oven to 350°F. Line a baking sheet with parchment paper.
- Cream butter and sugar: In a large bowl, cream together butter and sugar until light and fluffy. Mix in vanilla extract.
- Combine dry ingredients: Gradually add flour and salt, mixing until a soft dough forms.
- Shape and fill cookies: Roll dough into 1-inch balls and place on prepared baking sheet. Press a well into the center of each ball and fill with jam.
- Bake: Bake for 12–15 minutes until edges are lightly golden.
- Cool and serve: Cool on baking sheet for 5 minutes, then transfer to a wire rack. Dust with powdered sugar if desired.
Notes
- Use thick jam to prevent spreading.
- Cookies can be frozen for up to 1 month.
- Experiment with different jams for variety.
- Prep Time: 15 minutes
- Cook Time: 15 minutes
- Category: Dessert
- Method: Baking
- Cuisine: American
Nutrition
- Serving Size: 1 cookie
- Calories: 130
- Sugar: 7g
- Sodium: 40mg
- Fat: 8g
- Saturated Fat: 5g
- Unsaturated Fat: 2g
- Trans Fat: 0g
- Carbohydrates: 14g
- Fiber: 0g
- Protein: 1g
- Cholesterol: 20mg


