The Perfect Tuna Melt Recipe
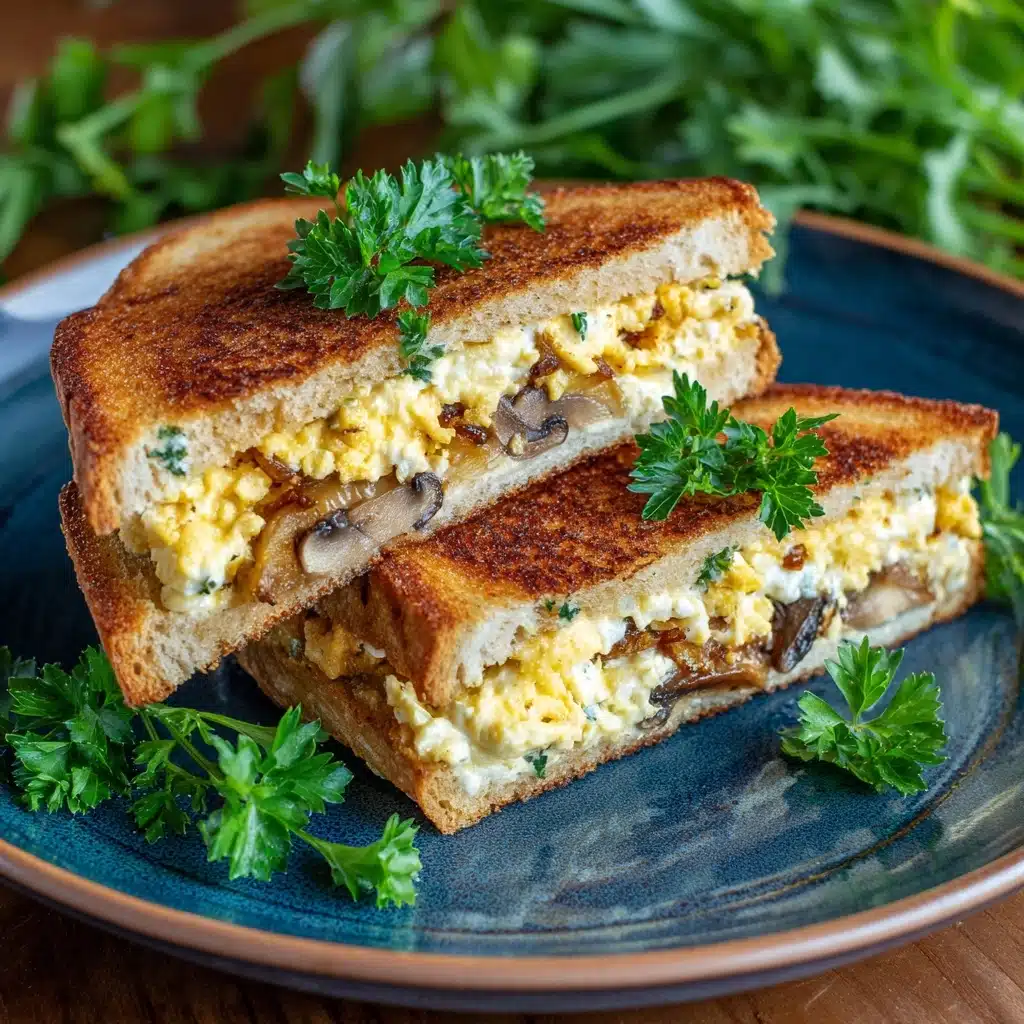
If you’ve ever craved a sandwich that wraps comfort, crunch, creaminess, and oozy cheese into one irresistible bite, The Perfect Tuna Melt is the answer to your lunchtime dreams. This classic American favorite is a symphony of textures and flavors: flaky, savory tuna salad meets sharp, melty cheese and golden, buttery bread. In just 20 minutes, you can transform simple pantry staples into a dish that feels like a warm hug on a plate. Whether you’re feeding a family or treating yourself, The Perfect Tuna Melt checks every box for satisfaction, nostalgia, and full-on flavor.
Ingredients You’ll Need
The beauty of The Perfect Tuna Melt lies in its simplicity: each ingredient has a role to play, bringing crunch, tang, creaminess, or that all-important melt factor. These kitchen staples come together to create something far greater than the sum of their parts.
- Tuna: Opt for high-quality canned tuna packed in water for a lighter, flakier filling that absorbs flavors beautifully.
- Mayonnaise: Brings creamy richness and helps bind the tuna salad for that classic mouthfeel.
- Dijon Mustard: Adds a gentle, sophisticated tang that lifts and sharpens the whole filling.
- Red Onion: Offers a pop of color and a subtle bite without overpowering the salad.
- Celery: Gives a delightful crunch and fresh, clean flavor that brightens each bite.
- Pickles or Relish: Contributes a hint of acidity and sweetness to balance the creamy elements.
- Salt and Black Pepper: Essential for bringing all the flavors together—taste and adjust as you go.
- Bread: Sourdough or rye are top picks, providing sturdiness and flavor, but any favorite bread will work.
- Cheddar or Swiss Cheese: Melts like a dream and brings the signature gooey, savory finish.
- Butter: Softened and spread on the bread for that golden, crispy crust you can’t resist.
How to Make The Perfect Tuna Melt
Step 1: Mix the Tuna Salad
Start by opening your cans of tuna and draining them thoroughly—this prevents a watery salad. In a medium bowl, combine the tuna, mayonnaise, Dijon mustard, red onion, celery, pickles or relish, and a pinch each of salt and black pepper. Stir everything together until it’s evenly mixed and the veggies are well dispersed. This blend is the heart of The Perfect Tuna Melt, so taste and adjust the seasoning until it’s truly crave-worthy.
Step 2: Assemble the Sandwiches
Lay out four slices of your chosen bread. Evenly spread the tuna mixture over two slices, pressing it all the way to the edges for maximum flavor in every bite. Next, layer on two generous slices of cheddar or Swiss cheese per sandwich, and cap with the remaining pieces of bread. The cheese goes both above and below the tuna if you want extra meltiness—don’t hold back!
Step 3: Butter the Bread
Take your softened butter and slather it on the outside of each sandwich—both the top and bottom slices. This step is the secret to that irresistible golden crunch and deep, toasty flavor that defines The Perfect Tuna Melt.
Step 4: Grill to Golden Perfection
Heat a skillet or griddle over medium heat. Once it’s hot, add the sandwiches and cook for 3 to 4 minutes per side. Press them gently with a spatula or, for an ultra-crisp finish, use a panini press. The bread should turn golden brown and crisp while the cheese inside melts into glorious gooeyness. Flip carefully and watch closely—this moment is where The Perfect Tuna Melt magic happens.
Step 5: Slice and Serve
Remove your sandwiches from the heat and let them rest for a minute—this helps the cheese settle slightly and keeps you from burning your fingers. Slice each sandwich in half for that classic presentation, and serve them up while still warm and melty.
How to Serve The Perfect Tuna Melt
Garnishes
A sprinkle of chopped fresh parsley or chives over the top adds a pop of color and a hint of herbal freshness. If you’re feeling bold, a few chili flakes or sliced pickled jalapeños inside the sandwich offer a gentle kick. For an extra burst of flavor, try a dash of hot sauce or a few thin tomato slices tucked inside before grilling.
Side Dishes
The Perfect Tuna Melt is a star on its own, but it truly shines with a bowl of tomato soup for dunking, a crisp green salad, or a handful of kettle chips for crunch. A side of coleslaw or pickles also complements the creamy, rich filling beautifully and brightens up the plate.
Creative Ways to Present
Cut your sandwiches into triangles or fingers for a playful, shareable platter—great for parties or lunchboxes. Serve open-faced on toasted bread for a lighter spin, or top with a fried egg for a brunch-worthy twist. The Perfect Tuna Melt also works as mini sliders on small buns for a fun appetizer spread.
Make Ahead and Storage
Storing Leftovers
If you happen to have leftovers (though it’s rare with The Perfect Tuna Melt!), let the sandwiches cool completely before wrapping them tightly in foil or placing in an airtight container. Refrigerate for up to 2 days. The bread may lose a bit of its initial crispness, but the flavors remain delicious.
Freezing
You can freeze assembled, ungrilled tuna melts by wrapping them individually in plastic wrap and then foil. Store in a freezer-safe bag for up to 1 month. Thaw overnight in the fridge before grilling as usual. Freezing after grilling is possible, but the bread may become a bit softer upon reheating.
Reheating
For best results, reheat The Perfect Tuna Melt in a skillet over medium-low heat, pressing the sandwich gently and flipping once, until the bread regains its crispness and the cheese is melty again. Avoid microwaving, as it tends to make the bread soggy. If you’re in a hurry, a toaster oven does the trick!
FAQs
Can I use a different type Main Course
Absolutely! While cheddar and Swiss are classic, feel free to experiment with provolone, mozzarella, or even pepper jack for a spicier kick. Choose a cheese that melts well and complements the tuna filling.
What’s the best bread for The Perfect Tuna Melt?
Sourdough and rye are top picks because their sturdy texture holds up to the filling and grilling, but you can use any bread you love—even whole wheat or a hearty multigrain.
Can I make The Perfect Tuna Melt without mayonnaise?
Yes! For a lighter option, swap mayo with Greek yogurt or mashed avocado. The texture will be slightly different, but you’ll still get a creamy, satisfying filling.
How can I make The Perfect Tuna Melt gluten-free?
Just use your favorite gluten-free bread and double-check that all other ingredients, such as pickles and mustard, are gluten-free. The results are just as delicious!
Is The Perfect Tuna Melt good for meal prep?
You can prepare the tuna salad ahead of time and store it in the fridge for up to three days. Assemble and grill the sandwiches just before serving for the best texture and freshness.
Final Thoughts
The Perfect Tuna Melt is pure comfort food that’s impossible to resist. Whether you’re reliving classic diner memories or whipping up a quick, satisfying lunch, this sandwich is sure to win you over with its melty, savory goodness. Give it a try—your taste buds will thank you!
Print
The Perfect Tuna Melt Recipe
- Total Time: 18 minutes
- Yield: 2 sandwiches 1x
- Diet: Non-Vegetarian
Description
The Perfect Tuna Melt is a classic American comfort food sandwich featuring a creamy tuna salad combined with melted cheddar or Swiss cheese, all toasted to golden perfection between slices of your favorite bread. This easy-to-make stovetop recipe delivers a warm, satisfying meal perfect for lunch or dinner.
Ingredients
Tuna Salad
- 2 (5 oz) cans tuna, drained
- 1/4 cup mayonnaise
- 1 tablespoon Dijon mustard
- 1 tablespoon finely chopped red onion
- 1 tablespoon chopped celery
- 1 tablespoon chopped pickles or relish
- Salt and black pepper to taste
Sandwich
- 4 slices of your favorite bread (sourdough or rye work great)
- 4 slices of cheddar or Swiss cheese
- 1 tablespoon butter, softened
Instructions
- Prepare Tuna Salad: In a medium bowl, combine the drained tuna, mayonnaise, Dijon mustard, finely chopped red onion, celery, chopped pickles or relish, salt, and black pepper. Stir well until all ingredients are evenly incorporated.
- Assemble Sandwich: Spread the tuna salad evenly over two slices of bread. Layer two slices of cheese on top of the tuna mixture on each slice. Top with the remaining slices of bread to form two complete sandwiches.
- Butter the Bread: Spread softened butter on the outside of each sandwich on both sides to ensure a golden, crispy crust when cooked.
- Cook Sandwiches: Heat a skillet or griddle over medium heat. Place the sandwiches in the pan and cook for 3 to 4 minutes per side, pressing gently with a spatula to compact the sandwich. Cook until the bread is golden brown and the cheese inside has melted.
- Serve: Remove the sandwiches from the skillet, slice if desired, and serve warm for best enjoyment.
Notes
- Add fresh tomato slices or a sprinkle of chili flakes inside the sandwich for extra flavor and a bit of heat.
- Use a panini press instead of a skillet for an ultra-crispy finish and evenly melted cheese.
- This tuna melt pairs perfectly with a bowl of soup or a crisp green salad for a complete meal.
- Prep Time: 10 minutes
- Cook Time: 8 minutes
- Category: Main Course
- Method: Stovetop
- Cuisine: American
Nutrition
- Serving Size: 1 sandwich
- Calories: 520
- Sugar: 3g
- Sodium: 780mg
- Fat: 32g
- Saturated Fat: 11g
- Unsaturated Fat: 18g
- Trans Fat: 0g
- Carbohydrates: 28g
- Fiber: 2g
- Protein: 33g
- Cholesterol: 75mg


