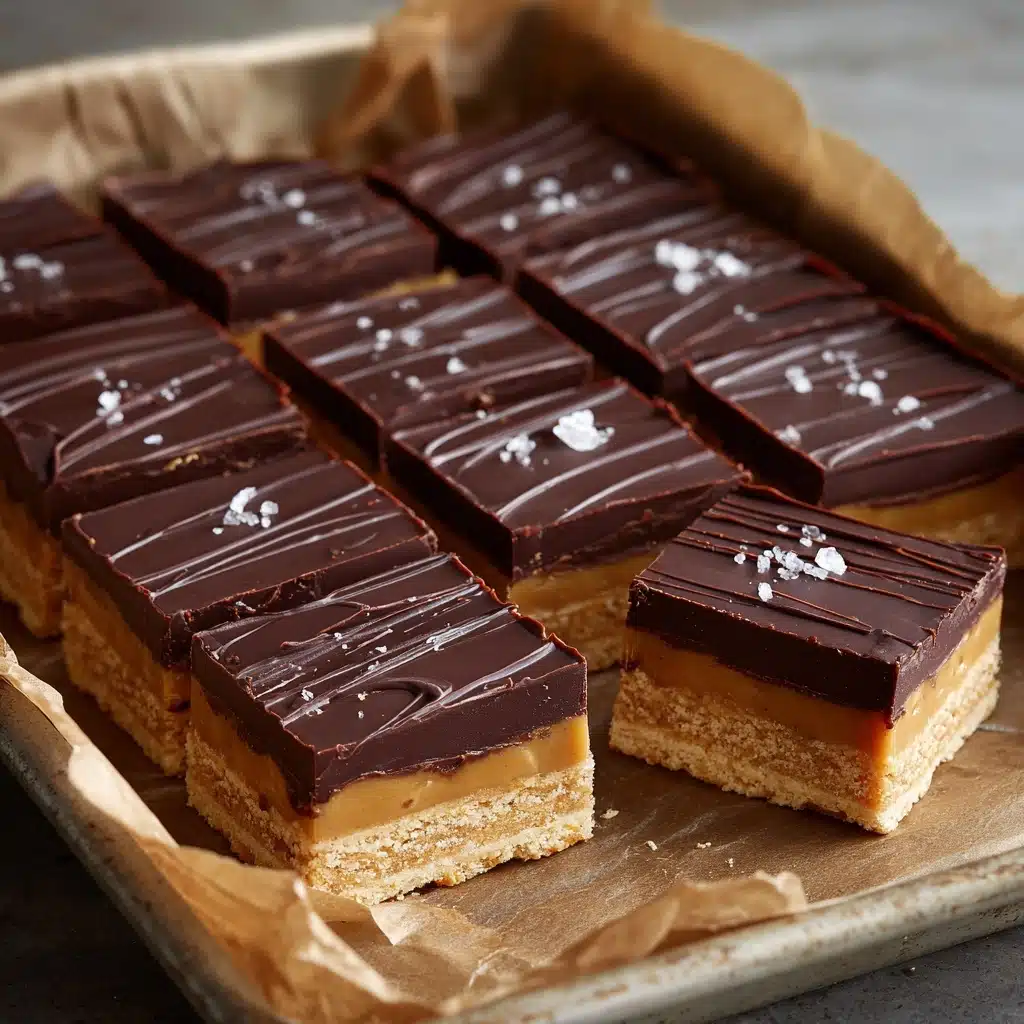
Homemade Twix Bars Recipe
If you’ve ever longed for the perfect candy bar that combines buttery shortbread, gooey caramel, and a silky, thick layer of milk chocolate, you’re about to fall in love with these Homemade Twix Bars. This recipe lets you recreate that irresistible, nostalgic treat right in your own kitchen, with pure, real ingredients and none of the store-bought additives. It’s a total game-changer for bake sales, dessert tables, or just sharing with friends who will be totally wowed (and begging for the recipe)!
Ingredients You’ll Need
Ingredients You’ll Need
The beauty of Homemade Twix Bars lies in their simplicity: just a handful of pantry staples come together to make a show-stopping dessert. Each ingredient has a purpose — buttery richness, soft caramel chew, melt-in-your-mouth chocolate — and when they combine, magic truly happens.
- Unsalted butter: The star of the shortbread crust, bringing rich flavor and that ultra-tender bite.
- Powdered sugar: Adds a subtle sweetness and ensures the shortbread is perfectly tender (not grainy).
- All-purpose flour: The backbone of the base, creating that classic shortbread texture.
- Salt: Just a touch sharpens all the other flavors and keeps the crust from tasting flat.
- Soft caramels: You can use store-bought or homemade — these melt down to create that signature gooey layer.
- Heavy cream: Loosens the caramel just enough so it sets perfectly, soft but not runny.
- Milk chocolate chips or chopped chocolate: For that thick, dreamy chocolate topping. Choose good-quality chocolate for the best results.
How to Make Homemade Twix Bars
Step 1: Prepare Your Pan and Oven
Start by preheating your oven to 350°F (175°C) — trust me, you’ll want it piping hot for that crisp, golden shortbread base. Line a 9×9-inch baking dish with parchment paper, making sure there’s a little overhang on the sides so you can lift the bars out later without any sticking drama. This simple step makes slicing and serving a total breeze!
Step 2: Make the Shortbread Base
Grab a medium bowl and cream together the softened butter and powdered sugar until you’ve got a pale, smooth mixture that looks totally irresistible already. Next, add the flour and salt, mixing just until everything is combined and a soft dough forms. Press this dough evenly into your prepared pan — don’t be shy about using your hands to really get into those corners! Bake the crust for 18–20 minutes, keeping an eye on the edges, which should turn a gentle golden brown. When it’s done, let the shortbread cool in the pan.
Step 3: Create the Caramel Layer
While your shortbread is cooling, it’s time to make the star of the show: caramel! In a small saucepan over low heat, gently melt the soft caramels with the heavy cream, stirring constantly until everything is velvety smooth. You want the caramel luscious but pourable. Immediately pour the caramel over the cooled shortbread, using an offset spatula to spread it all the way to the edges. Slide the pan into the fridge for about 30 minutes, just until the caramel firms up. This step is key for those clean, beautiful layers!
Step 4: Top with Chocolate
Now for the finishing flourish — melt your milk chocolate chips (or chopped chocolate) in a microwave-safe bowl in short increments, stirring after each zap until you have a smooth, glossy chocolate pool. Pour this right over the chilled caramel, gently tilting the pan or smoothing with a spatula so it covers every spot. Pop the pan back in the fridge to fully set (if you can wait that long!).
Step 5: Slice and Enjoy
Once everything’s firm, lift the entire block of Homemade Twix Bars out by the parchment, and lay it on a cutting board. For perfect slices, use a sharp knife and wipe it between cuts. Now comes the best part: crunch through the chocolate, sink into the caramel, and delight in the crumbly shortbread. There’s absolutely nothing like your first taste!
How to Serve Homemade Twix Bars
Garnishes
If you want to add a special touch to your Homemade Twix Bars, sprinkle a little flaky sea salt over the chocolate before it sets. Not only does it look beautiful, but the salt elevates the caramel’s sweetness and adds a gourmet flair. For a pop of color, try scattering chopped toasted nuts or tiny edible gold flakes — your bars will look straight out of a patisserie!
Side Dishes
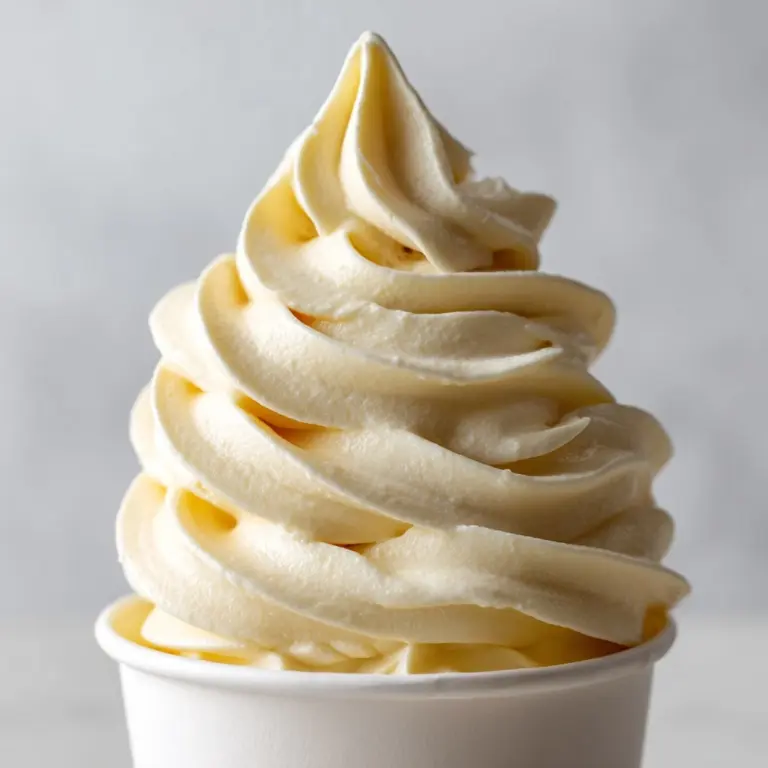
While these bars are totally satisfying on their own, pairing them with a scoop of vanilla bean ice cream or a hot cup of coffee takes the experience to another level. Serve them alongside a refreshing fruit salad — berries and citrus play beautifully with the caramel and chocolate notes. Or, for a dreamy dessert platter, offer them with a spread of other small bites like dark chocolate truffles and delicate butter cookies.
Creative Ways to Present
Homemade Twix Bars make a stunning edible gift: wrap slices in parchment and tie with twine, or arrange them in a decorative tin. For parties, cut them into bite-sized pieces and pile onto a tiered cake stand. You can even drizzle with white chocolate or add themed decorations to match holidays or special events. However you serve them, your creativity will shine!
Make Ahead and Storage
Storing Leftovers
Keep your Homemade Twix Bars fresh by storing them in an airtight container in the refrigerator. The chill helps the chocolate stay perfectly snappy and keeps the caramel from getting too soft. Let bars sit at room temperature for a few minutes before enjoying so all the flavors bloom and the texture is just right.
Freezing
If you need to make these bars ahead, you can absolutely freeze them! Place the cut bars in a single layer on a lined baking sheet to freeze solid, then transfer to a freezer-safe container, separating layers with parchment. Thaw them in the fridge overnight or on the counter for a couple of hours — they’ll taste just as fresh and delicious, with all their luscious texture intact.
Reheating
While Homemade Twix Bars are best served chilled or at room temperature, if you find the caramel is too firm straight from the fridge, let a slice sit out for 10–15 minutes. You can zap an individual bar in the microwave for about 5 seconds to slightly soften the caramel if you like a gooier bite, but don’t overdo it or the chocolate might melt!
FAQs
Can I use dark chocolate instead of milk chocolate?
Absolutely! Dark chocolate gives Homemade Twix Bars a more intense, grown-up flavor that balances the sweetness of the caramel, so feel free to use whichever chocolate makes your taste buds happiest.
How do I keep the chocolate layer from cracking when I slice the bars?
The secret is to let the bars sit at room temperature for several minutes before cutting, which softens the chocolate enough for a clean cut. Using a hot, sharp knife (dip in hot water and wipe dry) also helps achieve those picture-perfect slices.
Can I make these gluten-free?
Yes, you can substitute your favorite 1:1 gluten-free all-purpose flour blend for the regular flour, and you’ll still end up with delicious, crumbly shortbread in your Homemade Twix Bars.
Do I have to use store-bought caramels, or can I make my own?
Either works beautifully! If you’re comfortable making caramel from scratch, go for it and your bars will be extra special. Store-bought soft caramels are a convenient, reliable shortcut that also tastes fantastic.
How long will Homemade Twix Bars keep?
Stored properly in the fridge, Homemade Twix Bars will stay fresh and delicious for up to five days, and you can freeze them for up to two months. They’re great for making ahead for busy weeks or special celebrations!
Final Thoughts
If you’re ready to treat yourself to something truly special, don’t wait any longer to make these Homemade Twix Bars! There’s something so satisfying about bringing your favorite candy bar to life in your own kitchen. I can’t wait for you to share them with your loved ones — or just sneak a few for yourself. Happy baking!
Print
Homemade Twix Bars Recipe
- Total Time: 1 hour 15 minutes (including chilling)
- Yield: 16 bars 1x
- Diet: Vegetarian
Description
Indulge in the rich, buttery goodness of these Homemade Twix Bars. With layers of shortbread, caramel, and chocolate, these bars are a delightful treat for any occasion.
Ingredients
Shortbread:
- 1 cup unsalted butter, softened
- 1/2 cup powdered sugar
- 2 cups all-purpose flour
- 1/4 teaspoon salt
Caramel Layer:
- 1 1/2 cups soft caramels (store-bought or homemade)
- 2 tablespoons heavy cream
Chocolate Layer:
- 2 cups milk chocolate chips or chopped chocolate
Instructions
- Preparation: Preheat the oven to 350°F (175°C) and line a 9×9-inch baking dish with parchment paper.
- Baking: Bake for 18–20 minutes or until lightly golden around the edges. Let it cool completely.
- Caramel Layer: Meanwhile, melt the caramels with the heavy cream in a saucepan over low heat, stirring until smooth. Pour the caramel over the cooled shortbread base and spread evenly. Chill in the refrigerator for about 30 minutes, or until the caramel is firm.
- Chocolate Layer: Melt the chocolate in a microwave-safe bowl in 20-second intervals, stirring until smooth. Pour and spread over the chilled caramel layer. Refrigerate until fully set, then slice into bars with a sharp knife.
In a medium bowl, cream the softened butter and powdered sugar until smooth. Mix in the flour and salt until a soft dough forms. Press the dough evenly into the bottom of the prepared pan.
Notes
- For a salted twist, sprinkle flaky sea salt over the caramel layer before adding the chocolate.
- Store bars in the fridge for clean cuts, and let them sit at room temperature a few minutes before serving for the best texture.
- Prep Time: 25 minutes
- Cook Time: 20 minutes
- Category: Dessert
- Method: Baking
- Cuisine: American
Nutrition
- Serving Size: 1 bar
- Calories: 270
- Sugar: 22g
- Sodium: 90mg
- Fat: 16g
- Saturated Fat: 10g
- Unsaturated Fat: 5g
- Trans Fat: 0g
- Carbohydrates: 31g
- Fiber: 1g
- Protein: 2g
- Cholesterol: 30mg


