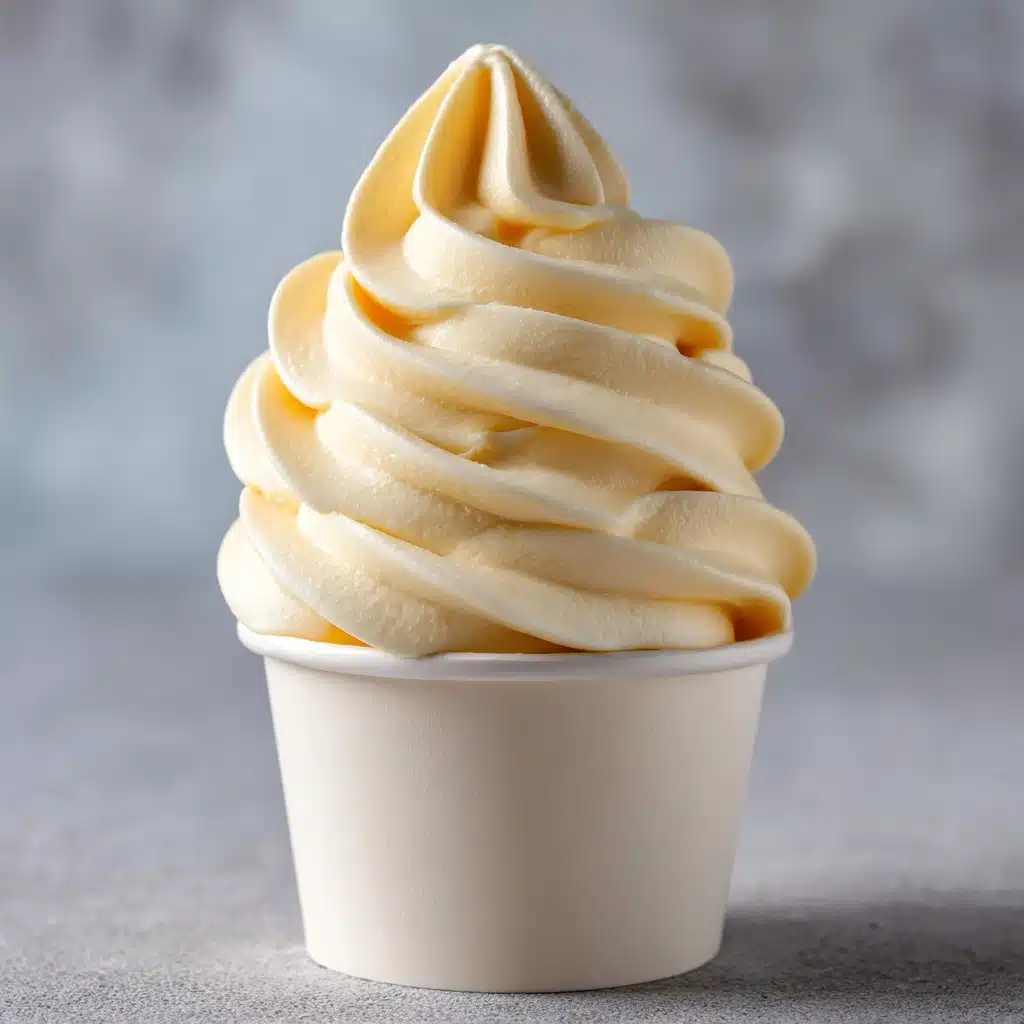
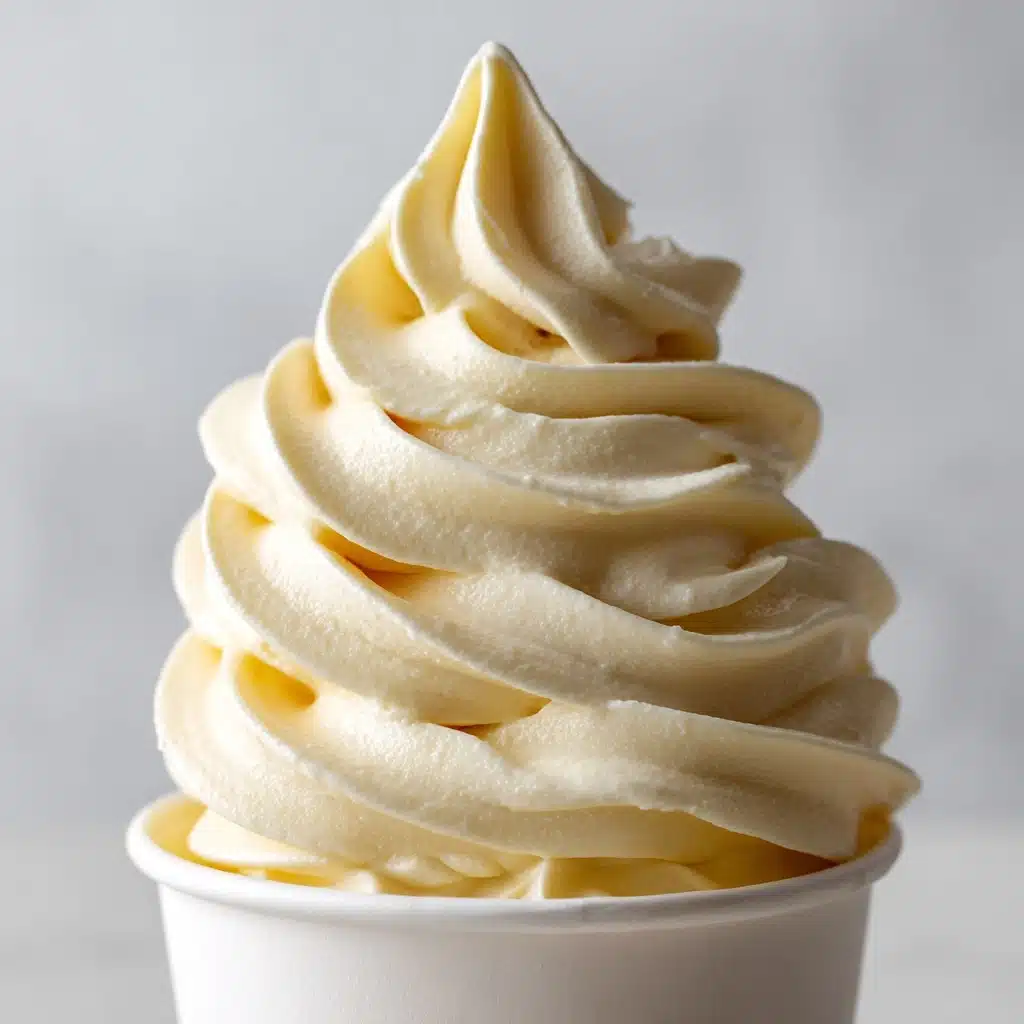
Homemade Pineapple Soft Serve Ice Cream Recipe
If you’re craving a bright, refreshing dessert that’s both light and creamy, this Homemade Pineapple Soft Serve Ice Cream is a taste of summer in every bite. With the burst of tropical pineapple, a splash of coconut milk, and just a hint of natural sweetness, it’s incredibly simple to whip up in your own kitchen—no fancy equipment or endless churning needed. You’ll love how this treat strikes that perfect balance of tangy, sweet, and silky, making it just the thing to cool off or impress guests with a homemade touch.
Ingredients You’ll Need
Every ingredient in this ice cream is thoughtfully chosen—each one brings out the flavor, texture, or color that makes it sing. The best part? The ingredient list is short and sweet, so every scoop delivers punchy pineapple goodness without fuss or filler.
- Frozen pineapple chunks: The star of the show—these give the ice cream its vibrant flavor and that quintessential soft serve texture.
- Unsweetened coconut milk (or any milk of choice): This adds creaminess and a gentle tropical note, perfect if you want a dairy-free option.
- Honey or maple syrup (optional): If your pineapple isn’t super sweet, just a touch of this brings everything into balance.
- Fresh lemon juice: Adds brightness and a subtle tang that heightens the other flavors beautifully.
- Vanilla extract: Just a splash brings warmth and rounds out the overall profile of the dessert.
- Pinch of salt: A must for making those fruity, sweet flavors really pop!
How to Make Homemade Pineapple Soft Serve Ice Cream
Step 1: Gather and Prep Your Ingredients
Make sure your pineapple chunks are truly frozen before you begin—that’s key for the soft serve effect. If you’re starting with a fresh pineapple, just cut it into bite-sized chunks and let them freeze completely, ideally overnight. Double-check that your coconut milk is ready to pour and measure out your flavor-boosters so everything’s right at hand.
Step 2: Add Everything to the Blender
Pop the frozen pineapple chunks, coconut milk, honey or maple syrup (if you’re using it), lemon juice, vanilla extract, and a pinch of salt into a high-speed blender or food processor. This method keeps things hands-off, but if your blender needs a little help, don’t hesitate to pause and scrape down the sides as you go.
Step 3: Blend Until Creamy and Smooth
Turn the blender on high and blend—patience is key here. You want the pineapple to break down completely, giving you a smooth, dreamy, thick consistency. If the mixture seems stubbornly thick, drizzle in extra coconut milk one tablespoon at a time until you reach that perfect, soft serve swirl.
Step 4: Serve or Freeze for Later
For the classic swirl, scoop and serve the Homemade Pineapple Soft Serve Ice Cream immediately. If you’re after a firmer, scoopable treat, transfer the mixture to a lidded container and freeze for 1 to 2 hours. Either way, you’re looking at a creamy, luscious dessert that’s ready in no time.
How to Serve Homemade Pineapple Soft Serve Ice Cream
Garnishes
The fun really begins with toppings! Sprinkle on toasted coconut flakes, add a handful of fresh berries, or toss a few chopped mint leaves for extra color and freshness. A drizzle of honey or even some crunchy granola can turn your bowl into a sundae worthy of any occasion.
Side Dishes
If you want to create more of a dessert spread, serve this ice cream alongside tropical fruit salad, crisp coconut shortbread cookies, or a wedge of grilled pineapple. These combinations boost the tropical theme and make every bite a mini-vacation.
Creative Ways to Present
Try serving Homemade Pineapple Soft Serve Ice Cream in hollowed-out pineapple halves for a show-stopping centerpiece. You can also layer scoops between crisp meringue cookies for fruity ice cream sandwiches, or fill mini waffle cones for kid-friendly treats. The presentation possibilities are endless and totally fun!
Make Ahead and Storage
Storing Leftovers
If you somehow end up with leftovers, simply transfer any extra Homemade Pineapple Soft Serve Ice Cream into an airtight container. Smooth out the top, press a piece of parchment directly onto the surface, and seal tightly to keep it from picking up any freezer aromas or forming ice crystals.
Freezing
For longer storage, freeze the ice cream for up to a month. Be aware that the texture may firm up more than classic soft serve, so let the container sit at room temperature for 10-15 minutes before scooping. This will restore that luscious, creamy texture—almost like it’s freshly made.
Reheating
While you’ll never need to “reheat” Homemade Pineapple Soft Serve Ice Cream, you can easily soften it if it gets too hard in the freezer. Just let the container rest on your countertop for a few minutes, then stir gently to bring back that smooth, spoonable goodness.
FAQs
Can I make Homemade Pineapple Soft Serve Ice Cream without coconut milk?
Absolutely! You can substitute any plant-based milk like almond or oat, or even use regular dairy milk if you’re not looking for a vegan treat. Each choice brings a unique twist to the flavor and creaminess.
Does this recipe taste like Dole Whip from the parks?
It’s deliciously close! This Homemade Pineapple Soft Serve Ice Cream captures the bright, tangy flavor and smooth, creamy texture made famous at theme parks, but with wholesome ingredients and no mystery additives.
What if my pineapple isn’t sweet enough?
If your pineapple chunks are more tart than sweet, feel free to stir in a bit of extra honey, maple syrup, or even agave. Taste as you go—the beauty of homemade is that you’re in control of the flavor.
Can I use other fruits besides pineapple?
Definitely! Mangoes, bananas, or even a blend of tropical fruits work beautifully in this recipe. Just remember to freeze your fruit in advance for the best soft serve consistency.
Is Homemade Pineapple Soft Serve Ice Cream vegan and gluten-free?
Yes, as long as you use a plant-based milk and maple syrup instead of honey, it’s totally vegan, and all the ingredients are naturally gluten-free—making it a dessert that almost everyone can enjoy!
Final Thoughts
If you’re ready for a taste of sunshine in dessert form, I can’t wait for you to try Homemade Pineapple Soft Serve Ice Cream for yourself. It’s genuinely a joy to blend together and even more fun to share. So pull out that blender and treat yourself to this cool, creamy escape from the everyday—you’re going to love every spoonful!
Print
Homemade Pineapple Soft Serve Ice Cream Recipe
- Total Time: 10 minutes
- Yield: 2 servings 1x
- Diet: Vegan
Description
Indulge in a tropical treat with this Homemade Pineapple Soft Serve Ice Cream recipe. Creamy, dairy-free, and bursting with pineapple flavor, this vegan dessert is a guilt-free delight for any time of the year.
Ingredients
Frozen Pineapple Soft Serve:
- 2 cups frozen pineapple chunks
- 1/2 cup unsweetened coconut milk (or any milk of choice)
- 1 tablespoon honey or maple syrup (optional)
- 1 teaspoon fresh lemon juice
- 1/2 teaspoon vanilla extract
- pinch of salt
Instructions
- Blend Ingredients: Add the frozen pineapple chunks, coconut milk, honey or maple syrup (if using), lemon juice, vanilla extract, and a pinch of salt to a high-speed blender or food processor.
- Blend Until Smooth: Blend on high until the mixture becomes smooth and creamy, stopping to scrape down the sides as needed.
- Adjust Consistency: If the texture is too thick, add a little more coconut milk, one tablespoon at a time.
- Serve or Freeze: Once the mixture reaches a soft serve consistency, serve immediately for a creamy texture, or transfer to a container and freeze for 1-2 hours for a firmer scoopable texture.
Notes
- For a dairy-free version, use coconut milk or almond milk.
- You can also substitute mango or banana for pineapple to create different tropical variations.
- If using fresh pineapple, be sure to freeze it first for best results.
- Prep Time: 10 minutes
- Cook Time: 0 minutes
- Category: Dessert
- Method: Blending
- Cuisine: American
Nutrition
- Serving Size: 1 cup
- Calories: 120
- Sugar: 16g
- Sodium: 15mg
- Fat: 3.5g
- Saturated Fat: 2.5g
- Unsaturated Fat: 1g
- Trans Fat: 0g
- Carbohydrates: 25g
- Fiber: 2g
- Protein: 1g
- Cholesterol: 0mg


