Homemade Easter Candy Recipe
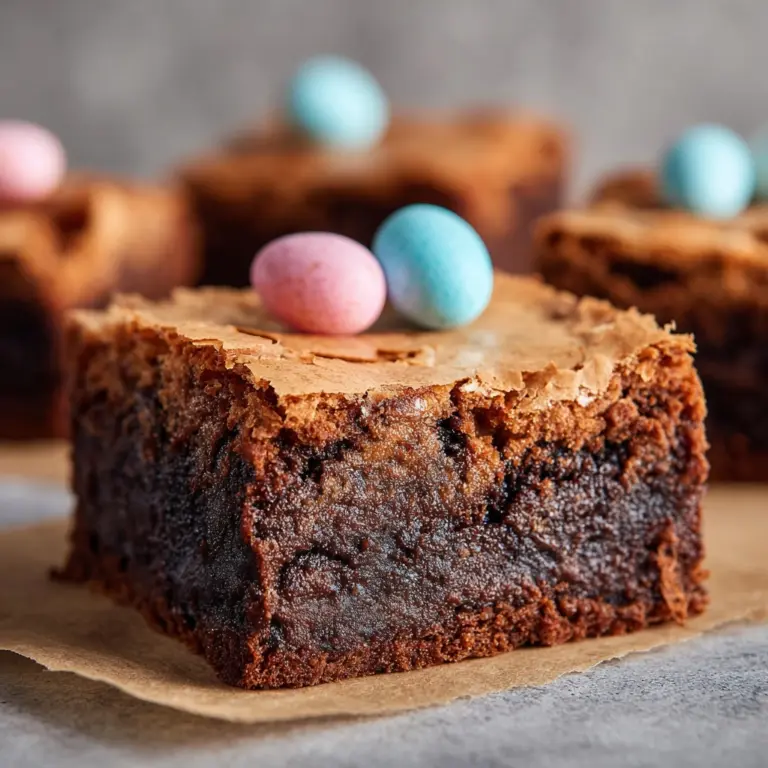
There’s something endlessly joyful about crafting Homemade Easter Candy in your own kitchen—the happy mess of sprinkles, the melt-in-your-mouth chocolate, and those sweet, nutty centers you just can’t wait to sample! This recipe is designed to be foolproof and fun, perfect for making memories with kids or simply indulging your inner candy-maker. Every bite tastes like childhood, celebration, and the anticipation of spring, making it a treat you’ll want to return to year after year.

Ingredients You’ll Need
Homemade Easter Candy is delightfully simple to make, and that’s thanks to its short list of basic ingredients. Each one plays a crucial role, lending flavor, texture, and that gorgeous, glossy finish you expect from classic homemade sweets.
- Peanut Butter (1 cup, creamy): The nutty base brings richness and smooth texture to every bite—creamy is best for seamless mixing.
- Unsalted Butter (1/4 cup, softened): This adds a hint of luxurious flavor and helps the candy hold together beautifully.
- Vanilla Extract (1/2 teaspoon): Just a splash elevates the sweetness and depth of the peanut butter filling.
- Powdered Sugar (2 cups): Essential for sweetening and thickening the mixture, creating that doughy, soft-but-firm center.
- Melting Chocolate or Chocolate Chips (12 oz, any type): Whether you love milk, dark, or white chocolate, this is what gives each candy its irresistible shell.
- Pastel Sprinkles or Crushed Mini Eggs (optional): These festive touches add delightful color, crunch, and visual appeal—go wild with your toppings!
How to Make Homemade Easter Candy
Step 1: Prepare Your Workspace
Start by lining a baking sheet with parchment paper. This easy step ensures your candy won’t stick and makes cleanup a total breeze. Plus, it’s the perfect spot for chilling and finishing your chocolate-dipped treasures later on!
Step 2: Mix the Filling
In a large bowl, blend together the creamy peanut butter, softened butter, and vanilla extract until you have a gorgeously smooth and creamy mixture. Gradually add the powdered sugar, stirring as you go, until it comes together as a thick, rollable dough. If it’s feeling a little too soft, no problem—just pop the bowl in the fridge for 10 to 15 minutes to firm it up slightly.
Step 3: Shape Your Eggs
Scoop out tablespoon-sized portions of the filling and roll them gently in your hands to form egg shapes or classic balls. Set each one on your prepared baking sheet as you go. Once shaped, place the candies in the freezer for 20 to 30 minutes until they’re good and firm. This makes dipping so much easier later on!
Step 4: Melt the Chocolate
While the candy centers chill, break out your favorite chocolate. Place the chips or melting chocolate in a microwave-safe bowl and heat in 30-second intervals, stirring in between until the chocolate is silky smooth. Take care not to overheat—it should be melted and glossy, not scorched.
Step 5: Dip and Decorate
Using a fork or a candy dipper, carefully dip each chilled egg or ball into the melted chocolate. Let any extra chocolate drip away, then return each piece to the baking sheet. If you love a pop of color or crunch, quickly shower with pastel sprinkles or crushed mini eggs before the coating sets.
Step 6: Chill and Finish
Once all your candies are dipped and sprinkled, place the baking sheet back in the fridge for about 15 minutes so the chocolate sets perfectly. After that, your Homemade Easter Candy is ready to eat, share, or stash away in a secret spot (we won’t tell!).
How to Serve Homemade Easter Candy

Garnishes
A fun homemade treat like this is just begging for a little extra flair. Try a drizzle of pastel-colored white chocolate for a whimsical accent, or add edible glitter for sparkle. Even a sprinkle of sea salt makes the chocolate truly shine—go ahead and make each candy distinctly yours!
Side Dishes
Though these sweets are indulgent on their own, you can round out an Easter spread with fresh strawberries, homemade lemonade, or a platter of crisp apple slices to balance the richness. For a celebratory brunch, serve alongside pretty cups of tea or coffee.
Creative Ways to Present
Presenting your Homemade Easter Candy is almost as much fun as making it! Pile them in a woven basket lined with tissue, add to cellophane bags with pastel ribbons for gifts, or nestle them individually in cupcake liners for easy serving at your spring get-together.
Make Ahead and Storage
Storing Leftovers
These candies keep best in an airtight container in the refrigerator, where they’ll stay fresh and delicious for 1 to 2 weeks. Separate layers with parchment to prevent sticking and keep those pretty decorations intact.
Freezing
Homemade Easter Candy is freezer-friendly, making it the ideal treat to prep ahead of time. Arrange finished candies in a single layer, freeze until solid, then transfer to a freezer-safe bag or container. They’ll keep well for up to 2 months—just thaw in the fridge before serving.
Reheating
You don’t actually need to reheat these candies, but if you love a melty center, let them rest at room temperature for about 10 minutes before eating. Avoid microwaving, which can cause the chocolate to weep or lose its shine.
FAQs
Can I make this recipe nut-free?
Absolutely! Swap the peanut butter with sunflower seed butter or an allergy-friendly alternative for delicious nut-free Homemade Easter Candy that everyone can enjoy.
Which type Dessert, Candy
You can use milk, dark, or white chocolate—whatever makes your taste buds happiest. Candy melts are also great for colorful or dairy-free options. For best results, choose a good-quality chocolate that melts smoothly.
How do I get perfectly smooth chocolate coating?
Chilling the shaped candy centers before dipping makes all the difference. Also, let any excess chocolate drip off after dipping and work quickly before the coating sets. If you want an ultra-shiny finish, temper the chocolate or add a tiny bit of coconut oil.
Can I make these in advance?
Definitely! You can make Homemade Easter Candy up to two weeks ahead of time if you store them in an airtight container in the fridge, or freeze them for longer storage.
What are some alternative flavor ideas?
For a twist, try mixing a little cinnamon, espresso powder, or orange zest into the filling. Swirl in a layer of Nutella, or coat in colorful candy melts for festive fun. The possibilities for customizing your Homemade Easter Candy are nearly endless!
Final Thoughts
Making your own Homemade Easter Candy turns any kitchen into a place of sweet memories and pure fun. Whether you’re sharing these treats with family, hiding them in baskets, or simply sneaking a few straight from the fridge, this recipe is the essence of festive delight. Gather your ingredients, get a little messy, and celebrate with every chocolatey bite—you deserve it!
Print
Homemade Easter Candy Recipe
- Total Time: 1 hour (including chilling)
- Yield: 24 pieces 1x
- Diet: Vegetarian, Gluten-Free
Description
Learn how to make delicious Homemade Easter Candy with creamy peanut butter centers coated in rich chocolate. These homemade treats are perfect for Easter celebrations and are sure to impress your family and friends.
Ingredients
Peanut Butter Filling:
- 1 cup creamy peanut butter
- 1/4 cup unsalted butter, softened
- 1/2 teaspoon vanilla extract
- 2 cups powdered sugar
Chocolate Coating:
- 12 oz melting chocolate or chocolate chips (milk, dark, or white)
Decoration:
- Pastel sprinkles or crushed mini eggs for decoration (optional)
Instructions
- Prepare Peanut Butter Filling: Line a baking sheet with parchment paper. Mix peanut butter, softened butter, and vanilla until smooth. Add powdered sugar to form a dough. Chill if too soft.
- Shape and Freeze: Roll dough into egg shapes, place on baking sheet, and freeze until firm.
- Coat in Chocolate: Melt chocolate, dip each egg, let excess drip off, and decorate if desired.
- Chill and Store: Chill until set, then store in the refrigerator.
Notes
- Try almond butter or sunflower seed butter for nut-free options.
- Get creative with dyed white chocolate drizzles or candy melt variations.
- Candies can be made in advance and stored in the fridge or freezer.
- Prep Time: 30 minutes
- Cook Time: 0 minutes
- Category: Dessert, Candy
- Method: No-Cook
- Cuisine: American
Nutrition
- Serving Size: 1 piece
- Calories: 145
- Sugar: 13g
- Sodium: 45mg
- Fat: 9g
- Saturated Fat: 4g
- Unsaturated Fat: 4g
- Trans Fat: 0g
- Carbohydrates: 15g
- Fiber: 1g
- Protein: 3g
- Cholesterol: 5mg

