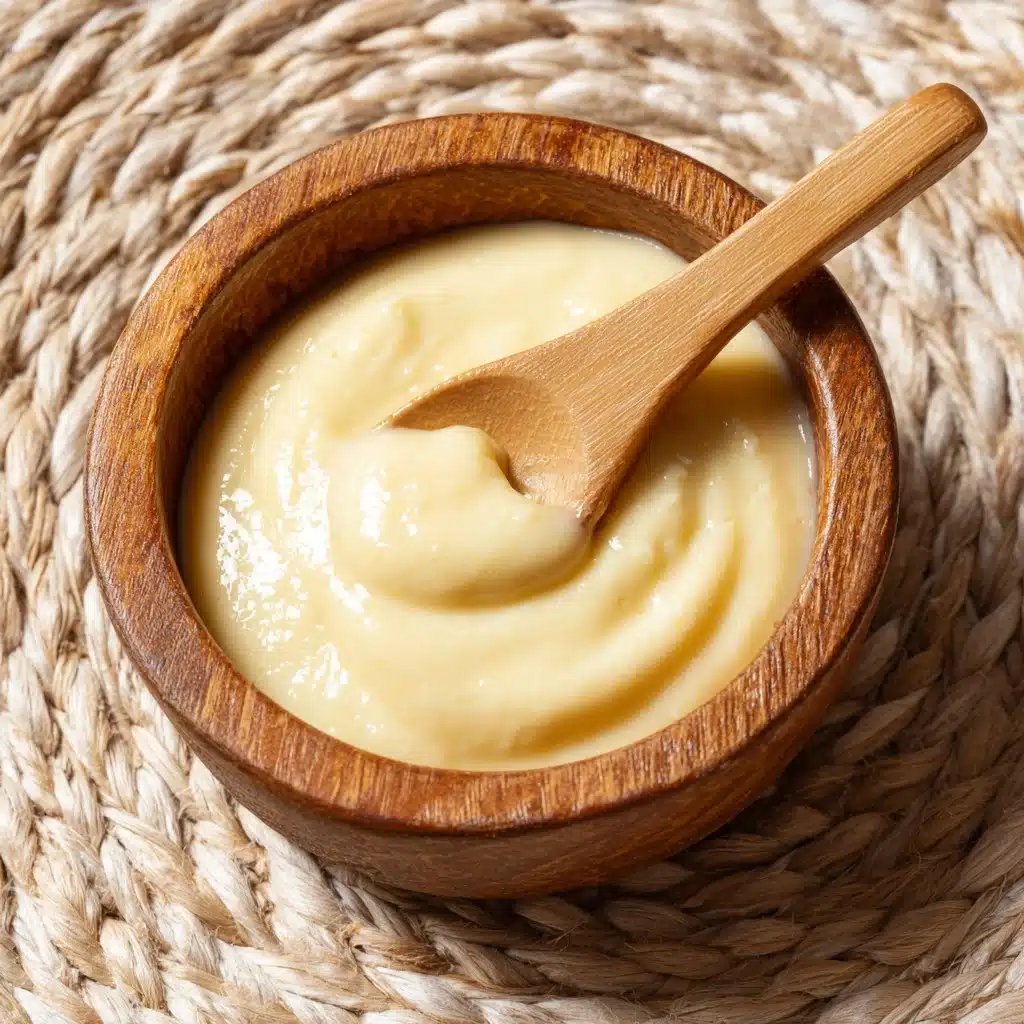
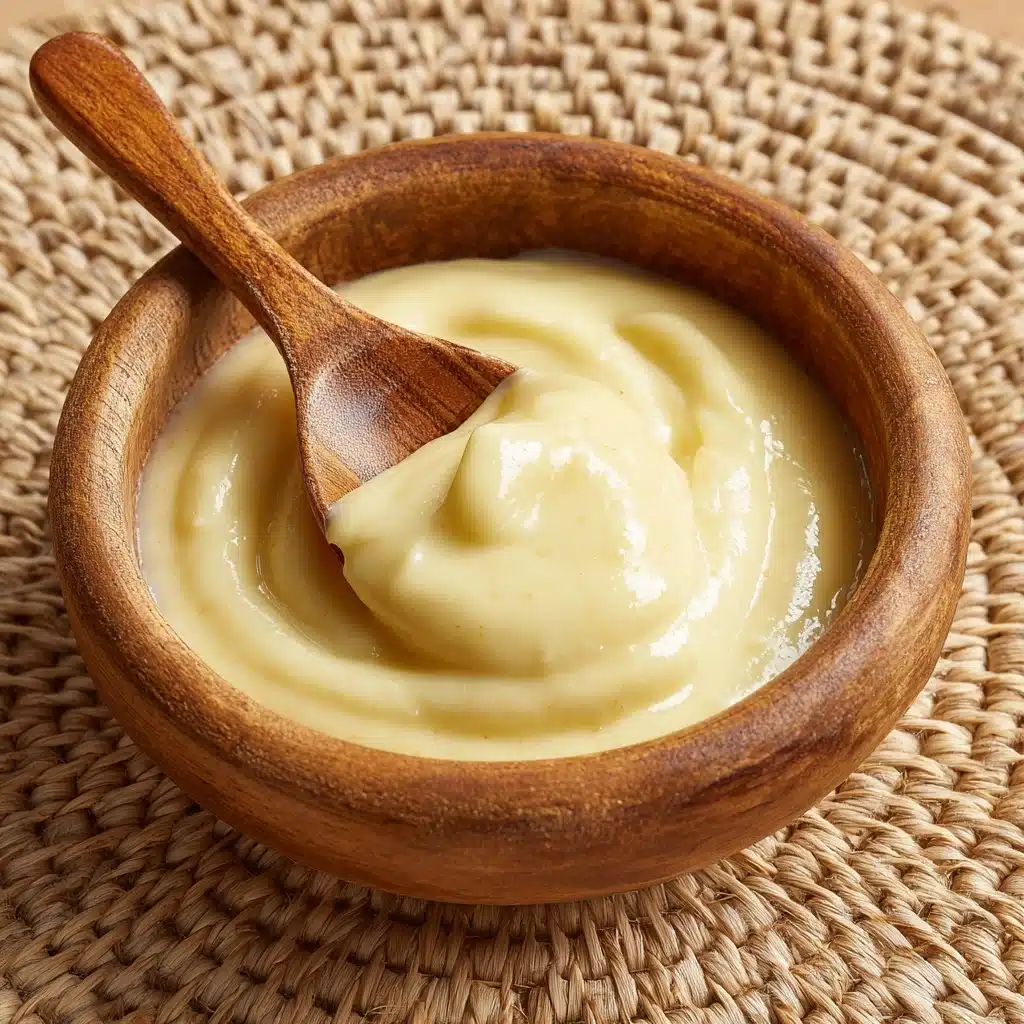
Homemade Condensed Milk Recipe
If you’ve ever wanted to capture the creamy, caramel-like magic of sweetened condensed milk in your own kitchen, this Homemade Condensed Milk Recipe is about to become your new secret weapon. Imagine the taste of real milk and butter, slowly simmered with sugar until thick and luscious, with a whisper of vanilla that makes every spoonful swoon-worthy. This recipe is astonishingly simple, yet delivers that unmistakable richness you expect from store-bought—but fresher, purer, and customizable. Whether you’re stirring it into coffee, swirling it into desserts, or licking the spoon (no judgment here), you’ll never look at the canned stuff the same way again.
Ingredients You’ll Need
One of the joys of this Homemade Condensed Milk Recipe is just how approachable it is—only a handful of ingredients, each playing a vital role in achieving that iconic taste and texture. Let’s take a closer look at what you’ll need and why they matter so much.
- Whole Milk: Provides the creamy base and authentic dairy richness that sets homemade condensed milk apart from the rest.
- Granulated Sugar: Essential for sweetness and also for transforming the milk into that unmistakable, syrupy consistency.
- Unsalted Butter: Adds a touch of luxurious silkiness and depth of flavor that really elevates the final result.
- Vanilla Extract (optional): Infuses the condensed milk with a delicate, aromatic note that makes homemade truly special—use it if you love a gentle vanilla finish!
How to Make Homemade Condensed Milk Recipe
Step 1: Combine Milk and Sugar
Start by pouring the whole milk and granulated sugar into a small, heavy-bottomed saucepan. The heavy bottom helps prevent scorching, giving you more control as the mixture simmers. Stir everything together and set the pan over medium-low heat, making sure the sugar begins to dissolve evenly into the milk.
Step 2: Dissolve and Simmer
Keep stirring gently and patiently until you no longer see any sugar granules. Once the mixture looks smooth, reduce the heat to low. This is where the magic happens—let it simmer gently for 30 to 40 minutes, giving it an occasional stir. You want the mixture to reduce by about half. Watch carefully to prevent any boiling or burning; patience here pays off with that perfect condensed texture.
Step 3: Add Butter and Vanilla
When the mixture has thickened and looks slightly golden, remove it from the heat. Stir in the unsalted butter until it melts completely, lending an irresistible gloss and richness. If you’re using vanilla extract, now’s the time to add it—just a quick stir is all it takes to infuse the whole batch with aromatic warmth.
Step 4: Cool Completely
Let the finished condensed milk cool to room temperature in the pan. As it cools, you’ll notice it thickening up even more, turning into that familiar velvety texture. Once cool, transfer to an airtight container and refrigerate. It’ll keep beautifully for up to a week, ready to use whenever inspiration strikes!
How to Serve Homemade Condensed Milk Recipe
Garnishes
Elevate your Homemade Condensed Milk Recipe with a sprinkle of cinnamon, a dusting of cocoa powder, or even a drizzle of honey on top. For a festive touch, try a few chocolate shavings or a hint of orange zest—it’s all about enhancing that sweet, creamy base.
Side Dishes
This homemade treat pairs wonderfully with fresh berries, cubes of pound cake, or buttery shortbread cookies. Serve it as a dip for fruit, or offer it alongside pancakes and waffles for a decadent breakfast upgrade. It’s also divine over warm bread pudding or stirred into oatmeal for a special morning boost.
Creative Ways to Present
Pour your Homemade Condensed Milk Recipe into a pretty jar with a ribbon for a thoughtful homemade gift. For dessert, layer it in parfait glasses with fruit and granola, or drizzle it artistically over ice cream for instant wow-factor. You can even swirl it into coffee drinks and milkshakes for a barista-level treat at home.
Make Ahead and Storage
Storing Leftovers
Store any leftover Homemade Condensed Milk Recipe in a clean, airtight jar or container in the refrigerator. It’ll stay fresh and creamy for up to one week, ready to add a rich, sweet note to your favorite recipes.
Freezing
If you want to keep your condensed milk for longer, freezing is an option! Pour it into a freezer-safe container, leaving a little space for expansion. It can be frozen for up to three months. Just thaw it overnight in the fridge before using, and give it a good stir to restore its smooth texture.
Reheating
To bring chilled Homemade Condensed Milk Recipe back to a pourable consistency, simply set the container in a bowl of warm water for a few minutes, or microwave it in short bursts, stirring in between. Avoid overheating, as this can alter the flavor and texture.
FAQs
Can I make this Homemade Condensed Milk Recipe dairy-free?
Absolutely! Swap the whole milk for canned full-fat coconut milk and use coconut oil or vegan butter. The result is creamy, rich, and perfect for vegan or dairy-free desserts.
How do I know when the mixture is thick enough?
After simmering for 30 to 40 minutes, your mixture should have reduced by half and coat the back of a spoon. It will thicken even more as it cools, so don’t worry if it seems a bit runny while hot.
Can I use low-fat milk instead of whole milk?
You can, but the final result won’t be as creamy or rich. Whole milk really gives the best classic texture and flavor for this Homemade Condensed Milk Recipe.
Is it possible to double or triple the recipe?
Yes! Just use a larger saucepan and stir more frequently to prevent scorching. Keep in mind that a bigger batch may take a bit longer to reduce.
How can I use homemade condensed milk in baking?
It’s perfect in any recipe that calls for sweetened condensed milk: think fudge, tres leches cake, key lime pie, or even homemade ice cream bases. Your desserts will taste extra fresh and flavorful!
Final Thoughts
There’s something truly special about making your own Homemade Condensed Milk Recipe from scratch. The process is simple, satisfying, and the results are nothing short of delightful. Whether you’re using it to elevate your baking, sweeten your morning coffee, or just sneaking spoonfuls straight from the jar, I hope you’ll give this a try and fall in love with the flavor—just like I did!
Print
Homemade Condensed Milk Recipe
- Total Time: 40 minutes
- Yield: 3/4 cup 1x
- Diet: Vegetarian
Description
This homemade condensed milk recipe is a simple and delicious alternative to store-bought sweetened condensed milk. Made with just a few basic ingredients, it’s perfect for baking, desserts, or sweetening your coffee. The recipe yields a rich, creamy, and slightly thickened milk that sweetens naturally and can be customized with vanilla. It’s easy to make on the stovetop in under 40 minutes and stores well in the refrigerator.
Ingredients
Ingredients
- 1 cup whole milk
- 1/3 cup granulated sugar
- 2 tablespoons unsalted butter
- 1/2 teaspoon vanilla extract (optional)
Instructions
- Combine Milk and Sugar: In a small, heavy-bottomed saucepan, combine the whole milk and granulated sugar over medium-low heat. Stir continuously to dissolve the sugar fully, ensuring no granules remain undissolved.
- Simmer and Reduce: Once the sugar has dissolved, reduce the heat to low and let the mixture simmer gently. Stir occasionally, making sure it doesn’t boil or scorch, for 30 to 40 minutes until the milk has reduced by about half and thickened slightly.
- Add Butter and Vanilla: Remove the pan from the heat, then stir in the unsalted butter until melted completely. Add the optional vanilla extract and mix well to combine the flavors.
- Cool and Store: Allow the condensed milk to cool completely, during which it will thicken further. Transfer the mixture to an airtight container and store it in the refrigerator for up to one week.
Notes
- For a dairy-free alternative, substitute the whole milk with canned full-fat coconut milk and replace butter with coconut oil or vegan butter.
- This homemade condensed milk is ideal for use in desserts, baking recipes, or as a sweetener in beverages like coffee.
- Stir gently during cooking to prevent scorching and ensure even thickening.
- The thickness will increase as the mixture cools, so avoid over-reducing it while hot.
- Prep Time: 5 minutes
- Cook Time: 35 minutes
- Category: Basics, Dessert
- Method: Stovetop
- Cuisine: American
Nutrition
- Serving Size: 2 tablespoons
- Calories: 90
- Sugar: 12g
- Sodium: 15mg
- Fat: 3.5g
- Saturated Fat: 2g
- Unsaturated Fat: 1g
- Trans Fat: 0g
- Carbohydrates: 13g
- Fiber: 0g
- Protein: 1g
- Cholesterol: 10mg


