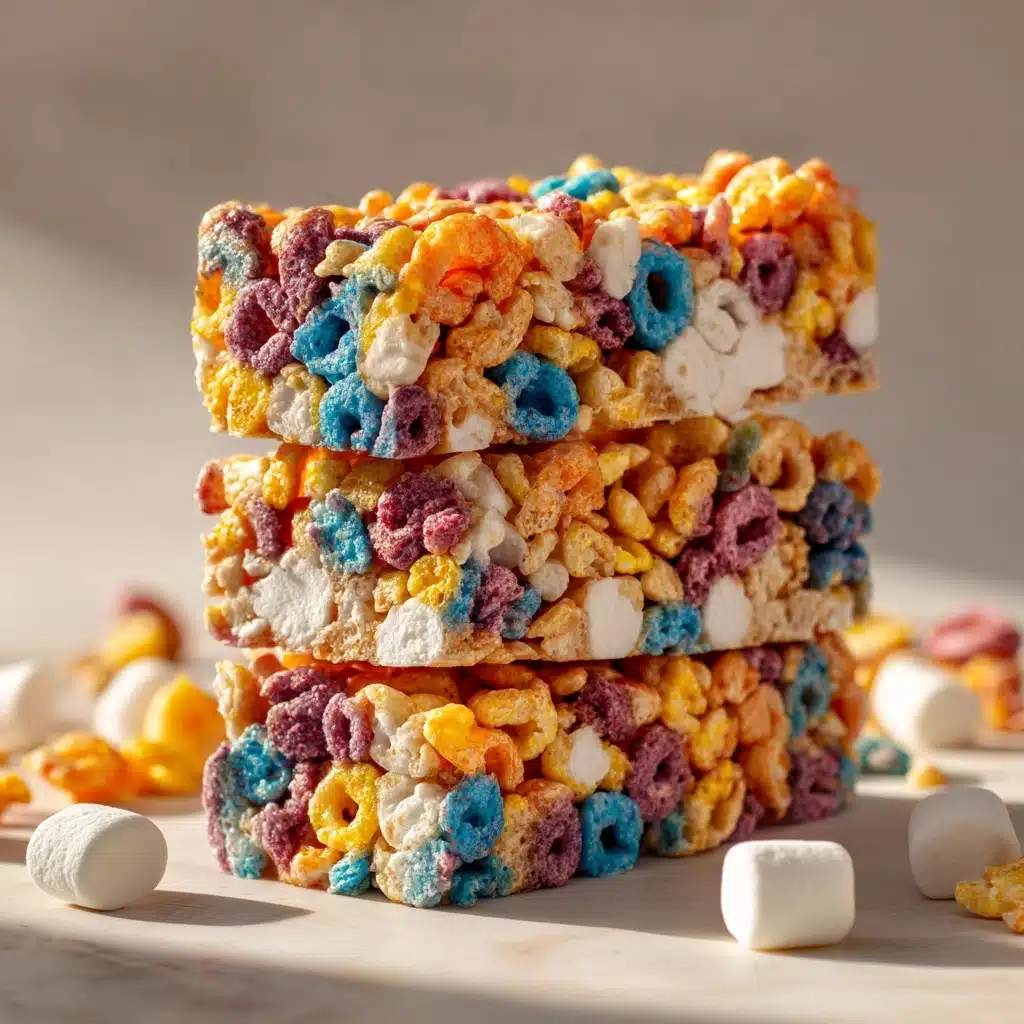
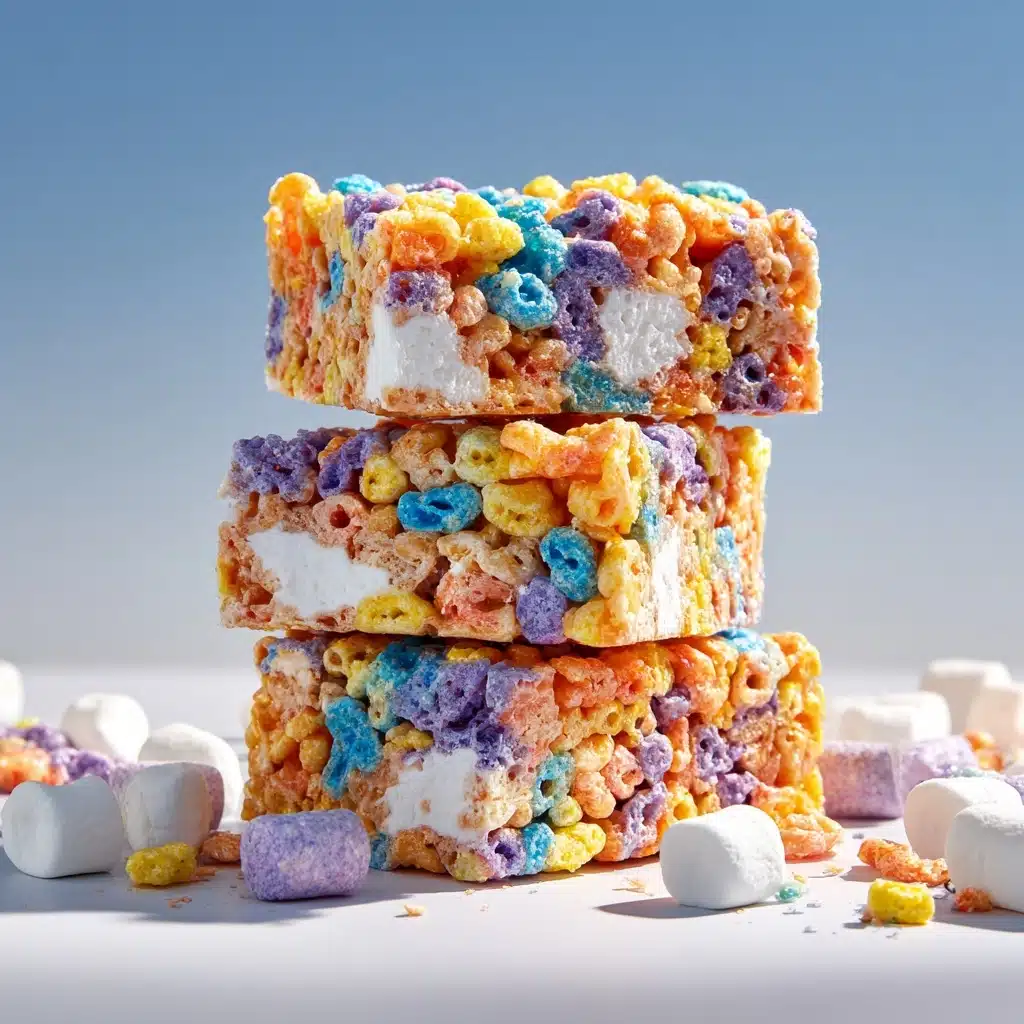
Fruity Pebbles Rice Krispie Treats Recipe
If there’s one treat that truly brings a rainbow of joy to any gathering, it’s the Fruity Pebbles Rice Krispie Treats Recipe. Imagine the classic, gooey, nostalgic marshmallow bars we all loved as kids, now transformed into something even more magical thanks to the colorful crunch and sweet fruit flavors of Fruity Pebbles cereal. Every bite bursts with vibrant happiness, making these no-bake dessert bars the life of the party—whether you’re sharing them at a birthday bash or just indulging in a slice of childhood on an ordinary day.
Ingredients You’ll Need
Get ready to gather a small handful of everyday ingredients with big personalities—each one essential in making your Fruity Pebbles Rice Krispie Treats Recipe a showstopper. The combination delivers an irresistible mix of chewy, gooey, and delightfully crisp textures.
- Fruity Pebbles cereal (6 cups): The bright rainbow colors and intense fruit flavor promise both visual wow-factor and irresistible taste.
- Unsalted butter (1/4 cup): Butter not only helps the marshmallows melt smoothly but also adds a rich, comforting base flavor.
- Mini marshmallows (1 10 oz bag): This is where the signature gooeyness comes from—mini marshmallows melt faster and coat every cereal piece evenly.
- Vanilla extract (1/2 teaspoon): Just a splash of vanilla deepens the marshmallow sweetness and ties all the flavors together.
- Pinch of salt: A tiny pinch balances out all the sweetness, letting each flavor shine through.
- Extra mini marshmallows (1 cup, optional): For those who never say no to more marshmallow goo—stir these in for extra pockets of marshmallowy bliss!
How to Make Fruity Pebbles Rice Krispie Treats Recipe
Step 1: Prepare Your Pan
Start by greasing a 9×13-inch baking dish with a bit of butter or a generous mist of nonstick spray. This keeps the treats from sticking and makes releasing those perfectly square bars an absolute breeze when it’s time to serve.
Step 2: Melt the Butter
Set a large saucepan over low heat and add your butter. Let it melt gently, swirling occasionally, until it becomes deliciously fragrant—this is the foundation for that classic flavor and ultra-smooth texture.
Step 3: Melt in the Marshmallows
Pour in the mini marshmallows (hold back 1 cup if you love extra goo!). Stir patiently and continuously until melted and glossy, making sure the mixture stays silky and lump-free without browning.
Step 4: Flavor Boost
Remove your pan from the heat and quickly stir in the vanilla extract and a small pinch of salt. These hidden heroes work behind the scenes, bringing out the best in all the sweet, fruity, buttery goodness.
Step 5: Add the Fruity Pebbles
Immediately dump the Fruity Pebbles cereal into the marshmallow lava and stir swiftly to coat every last flake in marshmallow magic. If you reserved that extra cup of mini marshmallows, fold them in now for bonus chewy bites.
Step 6: Press and Set
Transfer the entire technicolor mixture to your prepared pan. Use a buttered spatula or a piece of wax paper (pro tip: lightly grease it too) to gently press the mixture down evenly. Avoid pressing too hard—this keeps your Fruity Pebbles Rice Krispie Treats Recipe ultra soft and tender!
Step 7: Cool and Slice
Let your pan sit at room temperature for about 30 minutes, just enough for everything to set up and become perfectly sliceable. Cut into 16 cheerful squares—and get ready to watch them disappear.
How to Serve Fruity Pebbles Rice Krispie Treats Recipe
Garnishes
The possibilities for toppings here are as playful as the treats themselves! Try a whimsical drizzle of melted white chocolate, a flourish of rainbow sprinkles, or even a scattering of extra Fruity Pebbles for a bit of extra crunch and color on top. Each garnish adds a layer of fun and makes every batch uniquely yours.
Side Dishes
Balance out the sweet with small bowls of fresh fruit or a refreshingly simple fruit salad. A scoop of vanilla or strawberry ice cream turns these bars into a no-brainer sundae. And for grown-ups, a cup of strong coffee or a cold glass of milk makes the perfect pairing—nostalgic treats meet classic comfort!
Creative Ways to Present
Try cutting the bars into fun shapes using cookie cutters for a special event, or stack them on a tiered cake stand for a vibrant centerpiece. Wrap each square in colorful parchment and tie with ribbon to make adorable party favors—ideal for birthdays, bake sales, or just spreading a little cheer.
Make Ahead and Storage
Storing Leftovers
Keep any remaining Fruity Pebbles Rice Krispie Treats Recipe squares in an airtight container at room temperature. They’ll stay fresh and chewy for up to 3 days—if you somehow manage not to eat them all sooner! Avoid the fridge, as chilling can make the bars hard and less enjoyable.
Freezing
If you plan to store the treats longer, you can freeze them with great results. Layer squares between sheets of wax or parchment paper to prevent sticking, then seal in a freezer-safe container or zip-top bag. They’ll keep their flavor and texture for up to 2 months; simply thaw at room temperature before serving.
Reheating
While these treats truly shine at room temperature, if you want to restore a just-made softness, a few seconds (5-8) in the microwave will give you that ooey-gooey sensation once again. Just be careful not to overheat—marshmallows melt fast!
FAQs
Can I use regular marshmallows instead of mini ones?
You can! Just make sure to cut them into smaller pieces so they melt evenly and smoothly. Mini marshmallows are simply quicker and easier to work with, which is why they’re recommended.
What if I only have a smaller baking pan?
If you use an 8×8-inch or 9×9-inch pan, your Fruity Pebbles Rice Krispie Treats Recipe will be even thicker and more indulgent. They’ll take a little longer to set, but you’ll have extra-chewy, bakery-style bars as a result.
Can I make this recipe dairy-free?
Absolutely! Swap out the unsalted butter for a plant-based butter alternative, and confirm your marshmallows are vegan-friendly. The results will still be bright, fun, and delicious.
How can I prevent the mixture from sticking to my hands or spatula?
Lightly grease your spatula or press mixture down with wax or parchment paper. You can also lightly butter your hands—this makes shaping and pressing the sticky cereal mixture mess-free and easy.
Can I add mix-ins like chocolate chips or nuts?
Definitely! Mini white chocolate chips, colorful candy-coated chocolates, or chopped macadamias can make your Fruity Pebbles Rice Krispie Treats Recipe even more special. Add them along with the cereal so they’re evenly distributed.
Final Thoughts
There’s a reason this Fruity Pebbles Rice Krispie Treats Recipe has a special place in my heart—it’s pure, colorful happiness in dessert form, and so easy to whip up whenever the craving strikes. If you’re ready to relive a little childhood magic or surprise someone with an eye-popping treat, don’t wait to try this recipe. I can’t wait to hear how you make it your own and see those smiles with every bite!
Print
Fruity Pebbles Rice Krispie Treats Recipe
- Total Time: 15 minutes
- Yield: 16 squares 1x
- Diet: Vegetarian
Description
Indulge in these colorful and fun Fruity Pebbles Rice Krispie Treats that are perfect for any occasion. With a burst of fruity flavor and gooey marshmallows, these no-bake bars are a hit with both kids and adults alike.
Ingredients
Ingredients:
- 6 cups Fruity Pebbles cereal
- 1/4 cup unsalted butter
- 1 (10 oz) bag mini marshmallows
- 1/2 teaspoon vanilla extract
- pinch of salt
- optional: extra marshmallows (1 cup) for added texture
Instructions
- Grease the Baking Dish: Grease a 9×13-inch baking dish with butter or nonstick spray.
- Melt Butter and Marshmallows: In a large saucepan, melt the butter over low heat. Add the mini marshmallows (reserving 1 cup if using extra) and stir until completely melted and smooth.
- Combine Ingredients: Remove from heat and stir in the vanilla extract and salt. Fold in the Fruity Pebbles cereal, stirring quickly to coat evenly. Fold in the extra mini marshmallows if desired.
- Press into Pan: Press the mixture gently into the prepared pan using a buttered spatula or wax paper. Do not pack too firmly.
- Cool and Slice: Let cool at room temperature for about 30 minutes before slicing into squares.
Notes
- For thicker treats, use an 8×8-inch pan instead.
- Store in an airtight container at room temperature for up to 3 days.
- Add white chocolate drizzle or sprinkles for extra fun!
- Prep Time: 10 minutes
- Cook Time: 5 minutes
- Category: Dessert
- Method: No-Bake
- Cuisine: American
Nutrition
- Serving Size: 1 square
- Calories: 140
- Sugar: 13g
- Sodium: 85mg
- Fat: 3g
- Saturated Fat: 2g
- Unsaturated Fat: 1g
- Trans Fat: 0g
- Carbohydrates: 28g
- Fiber: 0g
- Protein: 1g
- Cholesterol: 10mg


