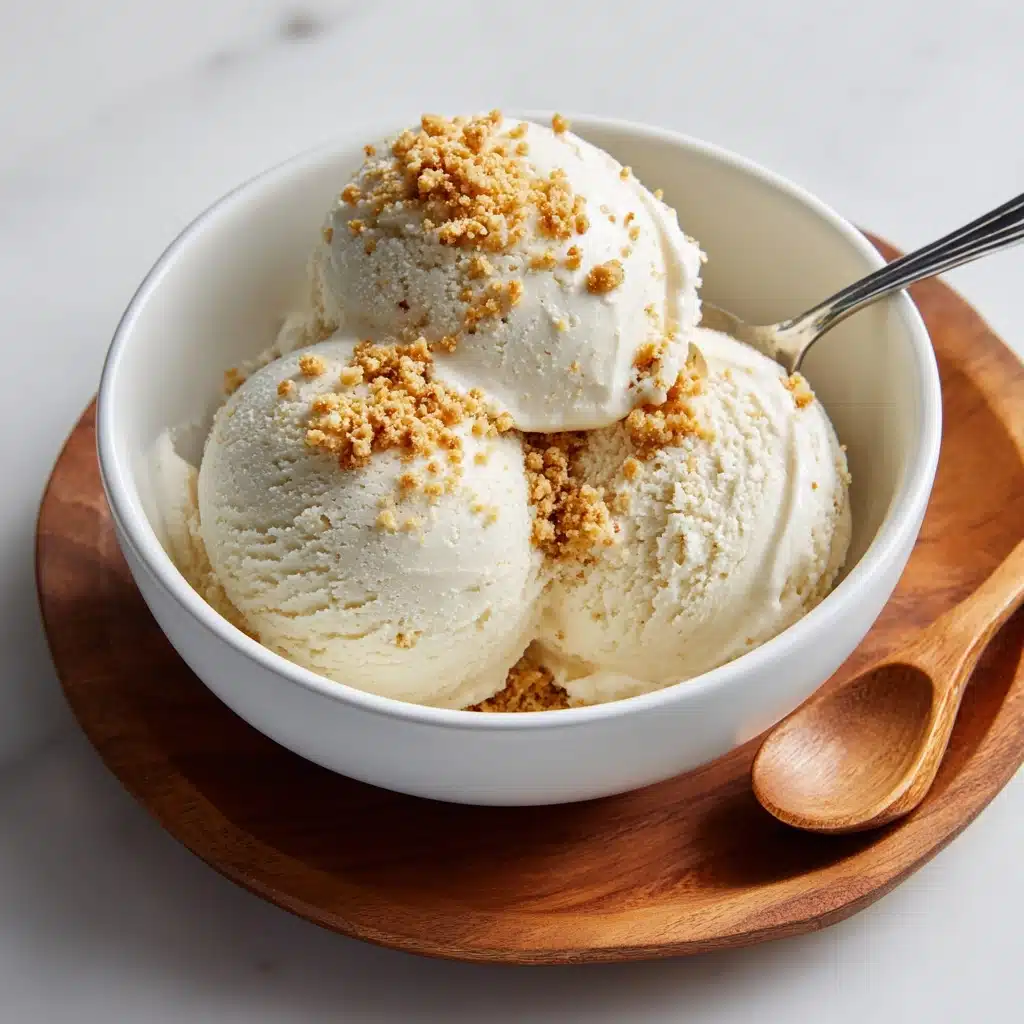
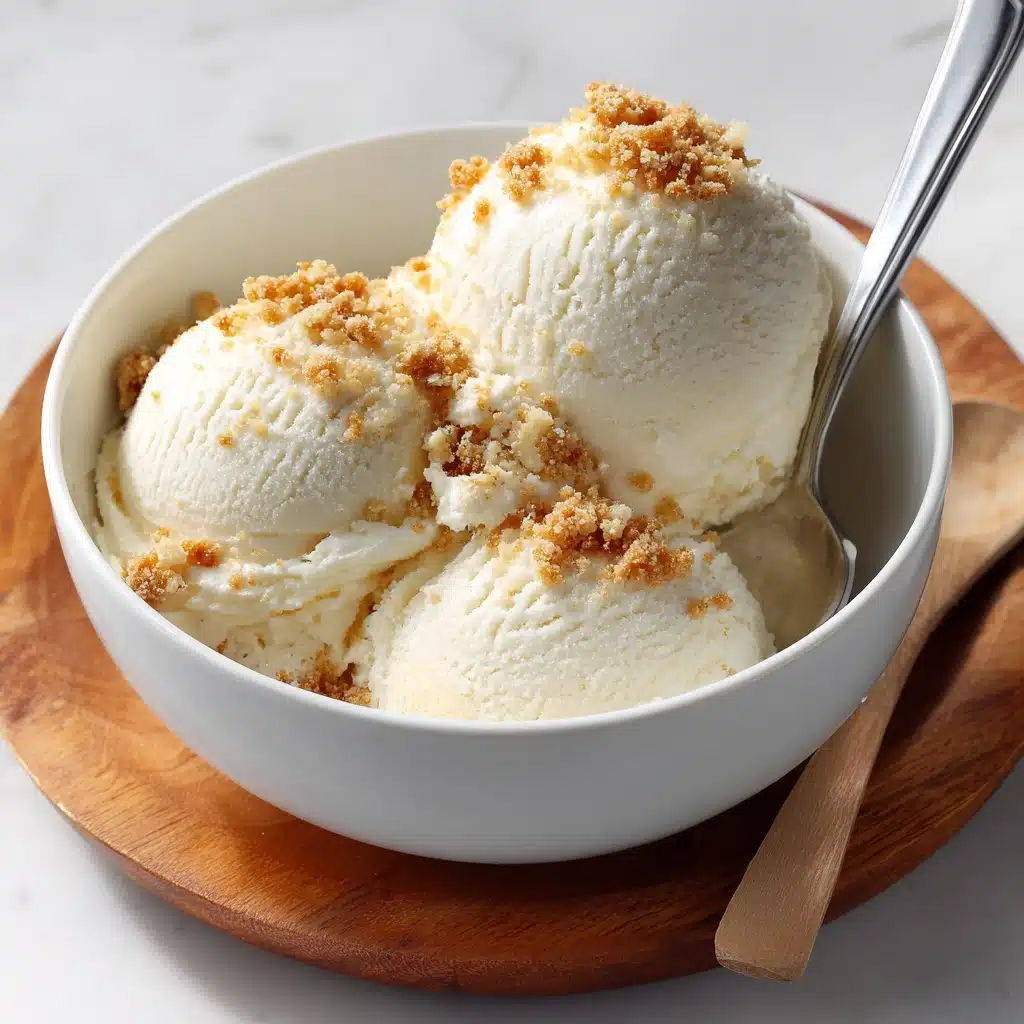
Coconut Milk Ice Cream Recipe
If you’re searching for the ultimate creamy, dreamy treat that’s delightfully dairy-free, Coconut Milk Ice Cream is about to become your new obsession. This luscious dessert transforms simple pantry staples into a scoop-worthy masterpiece, bursting with coconut flavor and subtle sweetness. Each bite is smooth, rich, and every bit as decadent as traditional ice cream, making it a hit with vegans, folks with dairy allergies, and—let’s be real—anyone who loves a cool, refreshing dessert on a warm afternoon.
Ingredients You’ll Need
There’s something truly magical about how just a handful of straightforward ingredients can come together to create a dessert this special. Each one brings something essential to the table, from the decadent base to the nuanced sweetness and scent.
- Full-fat coconut milk: This is the star of the show, lending the ice cream its ultra-creamy texture and unmistakably tropical flavor.
- Maple syrup or agave nectar: These natural sweeteners add a gentle sweetness and help keep the ice cream soft and scoopable straight from the freezer.
- Vanilla extract: Just a splash brings incredible warmth and aroma, making every bite even more inviting.
- Pinch of salt: A little salt heightens all the flavors and keeps the sweetness perfectly balanced.
- Optional mix-ins (shredded coconut, chocolate chips, fruit swirls): These are your secret weapon for added texture and bursts of flavor—get creative or keep it classic!
How to Make Coconut Milk Ice Cream
Step 1: Blend the Ingredients
Start by grabbing a blender or a large mixing bowl. Combine the full-fat coconut milk, maple syrup or agave nectar, vanilla extract, and a pinch of salt. Give everything a good blend or whisk until the mixture is totally smooth and uniform—no streaks or lumps! This is your dreamy base, so take a moment to appreciate that heavenly aroma of coconut and vanilla mingling together.
Step 2: Chill the Mixture
For the best Coconut Milk Ice Cream texture, patience is key. Pour your blended mixture into a bowl, cover it up, and pop it in the refrigerator to chill for at least 2 hours. You want it nice and cold before it meets the ice cream maker. This step is crucial for a creamy, scoopable result with fewer ice crystals.
Step 3: Churn in the Ice Cream Maker
Once your base is thoroughly chilled, give it one last quick stir. Then, pour it into your ice cream maker and churn following your machine’s instructions—usually about 20 to 25 minutes. You’ll be amazed as it transforms from liquid to thick, luxurious soft serve right before your eyes. If you’re planning to add mix-ins like chocolate chips or shredded coconut, toss them in during the final few minutes of churning so they’re evenly distributed.
Step 4: Freeze for a Firmer Texture
Once your Coconut Milk Ice Cream is churned and irresistible, transfer it to a freezer-safe container. Smooth the top, cover it, and freeze for 2 to 4 hours if you prefer a firmer, more classic ice cream scoop. When you’re ready to serve, let it sit on the counter for a few minutes to soften—then it’ll glide blissfully onto every cone or into every bowl!
How to Serve Coconut Milk Ice Cream
Garnishes
The beauty of Coconut Milk Ice Cream is that it pairs beautifully with endless toppings. Try a generous sprinkle of toasted coconut flakes, a scattering of mini chocolate chips, or a drizzle of fruit puree for a pop of color and zing. If you want to go extra fancy, a chiffonade of fresh basil or mint adds freshness that makes each bite feel like a little celebration.
Side Dishes
This ice cream doesn’t need much to shine, but it’s absolutely delightful alongside light, crispy treats—think coconut shortbread cookies, vanilla wafers, or even a slice of tropical fruit like pineapple or mango. The contrast in textures just elevates the whole experience and brings an added layer of fun to your dessert table.
Creative Ways to Present
Let your imagination run wild with presentation! Serve Coconut Milk Ice Cream in hollowed-out coconut shells for a beachy vibe, build a dreamy ice cream sundae bar with assorted toppings, or sandwich scoops between cookies for homemade vegan ice cream sandwiches. If you’re feeling playful, try popping mini scoops onto skewers with fruit for icy party pops.
Make Ahead and Storage
Storing Leftovers
If you have any leftover Coconut Milk Ice Cream (which, let’s be honest, is a rare occurrence!), simply transfer it to an airtight, freezer-safe container. For best results, press a layer of parchment directly onto the surface before sealing the lid—this helps prevent ice crystals and keeps the texture dreamy.
Freezing
Coconut Milk Ice Cream keeps well in the freezer for up to two weeks. The longer it sits, the firmer it gets, so remember to let it rest at room temperature for a few minutes before scooping. For best flavor and texture, try to enjoy it within the first week when it’s at peak creaminess.
Reheating
No need to reheat here! Simply let the container sit out on your counter for five to ten minutes to soften, making it easy to scoop. If you find it’s still too solid, don’t microwave—just give it a bit more time and let nature do its work!
FAQs
Can I make Coconut Milk Ice Cream without an ice cream maker?
Absolutely! Simply pour the chilled mixture into a shallow dish, freeze, and stir every 30 minutes until smooth and creamy—usually about two to three hours total. While the texture may be a touch less silky, it’s still incredibly satisfying.
Will light coconut milk work instead of full-fat?
For the richest, creamiest Coconut Milk Ice Cream, full-fat coconut milk is definitely the way to go. Light coconut milk can produce an icier, less luscious texture, but if you prefer something lighter, it will still freeze and taste delicious—just expect a little extra firmness and a less dreamy mouthfeel.
How can I make the flavor even more coconut-forward?
If you can’t get enough coconut, try adding a tablespoon of coconut cream to the base or swirling in some toasted coconut flakes at the end of churning. Both tricks really amp up those tropical vibes and make each spoonful positively luxurious.
Is this ice cream suitable for keto or paleo diets?
Coconut Milk Ice Cream is already a wonderful option for dairy-free and vegan diets. For keto or paleo needs, swap the sweetener for a compatible choice like monk fruit or stevia—just keep in mind this might slightly change the ice cream’s texture.
What are the best mix-ins for customizing this recipe?
The sky’s the limit! Classic choices like chocolate chips and shredded coconut are always winners, but fresh fruit swirls (like mango or raspberry), chopped nuts, or even cookie crumbs can all create your signature Coconut Milk Ice Cream flavor.
Final Thoughts
Scooping into a bowl of homemade Coconut Milk Ice Cream is the kind of joyful ritual everyone deserves to experience. Whether you’re looking for a refreshing vegan treat or simply trying to beat the summer heat, this recipe brings pure coconut joy to every spoonful. Give it a try—you’ll be amazed at how effortless (and irresistible) homemade ice cream can be!
Print
Coconut Milk Ice Cream Recipe
- Total Time: 2 hours 10 minutes (plus freezing)
- Yield: 6 servings 1x
- Diet: Vegan
Description
Indulge in the creamy goodness of homemade Coconut Milk Ice Cream – a luscious vegan and dairy-free treat that’s perfect for hot summer days. This recipe is simple to make and is customizable with your favorite mix-ins for a delightful dessert experience.
Ingredients
Main Ingredients:
- 2 (13.5 oz) cans full-fat coconut milk
- 1/2 cup maple syrup or agave nectar
- 1 tablespoon vanilla extract
- pinch of salt
Optional Mix-ins:
- 1/2 cup shredded coconut
- chocolate chips
- fruit swirls
Instructions
- Blend the Ingredients: In a blender or mixing bowl, combine the coconut milk, maple syrup, vanilla extract, and salt. Blend or whisk until smooth.
- Chill the Mixture: Refrigerate the mixture for at least 2 hours until cold.
- Churn the Ice Cream: Pour the chilled mixture into an ice cream maker and churn according to the manufacturer’s instructions, about 20–25 minutes, until thick and creamy.
- Add Mix-ins: Incorporate any desired mix-ins during the last few minutes of churning.
- Freeze the Ice Cream: Transfer the churned mixture to a freezer-safe container and freeze for 2–4 hours for a firmer texture.
- Serve: Allow the ice cream to sit at room temperature for a few minutes before scooping and enjoying.
Notes
- If you lack an ice cream maker, freeze the mixture in a shallow dish, stirring every 30 minutes until smooth and frozen (about 2–3 hours).
- For enhanced richness, consider adding a tablespoon of coconut cream to the mixture.
- Prep Time: 10 minutes
- Cook Time: 0 minutes
- Category: Dessert
- Method: Freezing
- Cuisine: American
Nutrition
- Serving Size: 1/2 cup
- Calories: 200
- Sugar: 10g
- Sodium: 30mg
- Fat: 17g
- Saturated Fat: 15g
- Unsaturated Fat: 2g
- Trans Fat: 0g
- Carbohydrates: 14g
- Fiber: 1g
- Protein: 1g
- Cholesterol: 0mg

