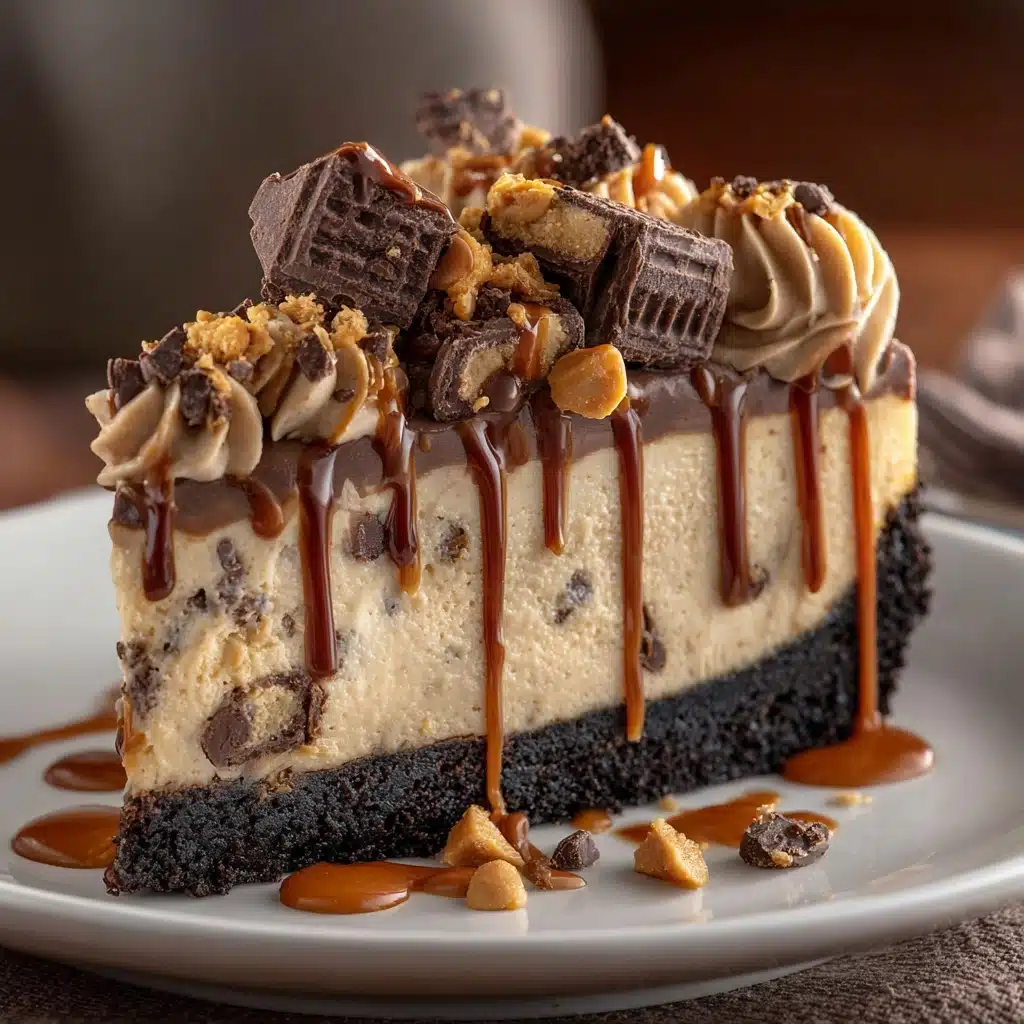
Butterfinger Cheesecake Recipe
If you’re searching for a show-stopping dessert that combines creamy cheesecake with irresistible candy bar crunch, you’ll fall head-over-heels for this Butterfinger Cheesecake Recipe. Each slice starts with a crisp chocolate cookie crust, followed by a silky smooth layer of cheesecake studded with bits of Butterfinger, and finishes with a glossy chocolate ganache. It’s equal parts comfort food and conversation starter—the treat everyone reaches for at parties or simply as a reward after a long day. If you love decadent, nostalgic flavors, this Butterfinger Cheesecake Recipe will quickly become a cherished favorite in your kitchen.
Ingredients You’ll Need
Assembling this Butterfinger Cheesecake Recipe is a breeze when you gather these high-impact ingredients. Each one brings something special—whether it’s creaminess, crunch, or pure chocolate bliss—to create a harmonious and luscious dessert.
- Chocolate sandwich cookies: These create a decadent, crunchy base that perfectly complements the creamy layers above.
- Unsalted butter: Melted butter binds the crust and adds a touch of richness.
- Cream cheese: The star of any cheesecake, providing a smooth, tangy foundation.
- Granulated sugar: Sweetens the cheesecake layer and balances the tang of the cream cheese.
- Sour cream: Adds extra creaminess and a subtle tang that lifts the flavor.
- Large eggs: These give structure to the cake, ensuring the perfect set without being dry.
- Vanilla extract: Just a splash brings warmth and depth to the filling.
- Butterfinger candy bars: The signature candy that adds a peanut buttery crunch and sweet caramel notes throughout the cake and on top.
- Heavy cream: The secret to a silky-smooth, pourable ganache topping.
- Semi-sweet chocolate chips: For an irresistibly glossy chocolate layer that crowns the whole cake.
How to Make Butterfinger Cheesecake Recipe
Step 1: Prepare the Pan and Crust
Start by preheating your oven to 325°F and covering the bottom of a 9-inch springform pan with parchment paper. In your food processor, pulse the chocolate sandwich cookies until they turn into fine, sandy crumbs. Mix these crumbs with your melted butter, then firmly press the mixture into the bottom of the pan to form a rich chocolate crust. Bake for 10 minutes, then set aside to cool while you move on to the creamy filling.
Step 2: Make the Creamy Cheesecake Filling
In a large bowl, beat your softened cream cheese until it’s velvety-smooth and free of lumps. Sprinkle in the sugar and beat the mixture until light, creamy, and deliciously fluffy. Next, blend in the sour cream and vanilla extract, and mix until everything’s fully combined. Now, add the eggs one at a time, gently mixing just until incorporated—taking care not to overmix. Gently fold in 1 cup of the chopped Butterfinger pieces for that perfect candy crunch in every bite.
Step 3: Bake the Cheesecake
Pour your cheesecake batter over the cooled crust, smoothing the top for an even surface. Bake for 50 to 60 minutes, or until the center is set but still slightly jiggly when you nudge the pan. Once your baking time is up, turn off the oven and let your cheesecake rest inside with the door ajar for one hour—this helps prevent cracks and keeps that creamy texture. Afterward, place the cheesecake in the refrigerator for at least four hours, or preferably overnight to set and chill completely.
Step 4: Prepare the Ganache Topping
For the finishing touch, gently heat your heavy cream in a small saucepan until it just begins to simmer. Pour the hot cream over the chocolate chips and let stand for a minute, then stir until the chocolate is fully melted and the ganache is glossy. Pour it over your chilled cheesecake, spreading it evenly to the edges.
Step 5: Decorate and Chill
Finish off your Butterfinger Cheesecake Recipe by sprinkling the remaining chopped Butterfinger bits over the top of the ganache. Pop the cheesecake back in the fridge for an additional 30 minutes so the topping sets perfectly. Once chilled, you’re ready to slice, serve, and savor every creamy, crunchy bite.
How to Serve Butterfinger Cheesecake Recipe

Garnishes
This cheesecake is a dream canvas for creative garnishes! A little extra whipped cream piped around the edges looks gorgeous and offers a light contrast to the rich cake. For added flair, drizzle with a bit of caramel sauce or scatter more chopped Butterfinger bars over individual slices right before serving. If you want to go all out, top each slice with a tiny square of a Butterfinger bar for a show-stopping finish!
Side Dishes
Pairing this Butterfinger Cheesecake Recipe with the right sides will make dessert even more memorable. Light, fresh berries help offset the sweetness and add a splash of color, while a scoop of vanilla or coffee ice cream turns each slice into a true celebration. For something fun and fizzy, a sparkling espresso or a chilled glass of dessert wine works wonders alongside the rich flavors.
Creative Ways to Present
While a classic wedge on a pretty plate is always a hit, you can have fun with presentation! Try cutting the cheesecake into bite-sized bars for a dessert buffet, or serve mini cheesecakes in individual ramekins. For parties, layer cubes of cheesecake in clear glasses with whipped cream and crushed Butterfingers for a playful parfait version. The possibilities are endless, so let your imagination run wild!
Make Ahead and Storage
Storing Leftovers
To store leftover Butterfinger Cheesecake Recipe, cover the pan tightly with plastic wrap or transfer slices to an airtight container. Keep refrigerated and enjoy within 4 to 5 days for best taste and texture. The flavors tend to deepen and meld as it sits, making each day-old slice just as luscious as the first!
Freezing
This cheesecake freezes beautifully! Wrap individual slices with plastic wrap and foil, or freeze the whole cake before you add the ganache topping. When you’re ready to serve, thaw overnight in the fridge, then add your chocolate and Butterfinger garnish for a dessert as impressive as if you’d just baked it fresh.
Reheating
Since cheesecake is best enjoyed chilled, you won’t need to reheat your Butterfinger Cheesecake Recipe. If you’d like your slice a bit softer, just let it sit at room temperature for 10 to 15 minutes before serving. This brings out the flavors and makes the texture extra creamy.
FAQs
Can I use a different type Dessert
Absolutely! While chocolate sandwich cookies give that signature flavor, a graham cracker crust or even chocolate wafer cookies work well. You can customize the base to suit your taste or use whatever you have on hand.
How do I prevent my cheesecake from cracking?
To minimize cracks, avoid overmixing the batter once you add the eggs and let the cheesecake cool gradually in the oven after baking. Using a water bath can further help, but it’s not essential for this Butterfinger Cheesecake Recipe.
Can I make this recipe gluten-free?
Yes! Swap the chocolate sandwich cookies for a gluten-free version and confirm your Butterfinger bars are gluten-free (always check product labels, as formulas can change). All other ingredients are naturally gluten-free.
What’s the best way to slice clean pieces?
Dip your knife in hot water, wipe it dry, and cut each slice with a clean, warm blade. Repeat the dip and wipe between each slice for neat, professional-looking results that will wow your guests.
Do I have to use ganache and Butterfinger topping?
The chocolate ganache and extra Butterfinger bits really make this Butterfinger Cheesecake Recipe shine, but you can skip them if you prefer something lighter or simpler. The cheesecake itself is delicious either way, and you can always top with whipped cream or fruit instead.
Final Thoughts
This Butterfinger Cheesecake Recipe is pure joy for anyone who loves a decadent dessert with a playful twist. Whether you’re baking for a special celebration or just because, one bite of this rich, candy-studded cheesecake will have friends and family begging for seconds. Dive in, get creative, and enjoy every luscious forkful—you deserve it!
Print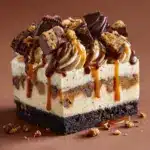
Butterfinger Cheesecake Recipe
- Total Time: 6 hours (including chilling)
- Yield: 12 slices 1x
- Diet: Vegetarian
Description
Indulge in the decadent delight of this Butterfinger Cheesecake Recipe. Creamy cheesecake with a chocolate cookie crust, topped with a luscious chocolate ganache and crunchy Butterfinger candy pieces. A heavenly treat for any occasion!
Ingredients
- 20 chocolate sandwich cookies (like Oreos)
- 4 tablespoons unsalted butter, melted
- 3 (8-ounce) packages cream cheese, softened
- 1 cup granulated sugar
- 1/2 cup sour cream
- 3 large eggs
- 1 teaspoon vanilla extract
- 1 1/2 cups chopped Butterfinger candy bars, divided
- 1/4 cup heavy cream
- 1/2 cup semi-sweet chocolate chips
For the Crust:
For the Cheesecake:
For the Ganache Topping:
Instructions
- Preheat and Prepare: Preheat oven to 325°F. Line a 9-inch springform pan with parchment paper.
- Make the Crust: Pulse chocolate cookies in a food processor, mix with melted butter, press into pan, and bake for 10 minutes.
- Prepare Cheesecake Filling: Beat cream cheese, add sugar, sour cream, vanilla, eggs, and fold in 1 cup of Butterfinger pieces.
- Bake: Pour batter over crust, bake for 50–60 minutes, then let cool in the oven.
- Chill: Refrigerate for at least 4 hours or overnight.
- Make Ganache: Heat cream, add chocolate chips, stir until smooth, pour over cheesecake, and sprinkle with remaining Butterfinger pieces.
- Final Chill: Chill for 30 minutes, slice, and serve.
Notes
- For easier slicing, dip the knife in hot water and wipe clean between cuts.
- You can use a graham cracker or chocolate cookie base for the crust.
- Prep Time: 25 minutes
- Cook Time: 60 minutes
- Category: Dessert
- Method: Baking
- Cuisine: American
Nutrition
- Serving Size: 1 slice
- Calories: 510
- Sugar: 36 g
- Sodium: 320 mg
- Fat: 34 g
- Saturated Fat: 20 g
- Unsaturated Fat: 12 g
- Trans Fat: 0 g
- Carbohydrates: 45 g
- Fiber: 1 g
- Protein: 7 g
- Cholesterol: 115 mg


