Northern Lights Candy Glow Recipe
If you’re looking to capture the shimmering, magical spirit of the aurora borealis in a homemade treat, Northern Lights Candy Glow is the show-stopping sweet you’ve been waiting for. This recipe transforms simple pantry staples into a dazzling array of neon, marbled hard candies swirled with color and sparkle. Each piece is a crunchy, jewel-toned shard that tastes as enchanting as it looks—a perfect centerpiece for parties, gifts, or any occasion that calls for a burst of edible joy.
Ingredients You’ll Need
What makes Northern Lights Candy Glow so wonderful is how a handful of humble ingredients come together for a jaw-dropping effect. Every element here has a role to play, from the glossy finish to the crackling snap and, of course, that luminous color burst.
- Granulated sugar: The base of your candy, responsible for that classic, glassy crunch and sweet flavor.
- Light corn syrup: Prevents crystallization and keeps the texture smooth and shiny—don’t skip it!
- Water: Dissolves the sugar and helps cook everything evenly; swap for tonic water if you want a glow under blacklight.
- Cream of tartar: Adds a hint of acidity to stabilize the syrup and ensure a perfect snap.
- Flavoring extract: Choose your favorite—raspberry, peppermint, or citrus make the colors pop with flavor.
- Assorted neon food coloring (blue, purple, green, pink): The secret to that iconic aurora effect; use safe, vibrant gels for best results.
- Edible luster dust or glow dust (optional): Adds a magical, shimmery finish that catches the light beautifully.
- Edible glitter (optional): For extra sparkle and a little bit of whimsy in every bite.
- Candy thermometer: Precision is key for the perfect crack—don’t eyeball it!
- Parchment paper or silicone mat: Keeps the candy from sticking and makes cleanup a breeze.
How to Make Northern Lights Candy Glow
Step 1: Prep Your Workspace
Before you even start melting sugar, line a baking sheet with parchment paper or a silicone mat and set it aside. Have your food colorings, edible dusts, and flavorings ready to go. This candy hardens fast, so setting up in advance ensures you can swirl those colors without missing a beat.
Step 2: Cook the Candy Base
Combine the granulated sugar, corn syrup, water, and cream of tartar in a heavy-bottomed saucepan. Stir gently over medium heat just until the sugar dissolves. Once you see a clear syrup, attach your candy thermometer to the pan and stop stirring. Let the mixture bubble away until it reaches 300°F (the hard crack stage)—this is what gives Northern Lights Candy Glow its signature snap.
Step 3: Add Flavor and Divide
As soon as your syrup hits 300°F, pull the pan off the heat right away. Stir in your chosen flavoring extract, mixing quickly but carefully. Divide the hot candy syrup into several heatproof bowls—one for each color you want to use. This step is your chance to get creative with the palette!
Step 4: Tint and Swirl
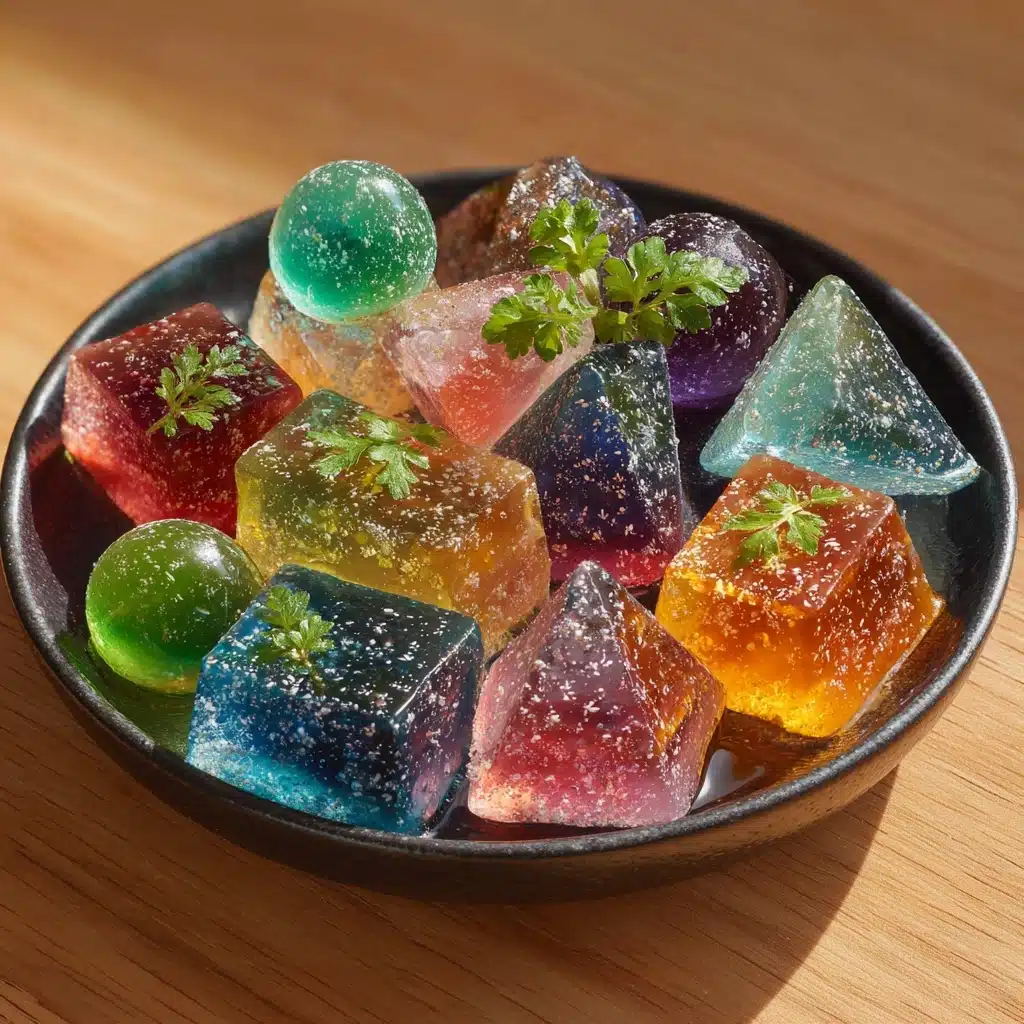
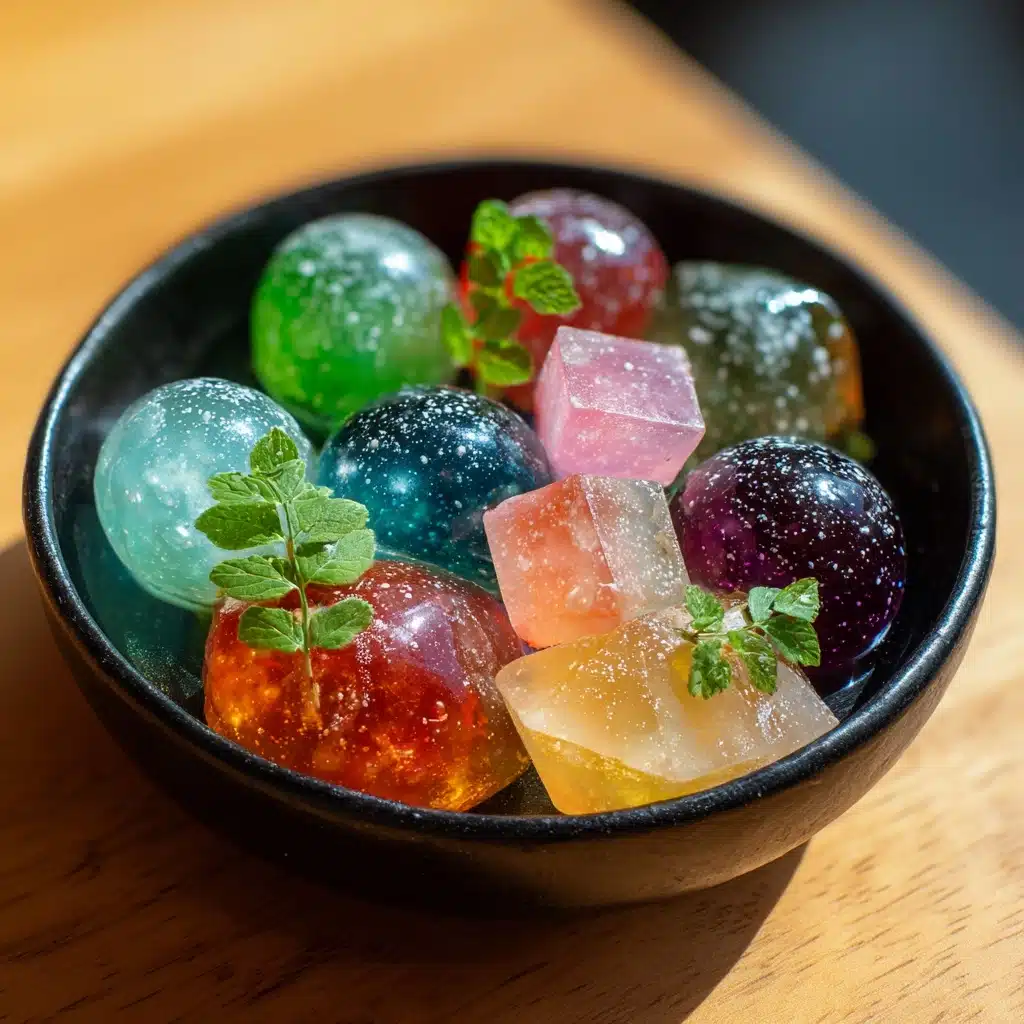
Add a few drops of neon food coloring to each bowl, stirring just until blended. Now, working quickly, spoon dollops of each colored syrup onto the prepared baking sheet. Use a skewer or toothpick to swirl the colors together, creating those mesmerizing, marbled patterns that make Northern Lights Candy Glow so memorable.
Step 5: Add Sparkle and Cool
While the candy is still warm and glossy, dust it lightly with edible luster dust or edible glitter if you want that extra twinkle. Let the candy cool and harden completely at room temperature—no fridge needed. Once set, break it into shimmering shards or pour into lollipop molds for a different twist.
How to Serve Northern Lights Candy Glow
Garnishes
For an unforgettable presentation, sprinkle on extra edible glitter or a touch of luster dust just before serving. These finishing touches catch the light and enhance the magical, glowing effect of Northern Lights Candy Glow, making each shard look like a piece of the aurora itself.
Side Dishes
Pair these candies with something creamy and subtle to balance the intense sweetness—a scoop of vanilla ice cream or a dollop of whipped cream works wonders. If you’re serving them at a party, arrange them alongside fresh berries or citrus segments for a pop of freshness.
Creative Ways to Present
There are so many fun ways to show off your Northern Lights Candy Glow creations! Try packaging shards in clear cellophane bags tied with ribbon for whimsical party favors. Or, display them on a platter with fairy lights underneath for an eye-catching dessert table centerpiece. You can even use them as edible toppers for cakes, cupcakes, or cocktails for a truly dazzling effect.
Make Ahead and Storage
Storing Leftovers
To keep your Northern Lights Candy Glow crisp and vibrant, store any leftovers in an airtight container at room temperature. Humidity is the enemy of hard candy, so keep the lid tightly closed and avoid the fridge, which can cause the candy to become sticky.
Freezing
While freezing isn’t recommended for hard candy like Northern Lights Candy Glow, as moisture can cause it to lose its glossy finish, you can store it for several weeks at room temperature. If you must freeze it, wrap tightly in plastic wrap and a zip-top bag, and allow to come to room temp before unwrapping.
Reheating
Once set, Northern Lights Candy Glow can’t really be reheated—its magic is in the initial pour and swirl. However, if you want to repurpose any shards, you can gently crush them and use as a colorful topping for desserts, or melt them down to make new shapes in candy molds.
FAQs
Can I make Northern Lights Candy Glow without a candy thermometer?
While it’s possible to judge the “hard crack” stage by dropping a bit of syrup into cold water and seeing if it snaps, a candy thermometer is the best way to guarantee perfect results and avoid burning.
What’s the best way to get those vibrant, glowing colors?
Use highly concentrated neon gel food colorings for the most vivid colors. For a blacklight glow, swap water for tonic water and use fluorescent-safe food dyes.
How do I avoid sticky or cloudy candy?
Make sure your candy reaches the full 300°F, and store finished pieces in a completely airtight container. Humidity and undercooking are the main culprits behind sticky candy.
Can I add different flavors to each color?
Absolutely! Divide your syrup and use a different extract in each bowl for a multi-flavored batch of Northern Lights Candy Glow. Just work quickly so the syrup doesn’t set before you’re ready to swirl.
Is Northern Lights Candy Glow gluten free?
Yes, this recipe is naturally gluten-free as long as you use gluten-free flavorings and colorings. Always check the labels if you’re cooking for someone with allergies.
Final Thoughts
There’s something truly enchanting about watching Northern Lights Candy Glow come together—the colors, the sparkle, the delicious snap. It’s a treat that’s as fun to make as it is to eat, perfect for sharing with friends or bringing a touch of magic to any celebration. If you’ve never made homemade hard candy before, this recipe is the perfect place to start. Give Northern Lights Candy Glow a try, and let your kitchen light up with edible wonder!
Print
Northern Lights Candy Glow Recipe
- Total Time: 25 minutes
- Yield: 12–16 candy pieces 1x
- Diet: Vegetarian
Description
Northern Lights Candy Glow is a vibrant and visually stunning homemade hard candy recipe that mimics the mesmerizing colors of the aurora borealis. This recipe combines classic candy ingredients with neon food colorings and optional edible glitter to create glowing, swirling sweets perfect for parties or festive treats. Simple to make on the stovetop, these candies harden to a crisp texture and can be enjoyed as shards or molded lollipops.
Ingredients
Main Ingredients
- 1 cup granulated sugar
- 1/3 cup light corn syrup
- 1/4 cup water
- 1/4 teaspoon cream of tartar
- 1/4 teaspoon flavoring extract (choose raspberry, peppermint, or citrus)
Color & Decoration
- Assorted neon food coloring (blue, purple, green, pink)
- Edible luster dust or glow dust (optional)
- Edible glitter (optional)
Tools
- Candy thermometer
- Parchment paper or silicone mat
Instructions
- Prepare the workspace: Line a baking sheet with parchment paper or a silicone mat to prevent sticking and set it aside for cooling the candy.
- Combine ingredients: In a medium heavy-bottomed saucepan, mix the granulated sugar, light corn syrup, water, and cream of tartar. Stir constantly over medium heat until the sugar fully dissolves, ensuring the mixture is smooth before heating further.
- Cook to hard crack stage: Attach a candy thermometer to the saucepan side and continue heating without stirring until the syrup reaches 300°F (hard crack stage). This temperature ensures the candy will be hard and brittle once cooled.
- Remove and flavor: Immediately take the pan off the heat to prevent burning, and stir in your chosen flavoring extract thoroughly.
- Divide and color: Carefully pour the hot candy syrup into separate heatproof bowls, tinting each portion with a different neon food coloring to resemble the northern lights colors—blue, purple, green, and pink.
- Create the swirl effect: Quickly spoon small amounts of each colored candy onto the prepared baking sheet. Use a skewer or toothpick to gently swirl the colors together, forming a beautiful marbled and glowing pattern while the candy is still molten.
- Optional decoration: While the candy is still warm, dust lightly with edible glitter or luster dust to enhance the magical glowing effect.
- Cool and harden: Let the candy sit at room temperature until it cools and hardens completely, about 15-20 minutes depending on thickness.
- Serve or store: Once set, break the candy into shards for serving or pour into molds to form lollipops. Store any extras in an airtight container to maintain crispness.
Notes
- Work quickly after adding food coloring, as the syrup hardens very fast and becomes difficult to swirl.
- For a glowing effect under blacklight, substitute the water with tonic water and use food colors that fluoresce safely.
- Store finished candy in an airtight container to keep it crisp and prevent moisture absorption.
- Use caution handling hot syrup to avoid burns.
- Prep Time: 10 minutes
- Cook Time: 15 minutes
- Category: Dessert
- Method: Stovetop
- Cuisine: American
Nutrition
- Serving Size: 1 piece
- Calories: 60
- Sugar: 14g
- Sodium: 5mg
- Fat: 0g
- Saturated Fat: 0g
- Unsaturated Fat: 0g
- Trans Fat: 0g
- Carbohydrates: 15g
- Fiber: 0g
- Protein: 0g
- Cholesterol: 0mg


