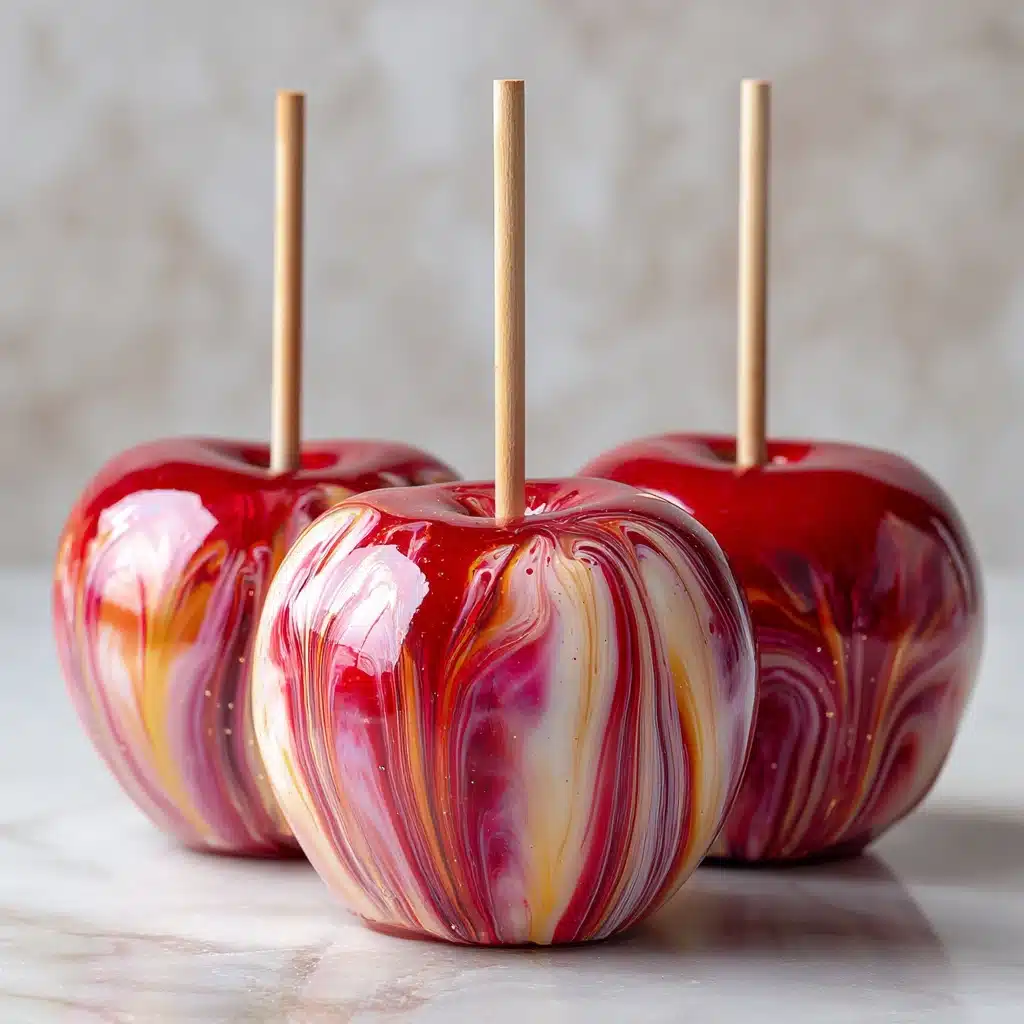
Marbled Effect Candy Apples Recipe
If you’re ready to truly wow your friends and family, Marbled Effect Candy Apples are the way to do it. These eye-catching treats combine crisp, tart apples with a shatteringly sweet shell that features swirling, vivid colors. They look like something out of a magical fair, but the real magic is how simple they are to make at home. Whether you’re planning a festive gathering or just want to add a splash of fun to your dessert table, these marbled candy apples will deliver both the flavor and the “wow” factor every time.
Ingredients You’ll Need
-
Apples:
- 6 small apples (washed and dried)
Candy Coating:
- 2 cups granulated sugar
- 1/2 cup light corn syrup
- 1/2 cup water
- 1/2 teaspoon vanilla extract
- Gel food coloring (choose 2–3 colors for marbling)
Other:
- 6 wooden sticks or lollipop sticks
- Candy thermometer
- Nonstick spray or parchment paper
How to Make Marbled Effect Candy Apples
Step 1: Prep the Apples and Tools
Begin by thoroughly washing and drying your apples—this helps the candy coating stick better. Twist off the stems and push a wooden stick or lollipop stick deep into the top of each apple. Arrange the apples on a baking sheet lined with parchment paper or lightly coated with nonstick spray, making cleanup a breeze.
Step 2: Make the Candy Syrup
In a medium saucepan, combine the granulated sugar, light corn syrup, and water. Set the pan over medium-high heat and stir gently until the sugar fully dissolves. As soon as your mixture looks clear and smooth, stop stirring—this step wards off sugar crystals that can make the syrup gritty.
Step 3: Cook to the Hard Crack Stage
Attach your candy thermometer to the side of the pan and bring the syrup to a rolling boil. Let the mixture cook undisturbed until it reaches 300°F, the “hard crack” stage, which usually takes 15 to 20 minutes. Patience here is key: resist the urge to stir or shake the pan, and keep an eye on that thermometer for candy perfection.
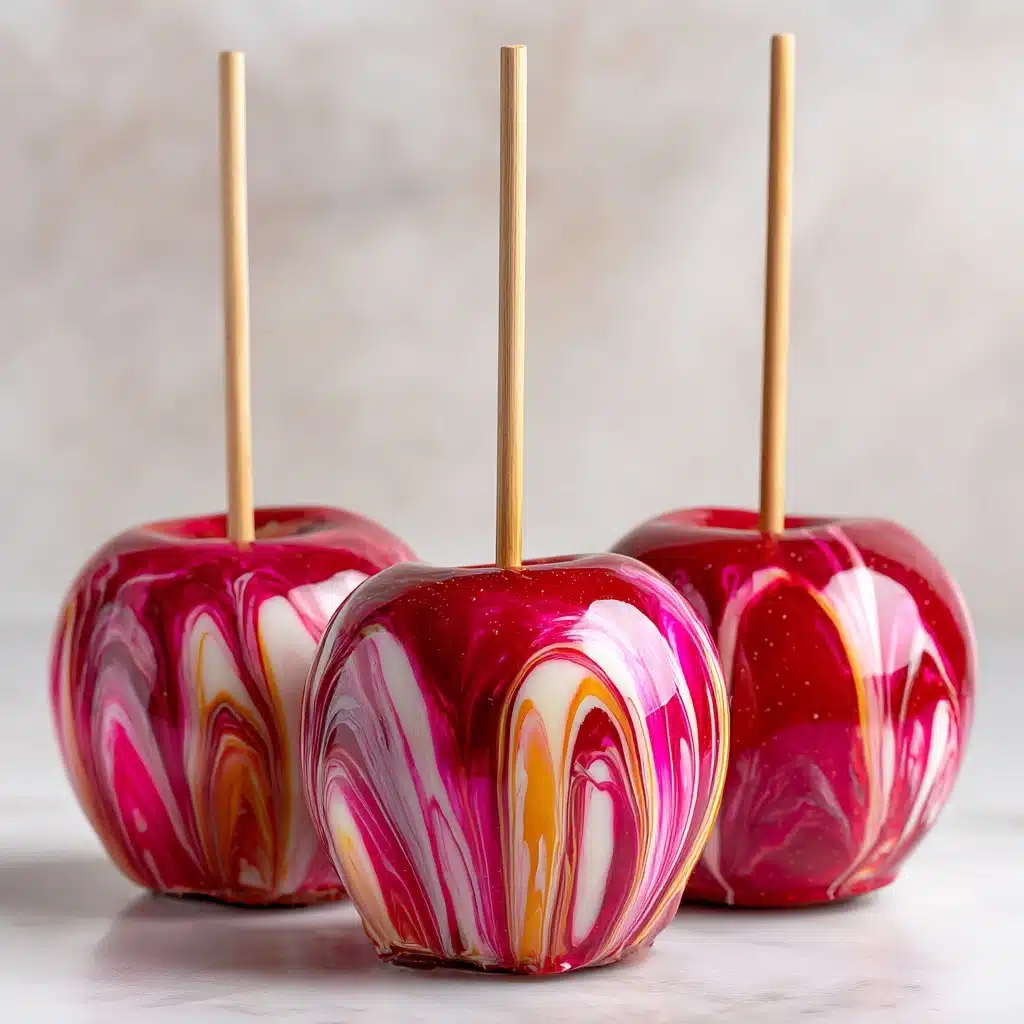
Step 4: Create the Marbled Effect
Remove the saucepan from the heat, then quickly stir in the vanilla extract. Now comes the fun part: dot the surface with your chosen gel food colorings. Use a skewer or toothpick to swirl the drops together, forming colorful ribbons. Swirl gently—less is more—to keep those vibrant veins intact for true Marbled Effect Candy Apples.
Step 5: Dip the Apples
Working quickly (the candy will begin to set fast!), tilt the pan slightly and dip each apple, turning it slowly to coat it evenly in the marbled candy. Let the excess drip off, then set the apple back onto your prepared baking sheet. Repeat with the remaining apples, marveling at how each one is completely unique.
Step 6: Let Cool and Set
Let your Marbled Effect Candy Apples cool completely at room temperature until the coating is hard and crisp. Then, they’re ready to be devoured and admired—no extra steps needed!
How to Serve Marbled Effect Candy Apples
Garnishes
Go for even more flair by adding edible glitter, sprinkles, or a dusting of powdered sugar while the candy is still a bit tacky. Strategic wrapping with cellophane and a ribbon at the base makes them look truly festive and is perfect for gifting. Decorative sticks or fun food-safe tags can give each apple its own personality!
Side Dishes
These apples shine on their own, but pairing them with a platter of sharp cheddar cheese, spiced nuts, or even a warm caramel dip lets everyone mix and match flavors for a whimsical snack experience. For a party, try serving them alongside popcorn or a seasonal punch to keep the fairground vibe going strong.
Creative Ways to Present
For a dazzling dessert table, display the apples upright on a platter lined with shimmering sugar or edible confetti. Individual cupcake wrappers or mini treat boxes make it easy to hand them out to guests. You can also tie a small note to each stick with a message, turning your Marbled Effect Candy Apples into edible party favors or place cards.
Make Ahead and Storage
Storing Leftovers
If you have extras (and that’s a big “if”), keep your Marbled Effect Candy Apples in a cool, dry place—never in the refrigerator, which can make the candy sweat and stick. Place them in a single layer on parchment paper, loosely covered, and enjoy within two days for best results.
Freezing
Freezing these candy apples isn’t recommended. The crisp candy shell doesn’t fare well against moisture from thawing and will likely become sticky or crack. It’s best to whip up just what you’ll eat in a couple days for maximum crunch and flavor.
Reheating
Reheating is not necessary and isn’t advised for Marbled Effect Candy Apples, since the candy coating can melt or lose its texture. If your apples have gotten a bit sticky, just let them sit in a cool, dry space for an hour to firm back up before serving.
FAQs
Why did my candy coating turn dull or grainy?
This often happens if the sugar wasn’t fully dissolved at the start or if the mixture was stirred after boiling began. Stick to the process: dissolve completely before boiling, don’t stir once it bubbles, and you’ll get shiny, glass-like finishes every time for your Marbled Effect Candy Apples.
What are the best apples to use?
Smaller apples with a tart snap, like Granny Smith or Gala, are perfect for candy apples. Firm apples that aren’t overly sweet help balance the sugar rush of the candy shell and give a satisfying bite.
How can I make the marbled design brighter?
Use high-quality gel food coloring—never liquid, as liquid will dilute the syrup and make the colors less vibrant. Swirl the colors just enough for defined ribbons, and don’t overmix for the most dramatic marbled effect.
Can I make Marbled Effect Candy Apples on a humid day?
It’s best to avoid making candy apples when it’s very humid, as the candy shell attracts moisture and becomes sticky. If you must make them, use a dehumidifier or cool, air-conditioned space while letting them set.
What should I do if the candy hardens before I finish dipping?
If the candy coating sets in your pan, you can gently re-warm it over low heat just until it becomes liquid again—be careful not to scorch it. Work quickly once it’s ready, as the marbled effect works best when the syrup is fluid and hot.
Final Thoughts
Creating Marbled Effect Candy Apples is not just a baking project—it’s a fun, colorful adventure that delivers a showstopping treat every time. Whether you make them for a party, a family night, or just because, these apples are guaranteed to bring smiles and spark conversation. Give them a try and let your creativity shine as bright as your marbled swirls!
Print
Marbled Effect Candy Apples Recipe
- Total Time: 30 minutes
- Yield: 6 candy apples 1x
- Diet: Vegetarian
Description
Learn how to make stunning Marbled Effect Candy Apples with this easy recipe. These colorful treats are perfect for Halloween or any festive occasion.
Ingredients
Apples:
- 6 small apples (washed and dried)
Candy Coating:
- 2 cups granulated sugar
- 1/2 cup light corn syrup
- 1/2 cup water
- 1/2 teaspoon vanilla extract
- Gel food coloring (choose 2–3 colors for marbling)
Other:
- 6 wooden sticks or lollipop sticks
- Candy thermometer
- Nonstick spray or parchment paper
Instructions
- Prepare Apples: Insert a wooden stick into the top of each apple and set them on a parchment-lined baking sheet.
- Make Candy Coating: In a medium saucepan over medium-high heat, combine the sugar, corn syrup, and water. Stir until the sugar dissolves, then stop stirring and bring to a boil.
- Cook the Candy: Attach a candy thermometer and let the mixture cook undisturbed until it reaches 300°F (hard crack stage), about 15–20 minutes. Remove from heat and stir in vanilla extract.
- Add Color and Marble: Carefully add drops of different gel food coloring and swirl gently. Working quickly, dip each apple, swirling it to coat evenly with the marbled candy.
- Set and Serve: Let excess drip off, then place on the prepared baking sheet to set. Let cool completely at room temperature before serving.
Notes
- Use gel food coloring for vibrant, swirlable color without watering down the syrup.
- Avoid humidity, as it can make the candy coating sticky.
- Store finished apples in a cool, dry place for up to 2 days.
- Prep Time: 10 minutes
- Cook Time: 20 minutes
- Category: Dessert
- Method: Stovetop
- Cuisine: American
Nutrition
- Serving Size: 1 apple
- Calories: 220
- Sugar: 44g
- Sodium: 5mg
- Fat: 0g
- Saturated Fat: 0g
- Unsaturated Fat: 0g
- Trans Fat: 0g
- Carbohydrates: 56g
- Fiber: 2g
- Protein: 0g
- Cholesterol: 0mg


