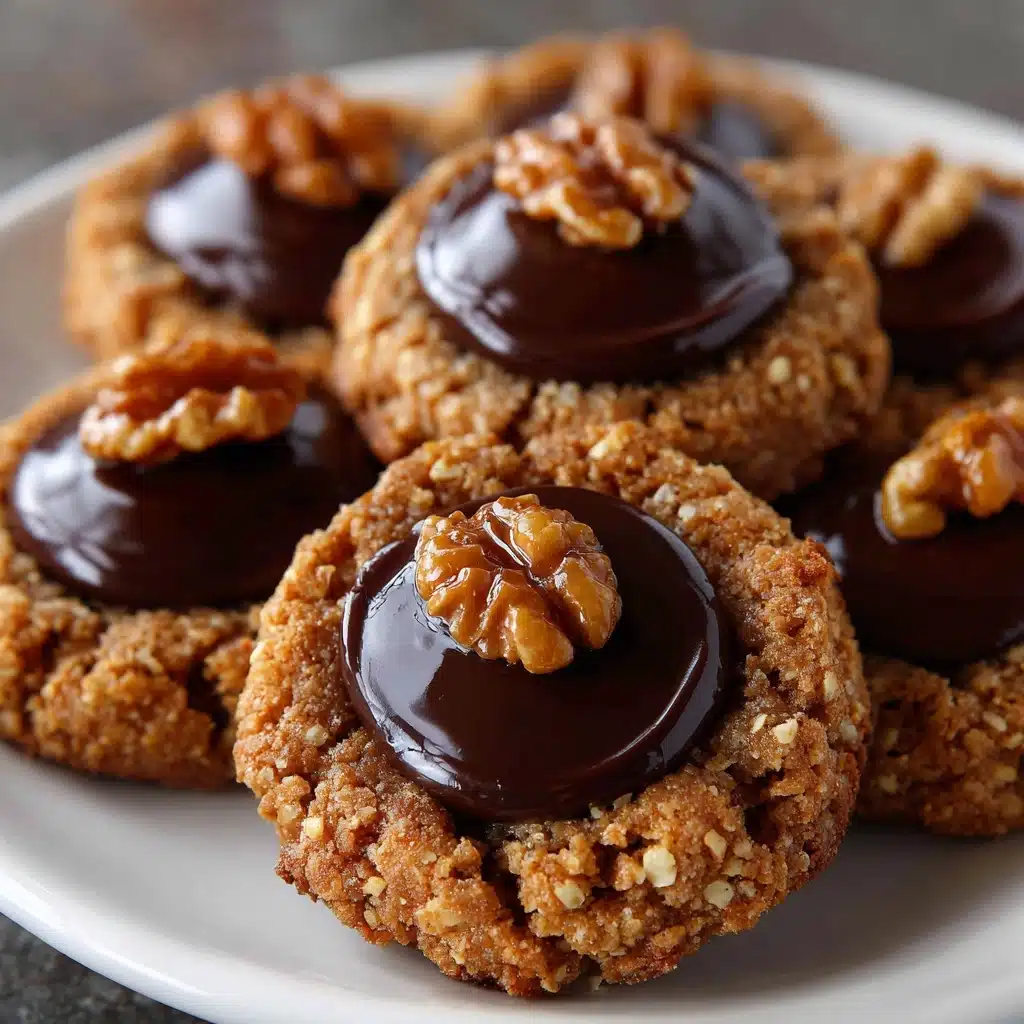
Chocolate Hazelnut Thumbprint Cookies Recipe
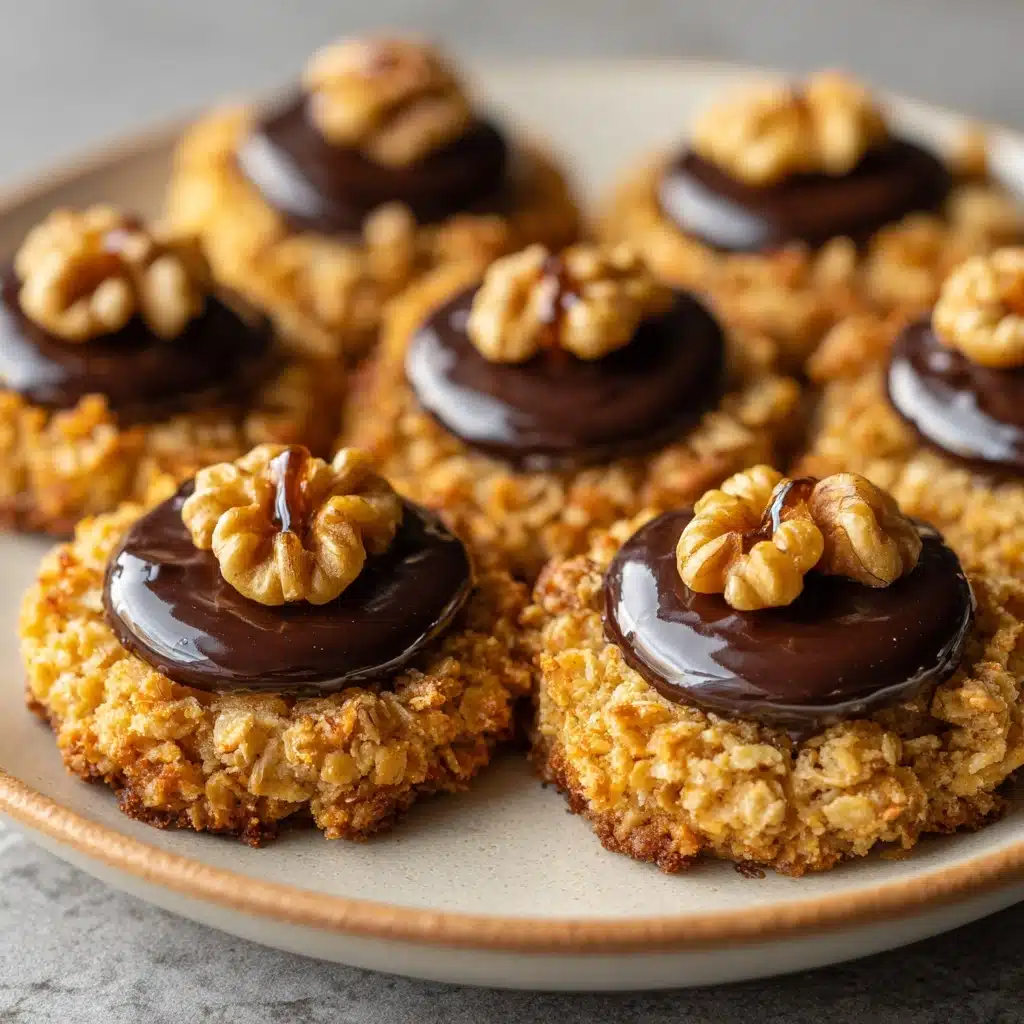
Imagine a cozy winter afternoon, the aroma of toasted hazelnuts mingling with fresh chocolate wafting from the kitchen. That’s the scene every time I bake a batch of Chocolate Hazelnut Thumbprint Cookies. With their buttery cocoa base, crunchy hazelnut coating, and a pool of luscious chocolate-hazelnut spread at the center of each cookie, these treats are a pure delight! Whether you’re sharing at a holiday gathering or sneaking one with your afternoon coffee, they truly bring the “wow” factor with every bite.
Ingredients You’ll Need
Ingredients You’ll Need
The ingredient list for these cookies is refreshingly simple, but each component is essential. Every element offers something special—think melt-in-your-mouth texture from butter, rich color from cocoa, and the irresistible aroma of toasted hazelnuts. Let’s take a closer look at what you’ll need to make these unforgettable Chocolate Hazelnut Thumbprint Cookies.
- All-purpose flour: The foundation for our delicate, melt-in-your-mouth cookie base.
- Unsweetened cocoa powder: Adds deep chocolate flavor and that rich, dark color.
- Salt: Just a pinch to balance sweetness and enhance every flavor.
- Unsalted butter, softened: Vital for tender cookies with a hint of creamy richness; make sure it’s at room temperature for best results.
- Granulated sugar: For that perfect touch of sweetness and a nice crumb texture.
- Large egg, separated: The yolk adds richness to the dough, while the white is used to help hazelnuts stick.
- Milk: Brings the dough together and ensures every bite is soft and moist.
- Vanilla extract: A dash for extra warmth and depth—it makes the chocolate pop!
- Finely chopped hazelnuts: These add crunch, flavor, and a nutty aroma (try toasting for even more impact).
- Chocolate-hazelnut spread (like Nutella): The decadent centerpiece for each thumbprint groove.
How to Make Chocolate Hazelnut Thumbprint Cookies
Step 1: Preheat and Prepare
Start by preheating your oven to 350°F (175°C) and lining a baking sheet with parchment paper. Getting your preparation ready from the get-go streamlines the entire process and prevents any dough from sticking.
Step 2: Mix the Dry Ingredients
In a medium bowl, whisk together the flour, cocoa powder, and salt. Combining the dry elements first ensures your cocoa and salt are evenly distributed for consistently chocolatey cookies with every batch.
Step 3: Cream Butter and Sugar
In a large bowl, beat the softened butter and sugar together until it turns light and fluffy. This crucial step creates air pockets for a delicate cookie texture and sets the foundation for every delicious bite.
Step 4: Add Wet Ingredients
Beat in the egg yolk, milk, and vanilla extract until the mixture is smooth and well combined. The yolk and milk infuse richness and tenderness, while vanilla lifts the whole batch with aromatic warmth.
Step 5: Combine Wet and Dry Mixes
Gradually add your dry flour-cocoa mixture to the wet bowl, mixing just until a soft dough forms. Overmixing can toughen the cookies, so stop as soon as the dough comes together.
Step 6: Prepare the Hazelnut Coating
In a small bowl, lightly beat the egg white. In a separate bowl, place your chopped hazelnuts—if you toasted them, the smell will be irresistible! Both will help your coating stick beautifully.
Step 7: Shape and Coat the Cookies
Scoop out tablespoon-sized portions of dough, roll them into 1-inch balls, then dip each ball in the egg white before rolling in hazelnuts. This layering creates that signature nutty crunch around every cookie.
Step 8: Create the Thumbprint
Arrange the coated balls about 2 inches apart on the prepared baking sheet. Gently press your thumb—or the back of a small spoon—into each ball, forming a neat indentation for the chocolate-hazelnut center.
Step 9: Bake
Pop your tray into the oven and bake for 10 to 12 minutes, or until the cookies are set but still soft. If the wells puff up during baking, simply press them down again gently when fresh from the oven.
Step 10: Cool and Fill
Let the cookies cool completely on a wire rack. Once cooled, pipe or spoon the chocolate-hazelnut spread into the indentations of each cookie. The gooey chocolate center is the best part!
How to Serve Chocolate Hazelnut Thumbprint Cookies
Garnishes
Amp up the presentation of your Chocolate Hazelnut Thumbprint Cookies with a sprinkle of flaky sea salt for a gourmet touch, a light dusting of powdered sugar for snowy charm, or even a drizzle of melted white chocolate across the tops for contrast and extra decadence.
Side Dishes
These cookies pair beautifully with a cup of espresso, a frothy latte, or even a classic glass of cold milk. Add a platter of fresh berries or a bowl of vanilla ice cream on the side for a festive dessert spread that everyone will adore.
Creative Ways to Present
For parties or gifting, stack your Chocolate Hazelnut Thumbprint Cookies in a clear jar tied with ribbon, or arrange them on a tiered cookie platter with other seasonal favorites. For an extra-special touch, wrap each cookie individually in wax paper and tuck them into gift boxes.
Make Ahead and Storage
Storing Leftovers
Once filled, these cookies store wonderfully in an airtight container at room temperature for up to five days. Stack them between parchment layers to keep the chocolate-hazelnut center from smudging or sticking.
Freezing
To freeze, assemble the cookies without the chocolate-hazelnut filling, freeze in a single layer until solid, then transfer to a freezer bag. When you’re ready to serve, thaw and add the chocolate-hazelnut spread for the freshest flavor and texture.
Reheating
If you love a slightly warm, gooey center, you can microwave each cookie for about 10 seconds before serving. Be careful not to overheat or the chocolate center might become runny, but that warm chocolate aroma is absolutely irresistible!
FAQs
Can I use a different nut instead of hazelnuts?
Absolutely! Almonds, pecans, or walnuts are all delicious alternatives and will each bring a unique flavor and texture to the cookies. Just make sure to chop them finely for even coating.
Do I need to toast the hazelnuts?
Toasting is optional but highly recommended. It intensifies the nutty flavor and adds a wonderful aroma. A quick 5-7 minutes in a 350°F oven is all you need before chopping.
Can I make the dough in advance?
Yes, you can prepare the dough, wrap it tightly, and refrigerate for up to two days. Bring it to room temperature before shaping for easy handling and even baking.
Is there a dairy-free version of these cookies?
Absolutely—swap out the butter for a plant-based alternative and use a dairy-free chocolate-hazelnut spread. Milk can be subbed with your favorite non-dairy milk for a deliciously inclusive treat.
How do I keep the cookies from spreading too much?
If your cookies tend to spread, try chilling the coated dough balls for 15 minutes before making the indentation and baking. This helps the butter firm up and gives you that beautiful, defined thumbprint shape.
Final Thoughts
There’s just something magical about homemade Chocolate Hazelnut Thumbprint Cookies. Whether they’re part of your holiday cookie tray or a simple weeknight treat, these cookies bring smiles with every bite. I hope you bake a batch soon and fall in love with their perfect mix of chocolate, hazelnut, and joy!
Print
Chocolate Hazelnut Thumbprint Cookies Recipe
- Total Time: 30-32 minutes
- Yield: 24 cookies 1x
- Diet: Vegetarian
Description
Indulge in these decadent Chocolate Hazelnut Thumbprint Cookies that are perfect for any occasion. These rich, chocolatey cookies with a delightful hazelnut twist will surely impress your family and friends.
Ingredients
Dry Ingredients:
- 1 cup all-purpose flour
- 1/3 cup unsweetened cocoa powder
- 1/4 teaspoon salt
Wet Ingredients:
- 1/2 cup unsalted butter, softened
- 2/3 cup granulated sugar
- 1 large egg, separated
- 2 tablespoons milk
- 1 teaspoon vanilla extract
Additional:
- 1 cup finely chopped hazelnuts
- 3/4 cup chocolate-hazelnut spread (such as Nutella)
Instructions
- Preheat Oven: Preheat oven to 350°F (175°C) and line a baking sheet with parchment paper.
- Prepare Dry Ingredients: In a medium bowl, whisk together flour, cocoa powder, and salt.
- Mix Wet Ingredients: In a large bowl, beat butter and sugar until light and fluffy. Beat in egg yolk, milk, and vanilla until combined.
- Combine and Shape: Gradually add dry ingredients to wet ingredients and mix until a dough forms. Shape dough into 1-inch balls.
- Coat and Bake: Dip dough balls in egg white, then roll in hazelnuts to coat. Place on baking sheet and make an indentation in the center of each. Bake for 10–12 minutes.
- Finish: If indentations puff up, press them down after baking. Cool cookies, then fill each indentation with chocolate-hazelnut spread.
Notes
- For a richer flavor, toast the hazelnuts before chopping.
- You can also fill cookies with dark chocolate ganache or caramel for variety.
- Store in an airtight container at room temperature for up to 5 days.
- Prep Time: 20 minutes
- Cook Time: 10-12 minutes
- Category: Dessert
- Method: Baking
- Cuisine: American
Nutrition
- Serving Size: 1 cookie
- Calories: 130
- Sugar: 9 g
- Sodium: 35 mg
- Fat: 8 g
- Saturated Fat: 4 g
- Unsaturated Fat: 3 g
- Trans Fat: 0 g
- Carbohydrates: 14 g
- Fiber: 1 g
- Protein: 2 g
- Cholesterol: 15 mg


