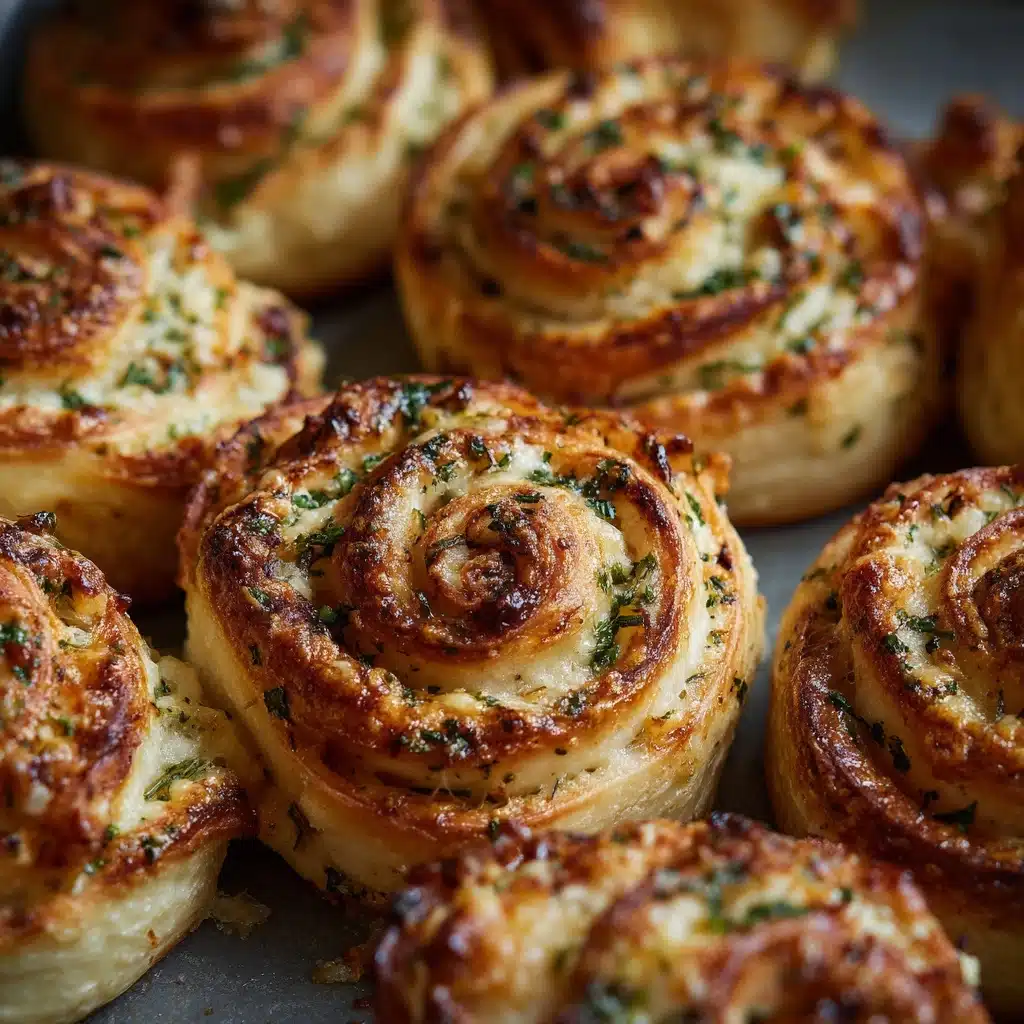
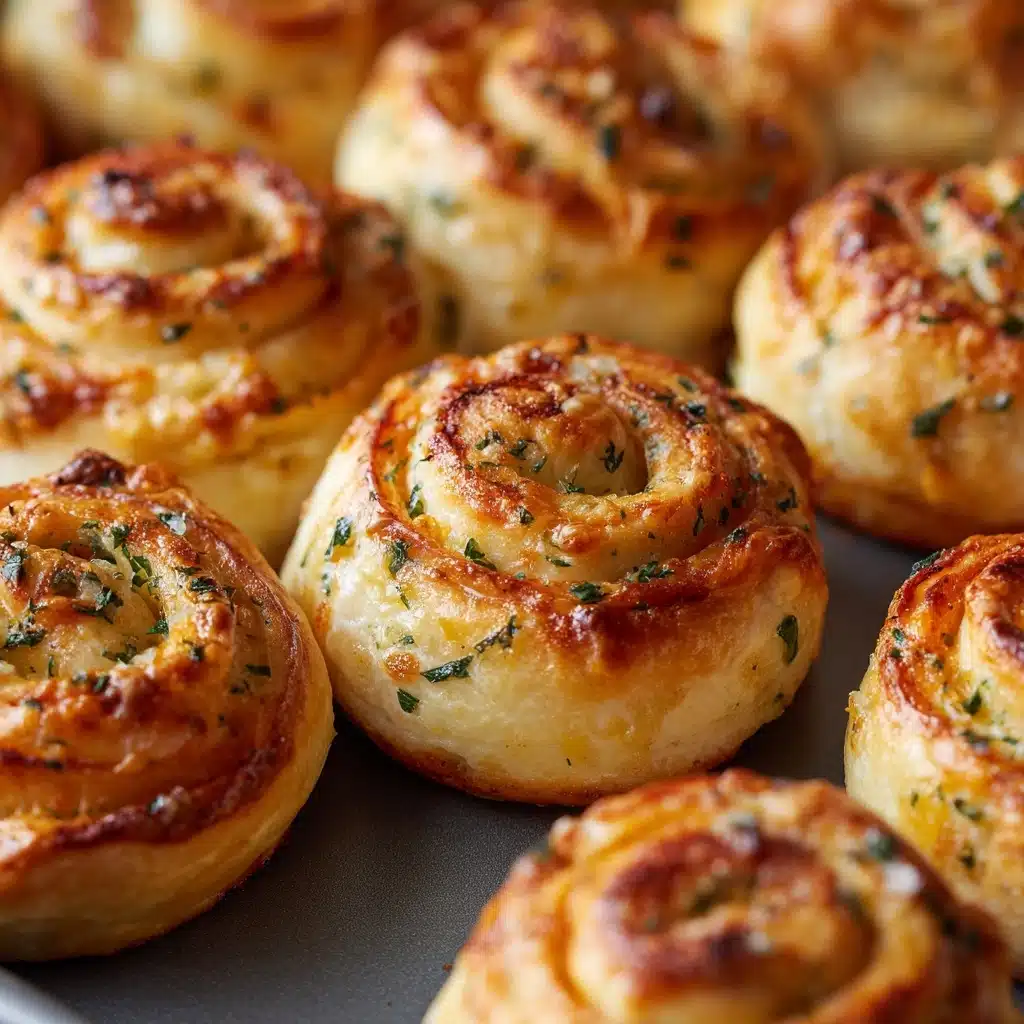
Cheesy Garlic Butter Rollups Recipe
If you’re looking to steal the show at your next gathering or just craving something outrageously satisfying for a snack, Cheesy Garlic Butter Rollups are the answer. Imagine warm, melty cheese wrapped inside crispy golden bread, all slathered with garlicky, herby butter. These rollups are pure comfort, equally perfect for party appetizers or cozy nights in. They come together in minutes, making them a delightful treat that delivers serious flavor with minimal effort!
Ingredients You’ll Need
This recipe for Cheesy Garlic Butter Rollups is refreshingly simple, yet each ingredient has an important role—whether it’s adding stretch, flavor, crunch, or color. Here’s what you’ll need and why each bit matters:
- White or whole wheat sandwich bread (8 slices, crusts removed): The soft base that crisps up beautifully while holding in the cheesy filling—make sure it’s fresh and pliable for best results.
- Shredded mozzarella cheese (1 cup): Delivers that iconic stretchy, gooey cheese-pull moment everyone loves.
- Shredded cheddar cheese (½ cup): Brings a sharper, rich flavor and vibrant color to the rollups.
- Grated Parmesan cheese (2 tbsp, optional): Adds extra savory depth and an irresistible hint of saltiness.
- Unsalted butter, melted (4 tbsp): Ensures maximum meltiness and is the base for the sumptuous garlic butter brushed on top.
- Garlic, minced (2 cloves): Fresh garlic infuses every bite with aromatic zing that makes these rollups special.
- Garlic powder (½ tsp): Builds on the garlicky goodness for even more flavor throughout.
- Chopped fresh parsley or dried parsley (1 tbsp fresh or 1 tsp dried), plus a pinch of salt: A sprinkle of green makes these pop visually and adds a lovely herbal note to balance all that cheese.
How to Make Cheesy Garlic Butter Rollups
Step 1: Prep and Preheat
Start by heating your oven to 375°F (190°C) and lining a baking sheet with parchment paper. This is essential for easy cleanup and helps make sure your Cheesy Garlic Butter Rollups get crisp all over rather than stick.
Step 2: Flatten the Bread
Lay each slice of sandwich bread out flat and gently roll with a rolling pin until thin. This creates the perfect canvas for your cheese filling, and makes the bread easy to roll without tearing or cracking.
Step 3: Fill with Cheese
Sprinkle a generous amount of mozzarella and cheddar cheese across the lower third of each bread slice. If you’re feeling bold, scatter on some Parmesan too for an extra punch of flavor.
Step 4: Roll It Up
Tightly roll each slice from the cheesy edge upwards, forming a little log. If the bread doesn’t want to stay rolled, dab a bit of melted butter on the edge to seal it—this trick also helps lock in all the melty goodness.
Step 5: Make and Brush the Garlic Butter
In a small bowl, mix your melted butter with minced garlic, garlic powder, parsley, and a pinch of salt. This mixture is your flavor bomb! Brush it generously all over each rollup, making sure to coat every exposed surface for maximum flavor and that unbeatable golden color.
Step 6: Bake Until Golden
Arrange the rollups seam-side down on your prepared baking sheet. Bake for 12–15 minutes until they’re golden brown and irresistibly crispy. Want extra crunch? Bake on a wire rack or pop them in the air fryer at 360°F (180°C) for 8–10 minutes, turning halfway through.
Step 7: Cool and Serve
Let the Cheesy Garlic Butter Rollups cool for a few minutes—they’ll be hot! Serve them warm on their own, or alongside a tangy marinara or your favorite dipping sauce for a truly memorable bite.
How to Serve Cheesy Garlic Butter Rollups
Garnishes
A final dusting of fresh parsley or a sprinkle of grated Parmesan makes your Cheesy Garlic Butter Rollups look fresh and inviting. For extra color and zing, add a tiny pinch of red pepper flakes or a squeeze of lemon over the top right before serving.
Side Dishes
These rollups pair beautifully with simple sides. Try them with a crisp salad, tomato soup, or a platter of fresh veggies and dip. They also make a spectacular addition to a snack board or game-day spread, where they’ll disappear in minutes.
Creative Ways to Present
You can cut Cheesy Garlic Butter Rollups into bite-sized pieces for party platters, stack them on skewers for fun snacks, or arrange them in a spiral on a large plate surrounded by dipping bowls. For brunch, serve them as a decadent twist on garlic bread alongside your favorite egg dishes.
Make Ahead and Storage
Storing Leftovers
If you find yourself with extra Cheesy Garlic Butter Rollups (a rare occurrence!), simply store them in an airtight container in the refrigerator. They’ll keep well for two to three days, still tasting delicious when you’re ready for another snack.
Freezing
For longer storage, you can freeze these rollups after baking. Let them cool completely, then wrap each one tightly in foil or plastic wrap before placing in a freezer-safe bag. They’ll stay tasty for up to one month—just thaw and reheat whenever the craving strikes!
Reheating
To revive leftover Cheesy Garlic Butter Rollups, pop them in a 350°F (175°C) oven or air fryer for a few minutes until warmed through and crispy again. Avoid the microwave if you can; you’ll get much better results by warming them gently in a hot oven.
FAQs
Can I use different types of bread?
Absolutely! While soft white or whole wheat sandwich bread works best, you can experiment with other breads, just make sure they’re pliable enough to roll without cracking.
What dipping sauces work best?
Classic marinara is always a hit, but these are delicious with ranch, garlic aioli, or even a spicy sriracha mayo. Try a few and see which is your favorite!
Can I make Cheesy Garlic Butter Rollups ahead of time?
Definitely! You can assemble them, cover, and refrigerate up to 24 hours before baking. Just brush with the garlic butter right before they go in the oven for best results.
How do I make these extra crispy?
Bake the rollups on a wire rack or use the air fryer method. Both techniques ensure maximum airflow around the rollups, turning them perfectly crisp and golden all over.
Do Cheesy Garlic Butter Rollups work for a vegetarian diet?
Yes! This recipe is vegetarian-friendly, using only bread, cheese, and herbs. Just double-check your cheese if you follow strict dietary guidelines.
Final Thoughts
I genuinely think you’ll fall in love with Cheesy Garlic Butter Rollups after just one bite. They’re simple, satisfying, and brimming with cheesy, garlicky joy. Whether you’re making them for family movie night, as a party appetizer, or just because you deserve a treat, don’t be surprised when they vanish quickly. Give them a try and let your kitchen be filled with the irresistible aroma of fresh-baked happiness!
Print
Cheesy Garlic Butter Rollups Recipe
- Total Time: 25 minutes
- Yield: about 8 rollups 1x
- Diet: Vegetarian
Description
Cheesy Garlic Butter Rollups are a delicious and easy-to-make appetizer or snack that is perfect for parties or a tasty treat. These rollups feature a flavorful combination of cheeses and garlic butter wrapped in bread and baked until golden and crispy. Serve warm with marinara or your favorite dipping sauce for a crowd-pleasing dish.
Ingredients
Bread Rollups:
- 8 slices white or whole wheat sandwich bread (crusts removed)
Cheese Filling:
- 1 cup shredded mozzarella cheese
- ½ cup shredded cheddar cheese
- 2 tbsp grated Parmesan cheese (optional)
Garlic Butter Mixture:
- 4 tbsp unsalted butter, melted
- 2 cloves garlic, minced
- ½ tsp garlic powder
- 1 tbsp chopped fresh parsley or 1 tsp dried parsley (plus a pinch of salt)
Instructions
- Preheat oven to 375°F (190°C) and line a baking sheet with parchment paper.
- Flatten each slice of bread with a rolling pin until thin.
- Sprinkle mozzarella and cheddar evenly across the bottom third of each bread slice.
- Roll each slice from the cheese side up to form a log, sealing the edge with a dab of melted butter if needed.
- Combine melted butter, minced garlic, garlic powder, parsley, and salt in a small bowl.
- Place rollups seam-side down on the baking sheet and brush generously with garlic butter.
- Bake for 12–15 minutes until golden and crispy.
- Let cool briefly before serving—serve warm, optionally with marinara or your favorite dipping sauce.
Notes
- Use soft, pliable bread to make rolling easier and avoid tearing.
- Seal edges well with butter to prevent rollups from unwrapping.
- For extra crispiness, bake on a wire rack or air fryer for 8–10 minutes at 360°F (180°C), turning halfway.
- These rollups can be assembled ahead of time and refrigerated (unbaked) for up to 24 hours before baking.
- Prep Time: 10 minutes
- Cook Time: 12-15 minutes
- Category: Appetizer, Snack
- Method: Baking (Air Fryer optional)
- Cuisine: American
Nutrition
- Serving Size: 2 rollups
- Calories: 190
- Sugar: 1 g
- Sodium: 290 mg
- Fat: 13 g
- Saturated Fat: 7 g
- Unsaturated Fat: 4 g
- Trans Fat: 0 g
- Carbohydrates: 12 g
- Fiber: 1 g
- Protein: 7 g
- Cholesterol: 30 mg

