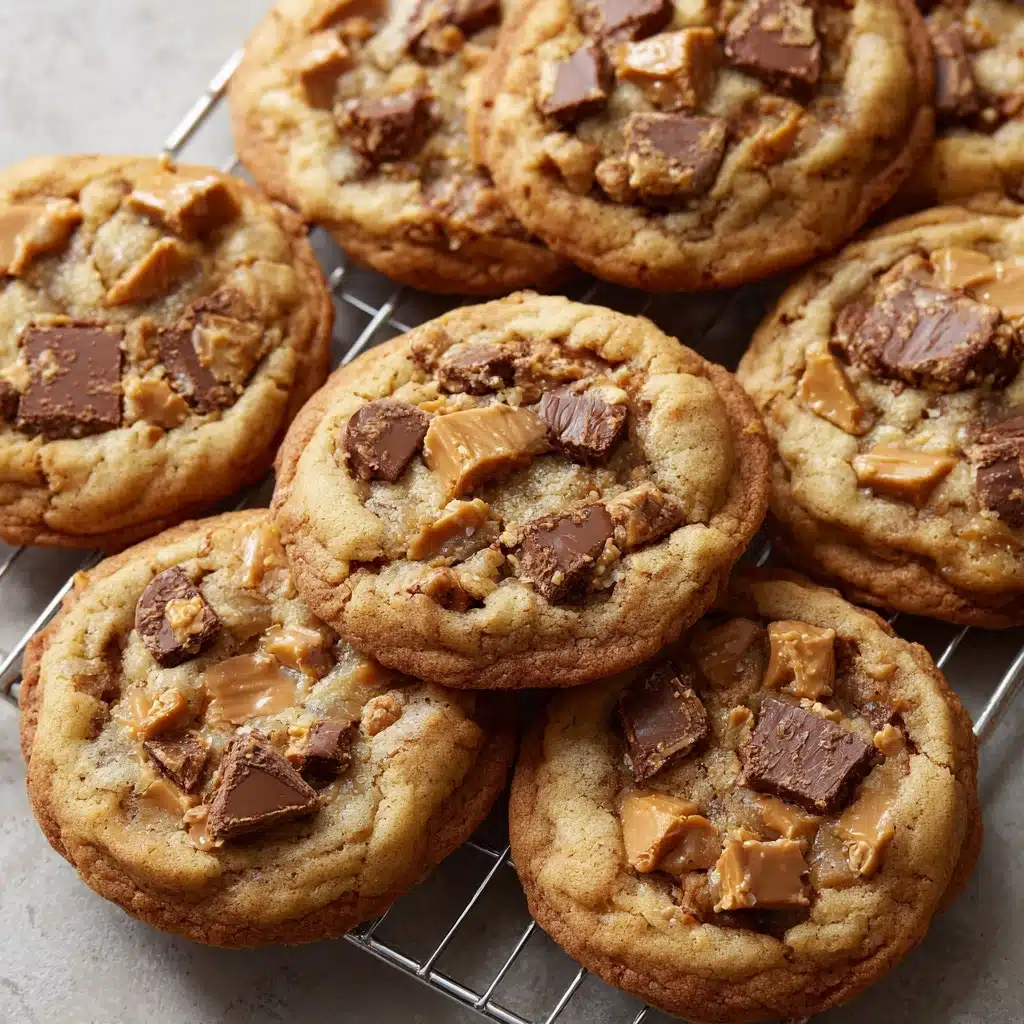
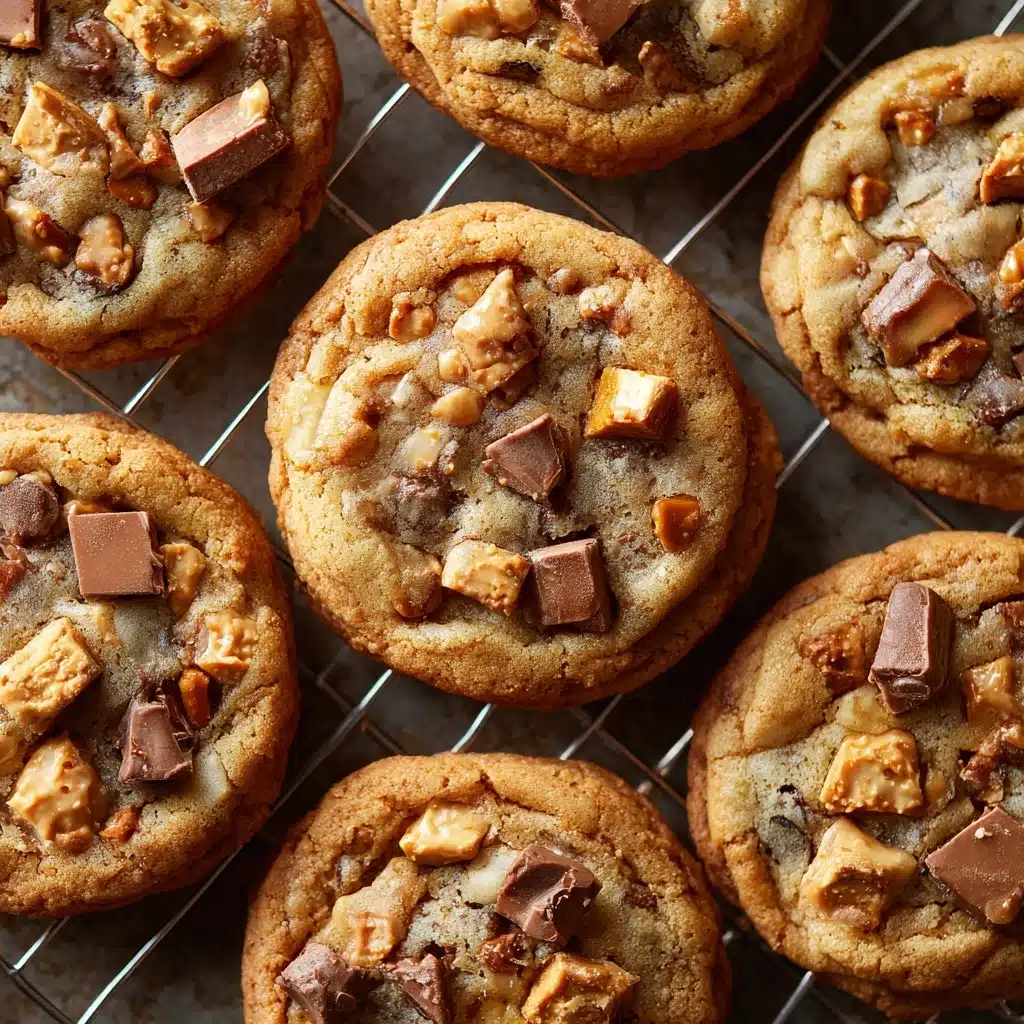
Peanut Butter Butterfinger Cookies Recipe
If you’re hunting for the ultimate dessert mashup that will win over peanut butter lovers and candy fanatics alike, you must try these Peanut Butter Butterfinger Cookies. Every chewy bite is packed with sweet, salty, and crispy goodness thanks to a buttery peanut butter base and bits of crushed Butterfinger candy bars hiding in every nook and cranny. Whether you’re baking for a family gathering or just want to treat yourself to a homemade sweet, these cookies bring pure joy and a serious dose of nostalgia. Let the baking adventure begin!
Ingredients You’ll Need
The beauty of these cookies is how a handful of pantry staples come together with one game-changing addition—Butterfinger bars! Each ingredient helps build the ultimate flavor bomb and the perfect texture, so don’t skip a single one.
- Creamy Peanut Butter: Delivers that rich, nutty flavor and creamy foundation we all crave in a cookie.
- Unsalted Butter (softened): Ensures a tender crumb and buttery richness; make sure it’s at room temperature for easy mixing.
- Granulated Sugar: Adds classic sweetness and a subtle crispness around the cookie edges.
- Brown Sugar: Deepens the flavor and adds extra moisture for irresistibly chewy centers.
- Large Eggs: Bind everything together for a rich, cohesive dough with just the right structure.
- Vanilla Extract: Balances all the sweet and salty elements with warm, aromatic flavor.
- All-Purpose Flour: Provides necessary structure, making sure the cookies hold their shape.
- Baking Soda: Helps the cookies spread and gives them a light, tender texture.
- Baking Powder: Ensures even more lift so your cookies stay soft and thick.
- Salt: Rounds out the sweetness and enhances every flavor in the batch.
- Crushed Butterfinger Candy Bars: The secret weapon—brings in irresistible crunch and bursts of caramelized, peanut-buttery candy in every bite!
How to Make Peanut Butter Butterfinger Cookies
Step 1: Preheat and Prepare
Start by preheating your oven to 350°F (175°C). This ensures even baking right from the start. Next, line your baking sheets with parchment paper—this prevents sticking and makes cleanup a breeze. Get all your ingredients measured and ready for a smooth baking process.
Step 2: Cream the Peanut Butter, Butter, and Sugars
In a large mixing bowl, combine the creamy peanut butter, softened butter, granulated sugar, and brown sugar. Using an electric mixer (or a super-strong arm and a sturdy spoon), beat the mixture until it becomes light, fluffy, and oh-so-inviting. This aeration gives the cookies their soft, chewy interiors.
Step 3: Add Eggs and Vanilla
Beat in the eggs, one at a time, making sure each is fully incorporated before adding the next. Pour in the vanilla extract and mix again. The dough should look rich and creamy at this point.
Step 4: Mix the Dry Ingredients Separately
In a separate bowl, whisk together the flour, baking soda, baking powder, and salt. This step helps distribute the leavening agents and salt evenly, so every single Peanut Butter Butterfinger Cookie bakes up perfectly.
Step 5: Combine Wet and Dry Ingredients
Gradually stir the dry ingredients into the wet mixture, mixing until no streaks remain. Take your time here—you’ll notice the dough turning thick and irresistibly fragrant. Don’t overmix! Stop as soon as the flour disappears.
Step 6: Fold in the Crushed Butterfinger
With a spatula, gently fold in the crushed Butterfinger bars. Try to distribute the candy bits as evenly as possible. Every scoop of dough should have little pockets of Butterfinger crunch peeking through!
Step 7: Scoop and Bake
Using a tablespoon or a cookie scoop, drop rounds of dough onto your prepared baking sheets, spacing them about 2 inches apart. This prevents them from sticking together as they spread in the oven. Bake for 10–12 minutes, until the edges are just golden and the centers still look slightly soft—resist the urge to overbake!
Step 8: Cool and Enjoy
Let the cookies rest on the baking sheet for 5 minutes, then transfer them to a wire rack to cool completely. This helps set their chewy texture and lets the flavors settle in. Warning: it’s hard to wait, but the anticipation makes that first bite even sweeter!
How to Serve Peanut Butter Butterfinger Cookies
Garnishes
For an extra flourish, sprinkle a few more Butterfinger pieces or a pinch of flaky sea salt over the warm cookies. If you want that bakery-style finish, you can also drizzle a little melted chocolate over the tops just as they cool. The contrasting textures and pops of flavor make the cookies truly unforgettable.
Side Dishes
These cookies are the star of any dessert table, but pair beautifully with a cold glass of milk, a hot cup of coffee, or a scoop of classic vanilla ice cream. Kids love dunking them, and adults will appreciate the nostalgic flavors paired with their favorite drinks.
Creative Ways to Present
If you’re sharing Peanut Butter Butterfinger Cookies at a party or potluck, stack them in a rustic tin, wrap them in colorful parchment, or pile them high on a vintage cake stand. For special occasions, tuck a few into gift bags tied with ribbon—they’re always a hit as edible gifts!
Make Ahead and Storage
Storing Leftovers
Once baked and completely cooled, stash your cookies in an airtight container at room temperature. They’ll stay delicious for up to 5 days—making them perfect for lunchbox treats, midday snacks, or late-night cravings.
Freezing
Want to keep Peanut Butter Butterfinger Cookies on hand at all times? Place cooled cookies in a freezer bag or airtight container and freeze for up to 2 months. For freshly baked flavor anytime, you can also freeze unbaked dough balls—just bake as needed and add a minute or two to the bake time.
Reheating
To revive that straight-from-the-oven warmth, pop a cookie in the microwave for 8–10 seconds or warm a small batch in a low oven. This restores their soft, chewy centers and brings the peanut buttery, candy-studded aroma back to life.
FAQs
Can I use crunchy peanut butter instead of creamy?
Absolutely! Crunchy peanut butter adds little bursts of peanut texture throughout the cookie. Just note that the end result will be a touch crumblier—still just as delicious.
What’s the best way to crush Butterfinger bars?
You can place them in a zip-top bag and gently smash them with a rolling pin or the bottom of a glass. Aim for pea-sized bits so you get both crunch and melt-in-your-mouth candy in every bite.
Can I double the recipe?
Yes you can double (or even triple) the recipe with ease. Just make sure to mix in batches if your mixing bowl isn’t big enough, and rotate your baking sheets for even cookies.
Do Peanut Butter Butterfinger Cookies travel well?
They travel wonderfully and are great for care packages, picnics, or sharing at a potluck. Just layer parchment between them in an airtight container to keep them from sticking together.
What if I don’t have Butterfinger bars?
While Butterfingers give their signature flavor and crunch, you can use similar crispy peanut butter candy, or even mix in chocolate chips and toffee pieces for a different twist.
Final Thoughts
If you’ve never baked with candy bars before, these Peanut Butter Butterfinger Cookies will absolutely win you over. They bring together the best of homemade comfort and playful candy shop magic—one batch just might not be enough. Grab your apron, gather your ingredients, and treat yourself to something truly special. Your cookie jar (and your taste buds) will thank you!
Print
Peanut Butter Butterfinger Cookies Recipe
- Total Time: 27 minutes
- Yield: 24 cookies 1x
- Diet: Vegetarian
Description
Indulge in these decadent Peanut Butter Butterfinger Cookies that are a perfect blend of creamy peanut butter and crunchy Butterfinger candy bars. These cookies are a delightful treat for any occasion, offering a balance of sweetness and nuttiness in every bite.
Ingredients
Cookie Dough:
- 1 cup creamy peanut butter
- ½ cup unsalted butter, softened
- 1 cup granulated sugar
- ½ cup brown sugar
- 2 large eggs
- 1 teaspoon vanilla extract
- 1 ½ cups all-purpose flour
- 1 teaspoon baking soda
- ½ teaspoon baking powder
- ½ teaspoon salt
Additions:
- 1 ½ cups crushed Butterfinger candy bars
Instructions
- Preheat Oven: Preheat oven to 350°F (175°C) and line baking sheets with parchment paper.
- Cream Ingredients: In a large bowl, cream together peanut butter, softened butter, granulated sugar, and brown sugar until light and fluffy.
- Add Eggs and Vanilla: Beat in eggs one at a time, then add vanilla extract.
- Mix Dry Ingredients: In a separate bowl, whisk together flour, baking soda, baking powder, and salt. Gradually add dry ingredients to the wet mixture until combined.
- Stir in Butterfinger: Fold in crushed Butterfinger pieces.
- Bake: Scoop tablespoon-sized dough balls onto prepared baking sheets. Bake for 10–12 minutes until lightly golden. Cool on the baking sheet before transferring to a wire rack.
Notes
- For extra crunch, mix in chopped peanuts or add more crushed Butterfinger on top before baking.
- Cookies can be stored in an airtight container for up to 5 days or frozen for up to 2 months.
- Prep Time: 15 minutes
- Cook Time: 12 minutes
- Category: Dessert
- Method: Baking
- Cuisine: American
Nutrition
- Serving Size: 1 cookie
- Calories: 190 kcal
- Sugar: 17 g
- Sodium: 140 mg
- Fat: 10 g
- Saturated Fat: 4 g
- Unsaturated Fat: 4 g
- Trans Fat: 0 g
- Carbohydrates: 22 g
- Fiber: 1 g
- Protein: 4 g
- Cholesterol: 20 mg

