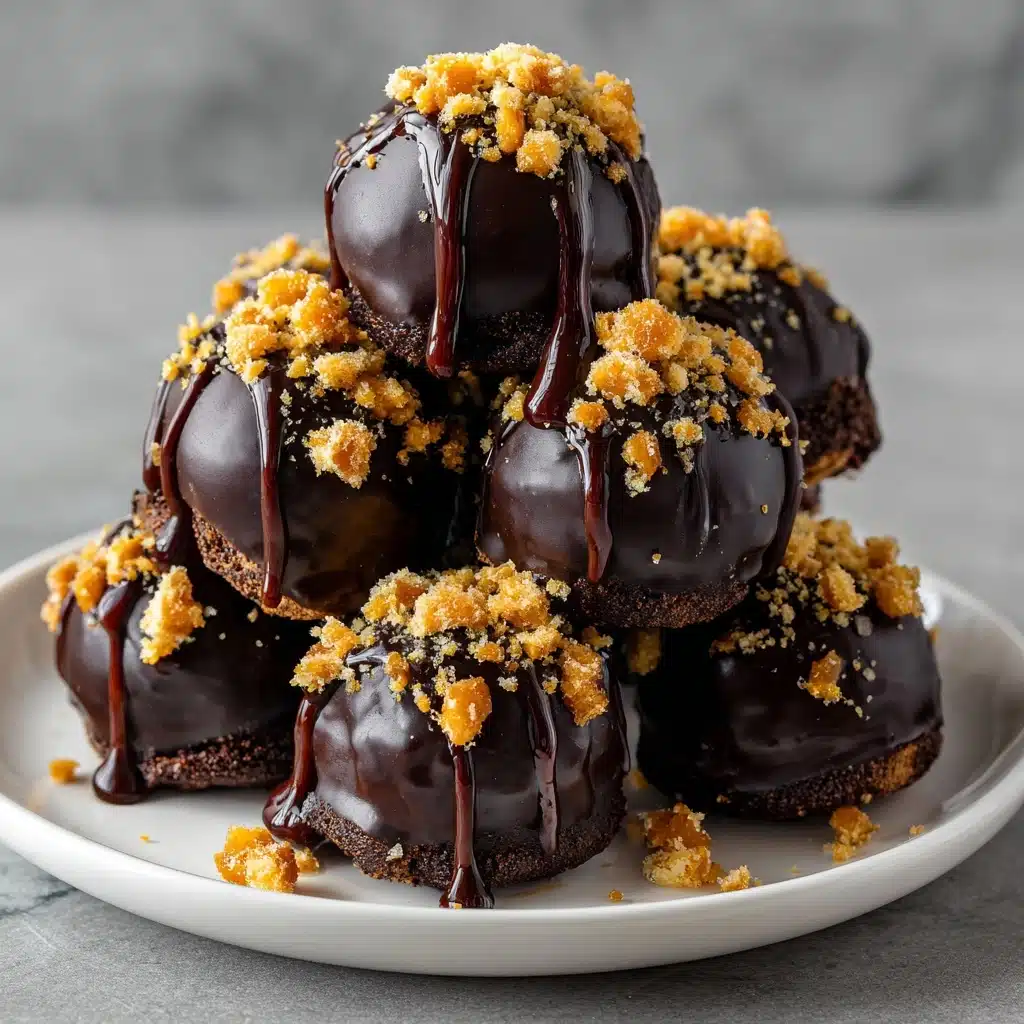
Easy Butterfinger Balls Recipe
If you’re looking for a no-bake treat that combines the sweet crunch of candy bars and the creamy richness of peanut butter, Easy Butterfinger Balls are about to become your new obsession. These little orbs of pure happiness bring together classic ingredients for a delightful dessert that’s both nostalgic and impressively satisfying. Whether you’re prepping for a holiday party, game night, or just want a quick homemade indulgence, Easy Butterfinger Balls deliver big on flavor and minimal fuss.
Ingredients You’ll Need
The magic of Easy Butterfinger Balls is in how a handful of staple ingredients join forces to create something truly unforgettable. Each item brings its unique role to the party, whether providing creamy texture, sweet nuttiness, or that unmistakable candy bar crunch.
- Creamy peanut butter: The heart of these treats, giving them a rich, nutty foundation and smooth bite.
- Unsalted butter (softened): Adds luxurious creaminess and helps bind everything together for perfect consistency.
- Powdered sugar: Sweetens the mix and provides that iconic truffle-like texture.
- Crushed Butterfinger candy bars: Bring the signature toffee crunch and caramelized peanut flavor that make these balls irresistible.
- Semi-sweet or milk chocolate chips: For a decadent coating that beautifully complements the peanut butter center.
- Coconut oil or shortening (optional): This helps your melted chocolate stay silky smooth for effortless dipping and a glossy finish.
How to Make Easy Butterfinger Balls
Step 1: Cream Together the Base
Start by combining the peanut butter and softened butter in a large mixing bowl. Use an electric mixer to beat the mixture until it’s completely smooth and fluffy. This step lays the foundation for the creamy centers, ensuring every Easy Butterfinger Ball melts perfectly in your mouth.
Step 2: Add Sweetness and Crunch
Gradually beat in the powdered sugar until everything comes together in a thick, dough-like mixture. Stir in the crushed Butterfinger candy bars. These bits not only provide that legendary candy crunch but also infuse the mixture with caramelized, peanutty flavor in every bite.
Step 3: Shape and Chill
Scoop out tablespoon-sized portions and roll them into 1-inch balls using your hands. Arrange them on a parchment-lined baking sheet. Pop the tray into the refrigerator for at least 30 minutes—this helps the balls firm up and makes dipping them in chocolate so much easier.
Step 4: Melt the Chocolate
Place your chocolate chips in a microwave-safe bowl, and heat in 30-second intervals. Stir well each time until the chocolate is fully melted and smooth. If you want that extra-glossy finish, blend in the coconut oil or shortening now.
Step 5: Dip and Set
Take each chilled ball and dip it into the melted chocolate using a fork, letting any excess chocolate drip off. Place them back on the parchment-lined sheet. If you’d like an extra hit of crunch, quickly sprinkle—or roll—the tops in more crushed Butterfingers before the chocolate hardens. Let them set at room temperature or return to the fridge for a quicker fix.
How to Serve Easy Butterfinger Balls
Garnishes
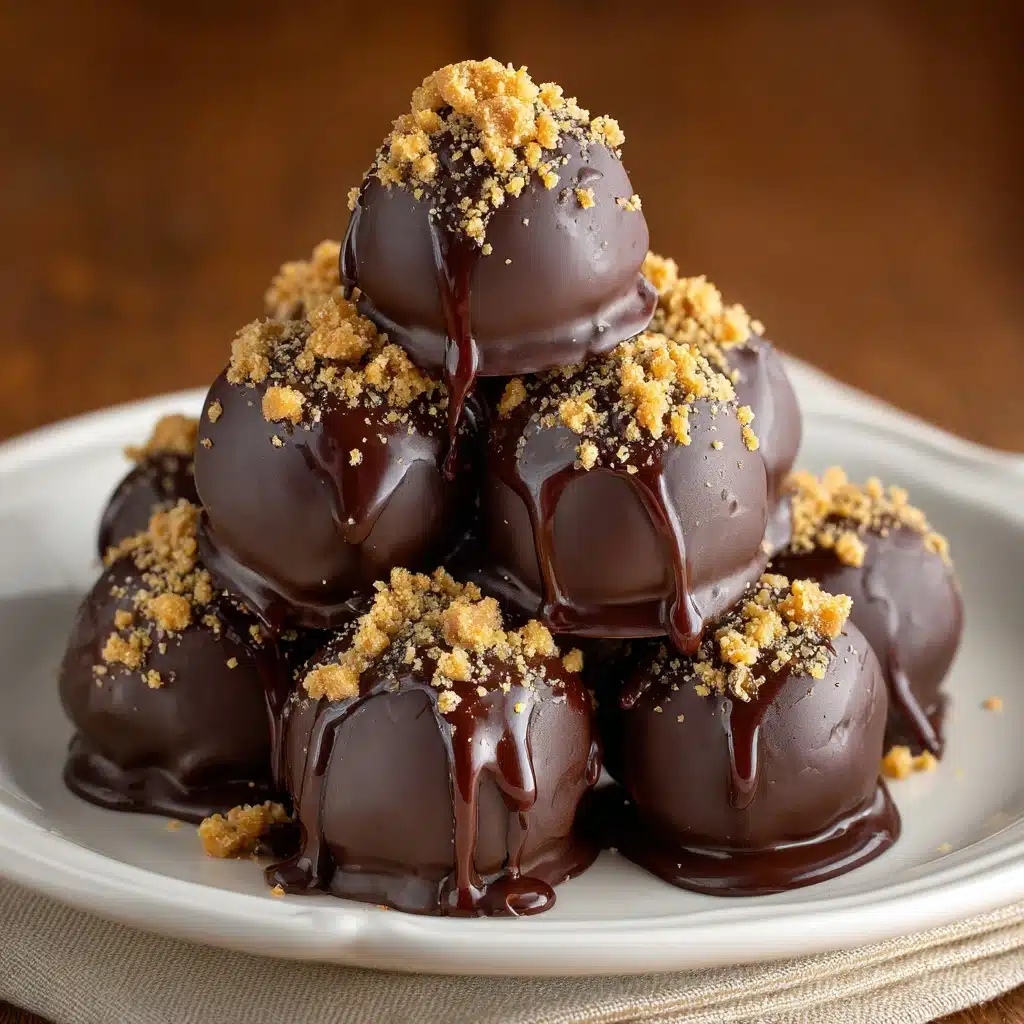
For an elegant finish, drizzle extra melted chocolate over each ball or sprinkle lightly with more crushed Butterfinger pieces while the chocolate is still tacky. This little touch not only looks gorgeous but adds an eye-catching texture contrast that everyone adores.
Side Dishes
If you want to serve Easy Butterfinger Balls as part of a dessert platter, pair them with fresh berries or sliced fruit for a refreshing contrast. They’re also fantastic with a scoop of vanilla or coffee ice cream, balancing out the richness with a cool, creamy side.
Creative Ways to Present
Display your Easy Butterfinger Balls in mini cupcake liners on a festive plate for a party-ready look, or stack them in a glass jar and tie with a ribbon for a homemade gift that will make anyone’s day. For special occasions, consider tucking them into decorative boxes for the ultimate edible favor.
Make Ahead and Storage
Storing Leftovers
Easy Butterfinger Balls can be kept in an airtight container in the refrigerator for up to one week. Make sure they’re well separated with layers of parchment so they don’t stick together and their coats stay picture-perfect.
Freezing
You can absolutely make these ahead and freeze them! Freeze the finished balls in a single layer on a baking sheet, then transfer to a freezer-safe container between sheets of parchment. They’ll keep beautifully for up to three months—just allow them to thaw in the fridge before serving.
Reheating
Since these are a no-bake dessert and best served chilled or at room temperature, there’s really no need to reheat. If you like a softer center, let them sit out for 10-15 minutes before enjoying for a melt-in-your-mouth experience.
FAQs
Can I use crunchy peanut butter instead of creamy?
Absolutely! Crunchy peanut butter adds even more texture, though the balls might be a little less smooth. If you love that extra crunch, give it a try for a fun twist on the classic Easy Butterfinger Balls formula.
What’s the best way to crush Butterfinger bars?
Place unwrapped Butterfinger bars in a zip-top bag and crush them lightly with a rolling pin or the bottom of a pan. You want some larger bits for maximum crunch, but a coarse texture works best for mixing into your Easy Butterfinger Balls.
Can I skip the coconut oil or shortening in the chocolate?
Definitely. The balls will still taste incredible, but the melted chocolate may be a bit thicker and less glossy. Including a little coconut oil just gives the coating a pro finish and makes dipping even easier.
Are Easy Butterfinger Balls gluten free?
Butterfinger candy bars are gluten free, but always double-check the labels for your particular brands—especially if you use off-brand chocolate chips or candy. With the right ingredients, these treats can fit a gluten free diet.
How far in advance can I make Easy Butterfinger Balls for a party?
You can prep them up to a week ahead if you store them in the refrigerator. For even earlier prep, freeze them and thaw before serving—they taste just as amazing, with all their signature crunch intact.
Final Thoughts
If you’re craving a sweet, crunchy treat that’s easy to whip up and always a crowd-pleaser, Easy Butterfinger Balls truly deliver. Whether you’re serving them at a party or enjoying a homemade bite of nostalgia, don’t be surprised if they disappear in a flash. Roll up your sleeves and give these irresistible candy balls a try—you’ll be making them on repeat!
Print
Easy Butterfinger Balls Recipe
- Total Time: 50 minutes (including chilling)
- Yield: 24 balls 1x
- Diet: Vegetarian
Description
These Easy Butterfinger Balls are a delightful no-bake treat perfect for satisfying your sweet tooth. Creamy peanut butter, crushed Butterfinger candy bars, and rich chocolate come together to create these indulgent bite-sized delights.
Ingredients
Peanut Butter Mixture:
- 1 1/2 cups creamy peanut butter
- 1/2 cup unsalted butter, softened
- 2 cups powdered sugar
Additional Ingredients:
- 1 1/2 cups crushed Butterfinger candy bars (about 6 fun-size bars)
- 2 cups semi-sweet or milk chocolate chips
- 1 tablespoon coconut oil or shortening (optional, for smoother coating)
Instructions
- Prepare Peanut Butter Mixture: In a large mixing bowl, beat together peanut butter and softened butter until smooth. Gradually add powdered sugar and mix until fully combined.
- Stir in Butterfinger: Mix in the crushed Butterfinger pieces.
- Shape into Balls: Roll the mixture into 1-inch balls and place on a parchment-lined baking sheet. Chill in the refrigerator for at least 30 minutes.
- Melt Chocolate: In a microwave-safe bowl, melt chocolate chips in 30-second intervals until smooth. Stir in coconut oil if using.
- Dip and Coat: Dip each chilled ball into the melted chocolate, letting excess drip off. Place back on the baking sheet to set.
Notes
- Store in the refrigerator for up to 1 week.
- For added crunch, roll in additional crushed Butterfinger pieces before the chocolate sets.
- Prep Time: 20 minutes
- Cook Time: 0 minutes
- Category: Dessert
- Method: No-Bake
- Cuisine: American
Nutrition
- Serving Size: 1 ball
- Calories: 210
- Sugar: 20g
- Sodium: 95mg
- Fat: 13g
- Saturated Fat: 6g
- Unsaturated Fat: 6g
- Trans Fat: 0g
- Carbohydrates: 22g
- Fiber: 1g
- Protein: 3g
- Cholesterol: 10mg

